&KDSWHU&RQILJXULQJWKH1HW6FUHHQIRUWKH)LUVW7LPH
1HW6FUHHQ
8VLQJWKH:HE8,
To perform the initial configuration through the WebUI, you need to change the
IP address of the management workstation to the same subnet as the NetScreen-
10/100 default system IP address, which is 192.168.1.1. You can then log on
through a Web browser and set the system IP address. The following sections
detail the procedures for administration of the NetScreen-10/100 device from the
administrator’s workstation.
Refer to Table 3-1 for administration requirements.
0DNLQJD&RQQHFWLRQ
Before you begin, be sure you connected the NetScreen-10/100 hardware to the
network as outlined in Chapter 2, “Connecting the NetScreen-10/100 to the
Network”.
6HWWLQJWKH6\VWHP,3$GGUHVV
For remote administration of the NetScreen device over a network connection, you
must change the system IP address. The NetScreen-10/100 ships from the factory
with a default IP address of 192.168.1.1. To change this to an address on the same
subnet as the other network devices to which the NetScreen-10/100 is connected,
perform the following procedure:
1. Record the IP address and subnet mask of your workstation; you must re-
enter them later in this process.
2. Change the IP address of the workstation to 192.168.1.2 and the netmask to
255.255.255.0. (You might have to restart the workstation to enable the
changes to take effect.) The workstation is now part of the same subnet as
the default IP address of the NetScreen-10/100.
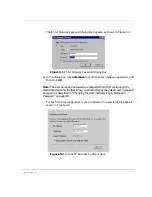
3. Start your Web browser.
4. In the URL field of the browser, enter the IP address of the NetScreen-10/
100: http://192.168.1.1.
Summary of Contents for NetScreen-10 Series
Page 1: ...1 76 5 1 QVWDOOHU V XLGH 9HUVLRQ 3 1 5HY...
Page 4: ...LY 1HW6FUHHQ...
Page 14: ...KDSWHU DUGZDUH DQG 6RIWZDUH HVFULSWLRQ 1HW6FUHHQ...
Page 20: ...KDSWHU RQQHFWLQJ WKH 1HW6FUHHQ WR WKH 1HWZRUN 1HW6FUHHQ...
Page 38: ...KDSWHU RQILJXULQJ WKH 1HW6FUHHQ IRU WKH LUVW 7LPH 1HW6FUHHQ...
Page 44: ...SSHQGL 6DIHW 5HFRPPHQGDWLRQV DQG DUQLQJV 1HW6FUHHQ...
Page 48: ...QGH 1HW6FUHHQ...

