background image

8VLQJWKH&/,

,QVWDOOHU·V*XLGH

8

6,1*

7+(

&/,

The following section provides information on how to configure the device using 
the command line interface (CLI).

0DNLQJD&RQQHFWLRQ

You can access the CLI either by connecting directly via a console (or serial) cable 
to the NS-10/100 console port or you can make a connection via Telnet. Connection 
instructions are offered for both methods.

&RQQHFWLQJYLDWKH&RQVROH3RUW

You need direct access to the NetScreen device you want to configure and the 
following items before you start:

• An RS-232 male-to-female serial cable

• Microsoft Hyperterminal software on the management workstation (or, if 

you are using a different operating system, a VT100 terminal emulator)

Follow these steps to connect the NetScreen device to the workstation:

1. Connect the serial cable from the management workstation to the console 

port on the NetScreen-10/100.

2. Start the terminal emulator on the workstation.

3. To create a new connection, type a name, select an icon, and then click OK.

The Connect To dialog box appears.

4. Select the serial port to which the serial cable is connected to the 

workstation, and click OK

The COM1 Properties dialog box appears.

5. Configure the port settings as follows, and then click OK.

– Serial communications 9600 bps 

– 8 bit

– no parity 

– 1 stop bit

– no flow control

6. Press the ENTER key to see the login prompt.

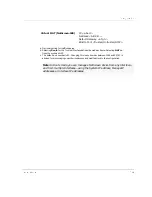
Note: For more information and examples on other configuration options, please 
refer to the
 NetScreen Concepts & Examples ScreenOS Reference Guide.

Summary of Contents for NetScreen-10 Series

Page 1: ...1 76 5 1 QVWDOOHU V XLGH 9HUVLRQ 3 1 5HY...

Page 2: ...CATE YOUR ACCEPTANCE OF THE TERMS OF THIS LEGAL AND BINDING AGREEMENT AND ARE CONSENTING TO BE BOUND BY AND ARE BECOMING A PART TO THIS AGREEMENT IF YOU DO NOT AGREE TO ALL OF THE TERMS OF THIS AGREEM...

Page 3: ...TY INCLUDING WITHOUT LIMITATION LOSS OF USE PROFITS GOODWILL SAVINGS LOSS OF DATA DATA FILES OR PROGRAMS THAT MAY HAVE BEEN STORED BY ANY USER OF THE FIRMWARE IN NO EVENT WILL NETSCREEN S OR ITS LICEN...

Page 4: ...LY 1HW6FUHHQ...

Page 5: ...WKH LUVW 7LPH 8VLQJ WKH HE8 0DNLQJ D RQQHFWLRQ 6HWWLQJ WKH 6 VWHP 3 GGUHVV RJJLQJ 2Q OORZLQJ 2XWERXQG 7UDIILF KDQJLQJ WKH GPLQLVWUDWRU RJLQ 1DPH DQG 3DVVZRUG 7HVWLQJ WKH RQILJXUDWLRQ 8VLQJ WKH 0DNLQJ...

Page 6: ...DUQLQJ 1R 8VHU 6HUYLFHDEOH 3DUWV DUQLQJ LUFXLW UHDNHU DUQLQJ 6 9 LUFXLW DUQLQJ LJKWQLQJ FWLYLW DUQLQJ LWKLXP DWWHU DUQLQJ 3URGXFW LVSRVDO DUQLQJ HQHUDO 6LWH 5HTXLUHPHQWV 2QVLWH 3UHFDXWLRQV TXLSPHQW 5D...

Page 7: ...cludes diagrams that show the typical placement of the NetScreen device between your network and the Internet and a summary of the tools and information you need before connecting the device Chapter 3...

Page 8: ...L 1HW6FUHHQ NetScreen CLI Reference Guide P N 093 0011 000 Revision C NetScreen WebUI Reference Guide P N 093 0040 000 Revision A NetScreen Concepts Examples ScreenOS Reference Guide P N 093 0039 000...

Page 9: ...lows solid green when power is supplied to the NetScreen 10 100 Status LED glows solid green when the NetScreen 10 100 is first powered up and the unit first performs diagnostics Then the unit goes in...

Page 10: ...cable with RJ45 connectors The DMZ port is a DCE port See Chapter 2 for cabling guidelines Untrusted Port Connect the NetScreen 10 100 using a twisted pair cable with RJ45 connectors The untrusted por...

Page 11: ...t power to the NetScreen 10 100 with the supplied power cable On Off Switch Turns the power to the NetScreen 10 100 on or off Table 1 1NetScreen 10 100 Model Numbers Model Type Functionality a Firewal...

Page 12: ...etScreen 10 100 menu column and explains the features found under each button The menu column consists of four functional categories System Network Lists and Monitor each of which contains further sub...

Page 13: ...a shown in Figure 1 5 lists the information for each of the menu items above in either a tabular or graphical format These displays generally contain links to other related screens through links such...

Page 14: ...KDSWHU DUGZDUH DQG 6RIWZDUH HVFULSWLRQ 1HW6FUHHQ...

Page 15: ...ation requires no tools Rack mounting requires a Phillips head screwdriver the rack mount bracket kit and four screws to match the rack Users will have to supply screws to match rack thread size Table...

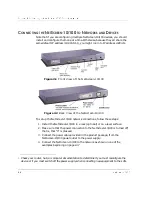
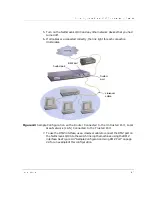
Page 16: ...NetScreen 10 100 network connections follow these steps 1 Install the NetScreen 10 100 in a rack optional or on a level surface 2 Make sure that the power connection to the NetScreen 10 100 is turned...

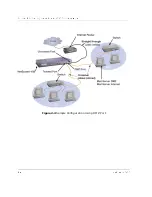
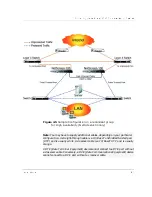
Page 17: ...Figure 2 3 Sample Configuration with a Router Connected to the Untrusted Port Local Area Network LAN Connected to the Trusted Port 7 To use the DMZ interface use a crossover cable to connect the DMZ p...

Page 18: ...KDSWHU RQQHFWLQJ WKH 1HW6FUHHQ WR WKH 1HWZRUN 1HW6FUHHQ Figure 2 4 Sample Configuration Using DMZ Port...

Page 19: ...cables depending on your particular configuration A straight through cable is a 10 BaseT unshielded twisted pair UTP and is usually white A crossover cable is a 10 BaseT UTP and is usually orange A DT...

Page 20: ...KDSWHU RQQHFWLQJ WKH 1HW6FUHHQ WR WKH 1HWZRUN 1HW6FUHHQ...

Page 21: ...the first time via the Web use interface WebUI and via the command line interface CLI Table 3 1 Administration Requirements lists the workstation requirements for each method The installation procedur...

Page 22: ...0 100 to the Network 6HWWLQJ WKH 6 VWHP 3 GGUHVV For remote administration of the NetScreen device over a network connection you must change the system IP address The NetScreen 10 100 ships from the f...

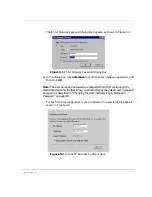
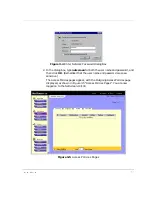
Page 23: ...and then click OK For the first time configuration you are directed to a special setup page as shown in Figure 3 2 Figure 3 2 Initial IP Address Configuration Note The user name and password are case...

Page 24: ...3 3 Configuring in Progress Screen 7 Reconfigure your administration workstation IP address and netmask back to the values you recorded in step 1 Depending on the operating system you might have to r...

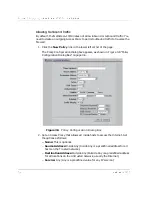
Page 25: ...e user name and password and then click OK Remember that the user name and password are case sensitive The Access Policies pages appear with the Outgoing Access Policies page displayed as shown in Fig...

Page 26: ...ion dialog box appears as shown in Figure 3 6 Policy Configuration Dialog Box on page 3 6 Figure 3 6 Policy Configuration Dialog Box 2 Set an Access Policy that allows all inside hosts to access the I...

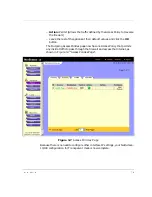
Page 27: ...OK button The Outgoing Access Policies page now has one Access Policy that permits any inside traffic to pass through the firewall and access the Internet as shown in Figure 3 7 Access Policies Page...

Page 28: ...ted and DMZ interfaces 7HVWLQJ WKH RQILJXUDWLRQ From a workstation on the trusted side of the NetScreen 10 100 use your Web browser to access an external Web site for example www netscreen com You sho...

Page 29: ...erent operating system a VT100 terminal emulator Follow these steps to connect the NetScreen device to the workstation 1 Connect the serial cable from the management workstation to the console port on...

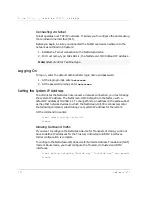
Page 30: ...rk connection you must change the system IP address The NetScreen 10 100 ships from the factory with a default IP address of 192 168 1 1 To change this to an address on the same subnet as the other ne...

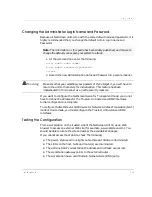
Page 31: ...s 7HVWLQJ WKH RQILJXUDWLRQ From a workstation on the trusted side of the NetScreen 10 100 use a Web browser to access an external Web site for example www netscreen com You should be able to locate th...

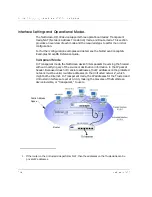
Page 32: ...In Transparent mode the NetScreen device filters packets traversing the firewall without modifying any of the source or destination information in the IP packet header Because it does not translate a...

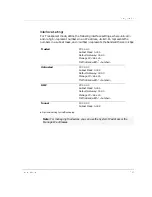
Page 33: ...0 0 0 0 Subnet Mask 0 0 0 0 Default Gateway 0 0 0 0 Manage IP a b c d Traffic Bandwidtha number a Optional setting for traffic shaping Untrusted IP 0 0 0 0 Subnet Mask 0 0 0 0 Default Gateway 0 0 0 0...

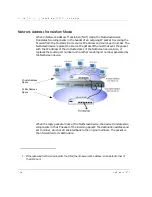
Page 34: ...with the IP address of the Untrusted port 1 of the NetScreen device Also it replaces the source port number with another random port number generated by the NetScreen device When the reply packet arri...

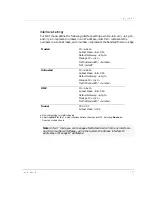
Page 35: ...lect b a Optional setting for traffic shaping b Selecting NAT for the Trusted interface defines the mode as NAT Selecting Route de fines the mode as Route Untrusted IP a b c d Subnet Mask A B C D Defa...

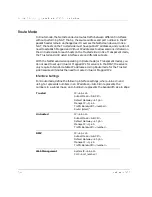
Page 36: ...ansparent mode you do not need to set up Virtual or Mapped IPs for servers in the DMZ the servers only require Internet routable IP addresses Using Route mode for the Trusted side likewise eliminates...

Page 37: ...face defines the mode as Route Selecting NAT de fines the mode as NAT c The default port number is 80 Changing this to any number between 1024 and 32 767 is advised for discouraging unauthorized acces...

Page 38: ...KDSWHU RQILJXULQJ WKH 1HW6FUHHQ IRU WKH LUVW 7LPH 1HW6FUHHQ...

Page 39: ...he devices tipping over do not stack or balance the equipment on other devices Make sure the installation is securely in place 6 7 51 1 6 Make sure that you adhere to the following set of safety warni...

Page 40: ...onsole and auxiliary ports contain safety extra low voltage SELV circuits Do not connect the NetScreen 10 100 to a telephone line or any Telco line e g T 1 T 3 RJ 48 lines Danger Do not work on the de...

Page 41: ...3UHFDXWLRQV You can place the NetScreen 10 100 on a desktop or mounted in a rack The location of the chassis and the layout of your equipment rack or wiring room are extremely important for proper sys...

Page 42: ...rayed power cords and missing safety grounds TXLSPHQW 5DFN 0RXQWLQJ XLGHOLQHV The following information will help you plan an acceptable equipment rack configuration Enclosed racks must have adequate...

Page 43: ...rity Architecture for the Internet Protocol RFC 2402 IP Authentication Header RFC 2403 The Use of HMAC MD5 96 within ESP and AH RFC 2404 The Use of HMAC SHA 1 96 within ESP and AH RFC 2405 The ESP DES...

Page 44: ...SSHQGL 6DIHW 5HFRPPHQGDWLRQV DQG DUQLQJV 1HW6FUHHQ...

Page 45: ...CLI Configuration DMZ port 2 4 initial 2 1 methods 3 1 multiple devices 2 2 testing 3 9 3 12 Connection examples 2 2 Console port 1 2 3 10 Data circuit terminating equipment See DCE Data Communication...

Page 46: ...e 3 2 3 11 NetScreen 10 100 connecting 2 2 Network address translation mode See NAT mode 2 Operating specification A 3 Outgoing access policies 3 5 3 Password changing 3 8 3 12 forgetting 3 8 initial...

Page 47: ...Transparent mode 3 1 3 7 Trusted port 1 2 2 6 8 Untrusted port 1 2 User name initial use 3 3 9 Ventilation A 3 A 4 Warnings A 1 Web administration tools 1 5 Web browser 1 vii requirements 3 1 Web user...

Page 48: ...QGH 1HW6FUHHQ...
Reviews: