background image


6.


Installation 

1


RA0715 

does not have the waterproof function. After the device completes joining the network, please place it indoor.


2


R72615 

has a waterproof function. After the device completes joining the network, please place it outdoors.


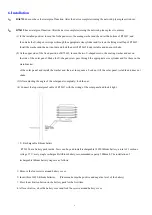
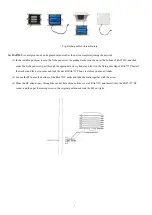
(1)


In the installed position, loosen the U-shaped screw, the mating washer and the nut at the bottom of R72617, and 

then make the U-shaped screw pass through the appropriate size cylinder and fix it on the fixing strut flap of R72615.   

Install the washer and the nut in order and lock the nut till R72615 body is stable and does not shake. 

(2)


At the upper side of the fixed position of R72615, loosen the two U-shaped screws, the mating washer and nut on   

the side of the solar panel. Make the U-shaped screw pass through the appropriate size cylinder and fix them on the 

main bracket   

of the solar panel and install the washer and the nut in sequence. Lock nut till the solar panel is stable and does not 

shake. 

(3) After adjusting the angle of the solar panel completely, lock the nut. 

(4) Connect the top waterproof cable of R72617 with the wiring of the solar panel and lock it tight. 


5

Rechargeable lithium battery 

R72615 has a battery pack inside. Users can buy and install rechargeable 18650 lithium battery, a total of 3 sections,   

voltage 3.7V/ every single rechargeable lithium battery, recommended capacity 5000mah. The installation of   

rechargeable lithium battery steps are as follows: 


1: Remove the four screws around battery cover. 

2: Insert three 18650 lithium batteries.   (Please make sure the positive and negative level of the battery) 

3: Press the activation button on the battery pack for the first time. 

4: After activation, close the battery cover and lock the screws around battery cover. 


Summary of Contents for R72615

Page 1: ...vox Technology Co Ltd This document contains proprietary technical information which is the property of NETVOX Technology It shall be maintained in strict confidence and shall not be disclosed to othe...

Page 2: ...1 Table of Content 1 Introduction 2 2 Appearance 3 3 Main Feature 4 4 Set up Instruction 4 5 Data Report 6 6 Installation 8 7 Important Maintenance Instruction 10...

Page 3: ...d low power consumption Compared with other communication methods LoRa spread spectrum modulation method greatly increases to expand the communication distance Widely used in long distance low data wi...

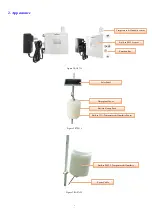
Page 4: ...dity Power Cable Built in PM2 5 sensor Function Key Built in CO2 Temperature Humidity Sensor Solar Panel Waterproof Cover Temperature Humidity sensor Built in Battery Pack 2 Appearance Figure 1 RA0715...

Page 5: ...he power supply Note 1 The engineering test requires to write the engineering testing software separately 2 The interval between on and off is suggested to be about 10 seconds to avoid the interferenc...

Page 6: ...aving the memory of network joining information This function acquiesces in turn off that is it will rejoin every time when it is power on If the device is turned on by the ResumeNetOnOff command the...

Page 7: ...supported by RA0715_R72615_RA0715Y Invalid configuration The data report is sent according to ReportMaxTime as a cycle the first data report is the start to the end of a cycle 4 Data pocket CO2 temper...

Page 8: ...Time should be 900s 2 Read RA0715 device parameter Downlink 0205000000000000000000 Device Return 8205001E03840000000000 device current parameter Description Device CmdI D DeviceType NetvoxPayLoadData...

Page 9: ...appropriate size cylinder and fix them on the main bracket of the solar panel and install the washer and the nut in sequence Lock nut till the solar panel is stable and does not shake 3 After adjustin...

Page 10: ...h the appropriate size cylinder and fix it on the fixing strut flap of RA0715Y Install the washer and the nut in order and lock the nut till RA0715Y body is stable and does not shake 2 Loosen the M5 n...

Page 11: ...batteries and deform or melt some plastic parts Do not store in excessive cold place Otherwise when the temperature rises to normal temperature moisture will form inside which will destroy the board...

Reviews: