background image

Getting Started 

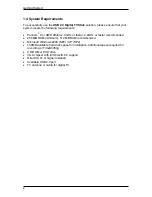
1.4 System Requirements 


To successfully use the 

USB 2.0 Digital TV Stick 

solution, please ensure that your 

system meets the following requirements: 
 

 Pentium

®

 4 or AMD Athlon 2.0 GHz or faster, 2.4GHz or faster recommended 

  256 MB RAM (minimum), 512 MB RAM recommended  

  Microsoft Windows 2000 (SP4) / XP (SP2) 

  100MB available hard disk space for installation, additional space required for 

recording or TimeShifting 

  CD-ROM or DVD drive   

  VGA chipset with full DirectX 9.0 support 

  DirectX 9.0c or higher installed 

  Available USB 2.0 port 

  TV antenna or cable for digital TV 


Summary of Contents for NW249

Page 1: ...USB 2 0 Digital TV Stick User Manual Ver 1 9...

Page 2: ...r organization of such revision or change In no event shall We be liable to you or any third party for any consequential incidental direct indirect special punitive or other damages including without...

Page 3: ...5 2 4 Installation of DTV 6 3 DTV 7 3 1 DTV Interface Overview 7 3 2 Scanning for TV Channels 8 3 3 Channel list 10 3 4 Volume controls 10 3 5 Signal Strength Meter 10 3 6 Teletext 11 3 7 EPG 12 3 8 K...

Page 4: ......

Page 5: ...l TV perfectly to MPEG 2 Scheduled recording and one touch recording from EPG Capture still images Ultra portable design you can take anywhere Compatible with Windows 2000 and XP 1 3 Package Contents...

Page 6: ...n 2 0 GHz or faster 2 4GHz or faster recommended 256 MB RAM minimum 512 MB RAM recommended Microsoft Windows 2000 SP4 XP SP2 100MB available hard disk space for installation additional space required...

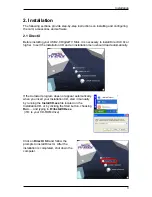
Page 7: ...e installation CD and an installation menu should load automatically If the Autostart program does not appear automatically when you insert your Installation CD start it manually by running the Instal...

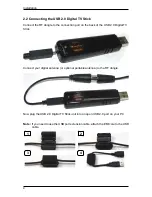
Page 8: ...t on the back of the USB 2 0 Digital TV Stick Connect your digital antenna or optional portable antenna to the RF dongle Now plug the USB 2 0 Digital TV Stick unit into an open USB 2 0 port on your PC...

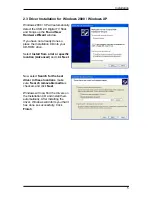
Page 9: ...ce the Installation CD into your CD ROM drive Select Install from a list or specific location Advanced and click Next Now select Search for the best driver in these locations make sure Search removabl...

Page 10: ...Installation 2 4 Installation of DTV Install the DTV software by clicking on DTV Setup Just follow the prompts to install the software 6...

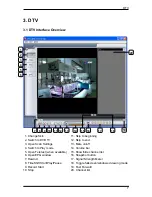
Page 11: ...2 Skip to end 3 Open Scan Settings 13 Mute on off 4 Switch to Play mode 14 Volume bar 5 Open Teletext when available 15 Show hide channel list 6 Open EPG window 16 Snapshot button 7 Rewind 17 Signal S...

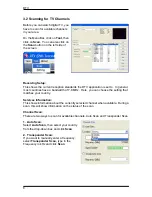
Page 12: ...bandwidth of 7 8 MHz Here you can choose the setting that matches your country Services Information This shows information about the currently selected channel when available During a scan this will s...

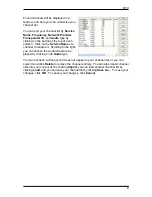
Page 13: ...name it Scrolling to the right you can choose the audio stream to be played by clicking on its Audio type You can uncheck a channel so it does not appear in your channel list or you can select it and...

Page 14: ...free to view and cannot be viewed in the DTV application However some TV stations misidentify their free to view channels as conditional access channels and will channels be listed under the DTV CA li...

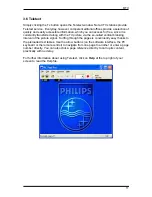
Page 15: ...e via the so called vertical blanking interval of the picture signal Surfing through the pages is conveniently easy thanks to the preloaded text tables Use the arrow buttons on the software interface...

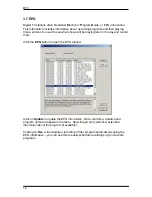
Page 16: ...the day and record them Click the EPG button to open the EPG window Click on Update to update the EPG information Date start time duration and program name will appear in the table Selecting an entry...

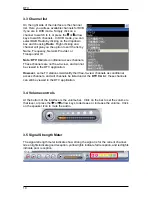
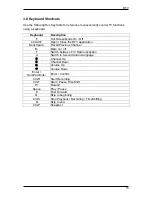
Page 17: ...TV application BackSpace Recall Previous Channel M Mute on off T Switch between TV Radio reception A Switch to Second Audio Language Channel Up Channel Down Volume Up Volume Down Enter NumPad Enter En...

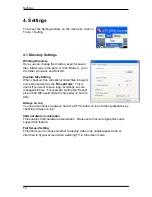
Page 18: ...his is useful if you want to save long recordings in more manageable files For example setting the file split size to 650 MB would make the files easy to burn to CDs Always on top You can also choose...

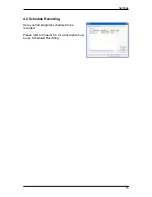
Page 19: ...Settings 4 2 Schedule Recording Here you find programs scheduled to be recorded Please refer to Chapter 5 3 for a description how to use Scheduled Recording 15...

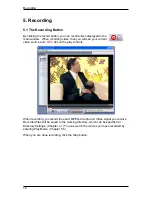
Page 20: ...current video source and REC above the play controls When recording you record the exact MPEG 2 Audio and Video signal you receive Recorded files will be saved to the working directory which can be sp...

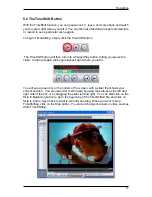
Page 21: ...o Clicking it again will begin playback right where you left it You will see a green bar at the bottom of the screen with a slider that shows your current position You can rewind or fast forward by us...

Page 22: ...t side of the screen Click One time if this is a one time only recording To make a weekly recording click on the days you want the program to record on Select the Source you want to record from then t...

Page 23: ...5 5 5 5 Play Mode You can see the files you have already recorded by clicking on Play on the left side of the interface Here you can select the file you wish to view on the right and it will display i...

Page 24: ...shot 7 Mute Mutes the Audio 8 CH CH Switches to the next previous channel 9 Rewind Rewinds current TimeShift or recorded video 10 Play Pause Resumes and pauses TimeShift or recorded video 11 Forward M...

Page 25: ......

Page 26: ......

Page 27: ...USB 2 0 Digital TV Stick Manual del Usuario Ver 1 9...

Page 28: ...cualquier persona u organizaci n En ning n caso Nosotros ser responsable por da os derivados incidentales directos indirectos especiales punitivos o de otro tipo incluyendo sin l mite da os por p rdid...

Page 29: ...1 Vista General de la Interface DTV 7 3 2 B squeda de Canales de TV 8 3 3 Lista de Canal 10 3 4 Controles de Volumen 10 3 5 Medidor de Intensidad del Se al 10 3 6 Teletext 11 3 7 EPG 12 3 8 Accesos D...

Page 30: ......

Page 31: ...Grabe TV digital perfectamente al MPEG 2 Grabaci n programada y grabaci n a un toque del EPG Capture im genes est ticas Dise o ultra portable que le permite llevar a cualquier lugar Compatible con Wi...

Page 32: ...veloz 2 4GHz o m s veloz 256 MB RAM m nimo se recomienda 512 MB RAM Microsoft Windows 2000 SP4 XP SP2 Espacio en disco duro de 100MB disponible para instalaci n espacio adicional requerido para grabac...

Page 33: ...men de instalaci n aparecer para ser cargado autom ticamente Si el programa Autostart no aparece autom ticamente despu s de insertar su CD de instalaci n in cielo manualmente ejecutando el archivo In...

Page 34: ...i n en la parte trasera del USB 2 0 Digital TV Stick Conecte su antena digital o antena portable opcional al dongle RF Ahora conecte la unidad USB 2 0 Digital TV Stick a un puerto USB 2 0 abierto en s...

Page 35: ...su unidad de CD ROM Seleccione Install from a list or specific location Advanced y haga clic en Next Ahora seleccione Search for the best driver in these locations aseg rese de escoger Search removabl...

Page 36: ...Instalaci n 2 4 Instalaci n de DTV Instale el software DTV haciendo clic en DTV Setup Simplemente siga las l neas de comando para instalar el software 6...

Page 37: ...sactivar Silencio 4 Pasar al modo de Reproducci n Play 14 Barra de Volumen 5 Abrir Teletext si disponible 15 Mostrar Esconder lista de canal 6 Abrir ventana EPG 16 Bot n para Crear Instant neas 7 Retr...

Page 38: ...ancho de banda de 7 8 MHz puede escoger el ajuste de su pa s Informaci n de Servicios Esto muestra la informaci n sobre el canal actualmente seleccionado cuando disponible Durante una b squeda esto mo...

Page 39: ...ra renombrarlo Desplazando para la derecha se puede escoger la secuencia de audio que ser reproducida haciendo clic en su tipo de Audio Se puede deseleccionar un canal para no aparecer en su lista de...

Page 40: ...no pueden ser vistos en la aplicaci n DTV Sin embargo algunas estaciones de TV identifican incorrectamente sus canales de acceso libre como canales de acceso condicional y estos canales ser n listado...

Page 41: ...valo blanco vertical del se al de imagen Navegando por las p ginas es muy f cil debido a las tablas de texto precargadas Utilice los botones de flecha en la interface del software el teclado PC o el c...

Page 42: ...os m s tarde y grab los Haga clic en el bot n EPG para abrir la ventana EPG Haga clic en Update para actualizar la informaci n EPG Fecha horario de inicio duraci n y nombre de programa aparecer n en l...

Page 43: ...ackSpace Rellamar el Canal Anterior M Activar desactivar Silencio Mute T Alternar entre recepci n de TV Radio A Pasar al Segundo Idioma de Audio Canal Arriba Canal Abajo Aumentar Volumen Reducir Volum...

Page 44: ...a o de Corte del Archivo Esto es til si deseas guardar grabaciones largas en archivos m s controlables Por ejemplo configurando el tama o de corte del archivo a 650 MB facilitar la grabaci n a los CDs...

Page 45: ...Settings 4 2 Grabaci n Programada Aqu se encuentra programas programados para grabaci n Consulte el Cap tulo 5 3 para obtener la descripci n de c mo usar la Grabaci n Programada 15...

Page 46: ...C arriba de los controles de reproducci n Durante grabaci n se graba el se al exacto de Audio y V deo MPEG 2 recibido Archivos grabados ser n guardados en el direct rio de trabajo que puede ser especi...

Page 47: ...vamente empezar la reproducci n desde el punto en que fue dejado Se podr ver una barra verde en la parte inferior de la pantalla con un control deslizante que muestra su posici n actual Se puede retro...

Page 48: ...de la pantalla Haga clic en One time Una Vez si esta grabaci n ocurre solamente una vez Para hacer grabaci n semanal haga clic en los d as que se desea programar la grabaci n Seleccione Source Fuente...

Page 49: ...p tulo 5 5 5 5 Modo Play Reproducci n Se puede ver los archivos ya grabados haciendo clic en el lado izquierdo de la interface Aqu se puede seleccionar el archivo deseado en la derecha y l ser mostrad...

Page 50: ...ambia a un canal visto anteriormente posteriormente 9 Rewind Rebobina el TimeShift actual o el v deo grabado 10 Play Pause Reinicia y pone en pausa Timeshift o im genes grabadas 11 Forward Se mueve ha...

Page 51: ......

Page 52: ......

Reviews: