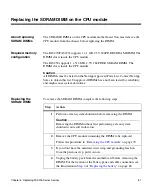
Chapter 4: Replacing FAS200 Series Devices
79
Hot-swapping a
module in a
clustered system
while in takeover
mode
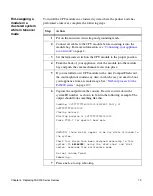
To install the CPU module in a clustered system where the partner node has
performed a takeover, complete the following steps.
Step
Action
1
Put on the antistatic wrist strap and grounding leash.
2
Connect all cables to the CPU module before inserting it into the
module bay. For more information, see “
3
Set the terminate switch on the CPU module to the proper position.
4
From the back of your appliance, slide the module into the module
bay and push the cam mechanism levers into place.
5
If you installed a new CPU module with a new CompactFlash card,
the card might not contain any data, in which case you need to boot
your appliance from a remote image. See “
6
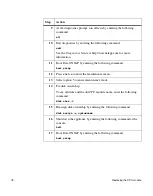
Capture the output from the console. Be sure to write down the
system ID number, as shown in bold in the following example. The
output should look something like this:
Loading: 0xffffffff80001000/8500653 Entry at
0xffffffff80001000
Closing network.
Starting program at 0xffffffff80001000
Press CTRL-C for special boot menu
.
.
WARNING: there do not appear to be any disks attached to
the system.
Check that disks have been assigned ownership to this
system (ID
84166052
) using the 'disk show' and 'disk
assign' commands from maintenance mode
No root volume found.
Rebooting
…
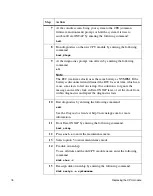
7
Press
ctrl-c
to stop rebooting.
Summary of Contents for FAS200 Series
Page 4: ...iv Copyright and trademark information...
Page 10: ...x Preface...
Page 76: ...64 Monitoring the CPU module...
Page 126: ...114 Troubleshooting hardware problems...
Page 134: ...122 Feature Update Record...


