Get Started
Quick Start
12
4
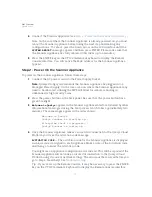
Connect the Scanner Appliance (see
Step 2 - Power On the Scanner Appliance
)
Note: In the case where the Scanner Appliance is already powered on, you must
reboot the Scanner Appliance before taking the next step and making any
configurations. To reboot, press the Down arrow on the LCD interface until the
SYSTEM REBOOT
message appears and then press ENTER. Please make sure that
the Scanner Appliance has fully rebooted (this takes up to 3 minutes).
5
Press the ENTER key on the VT100 terminal’s keyboard to display the Remote
Console interface. You will notice the MAC address for the Scanner Appliance
appears.
Step 2 - Power On the Scanner Appliance
To power on the Scanner Appliance, follow these steps:
1
Connect the AC power cord into the Power Supply Socket.
Note:
Qualys strongly recommends the Scanner Appliance be plugged into a
Managed Power Supply. On the rare occasion where the Scanner Appliance may
need to be rebooted, utilizing the MPS will allow for remote rebooting in
unmanned or high security areas.
2
Press the power button on the back panel. Be sure that the power button has a
green backlight.
3
Welcome
to
Qualys
appears in the Scanner Appliance interface followed by other
informational messages during the boot process which takes approximately two
minutes. These messages appear in the order shown:
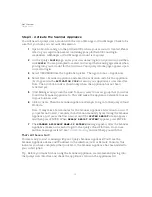
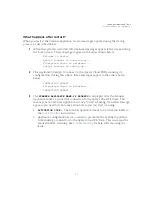
Welcome to Qualys
Qualys Scanner is starting up...
Filesystem check in progress...
Qualys Scanner is coming up...
4
Once the Scanner Appliance makes a successful connection to the Qualys Cloud
Platform you’ll see the activation code message.
ACTIVATION CODE
— The activation code for the Scanner Appliance is displayed.
A unique code is assigned to each Appliance. Make a note of the activation code
and then go to enter the activation code.
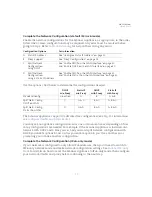
You might see an appliance configuration error instead. This will be reported if the
Scanner Appliance did not make a successful connection to the Qualys Cloud
Platform using its current network settings. The error must be resolved before you
go to Step 3. Need help? See
.
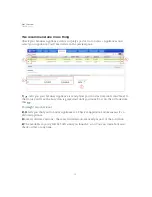
Tip - If you’ve set up the Remote Console, it may be necessary to press the ENTER
key on the VT100 terminal’s keyboard to display the Remote Console interface.
Summary of Contents for QGSA-5120-A1
Page 1: ...Scanner Appliance User Guide December 20 2021 ...
Page 6: ...Preface 6 ...
Page 58: ...Troubleshooting Where can I find the model number and serial number 58 ...
Page 60: ...Appendix A Product Specifications 60 ...
Page 62: ...Appendix B Software Credits 62 ...
Page 64: ...Appendix C Safety Notices 64 ...


