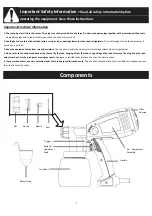

Setup
1.
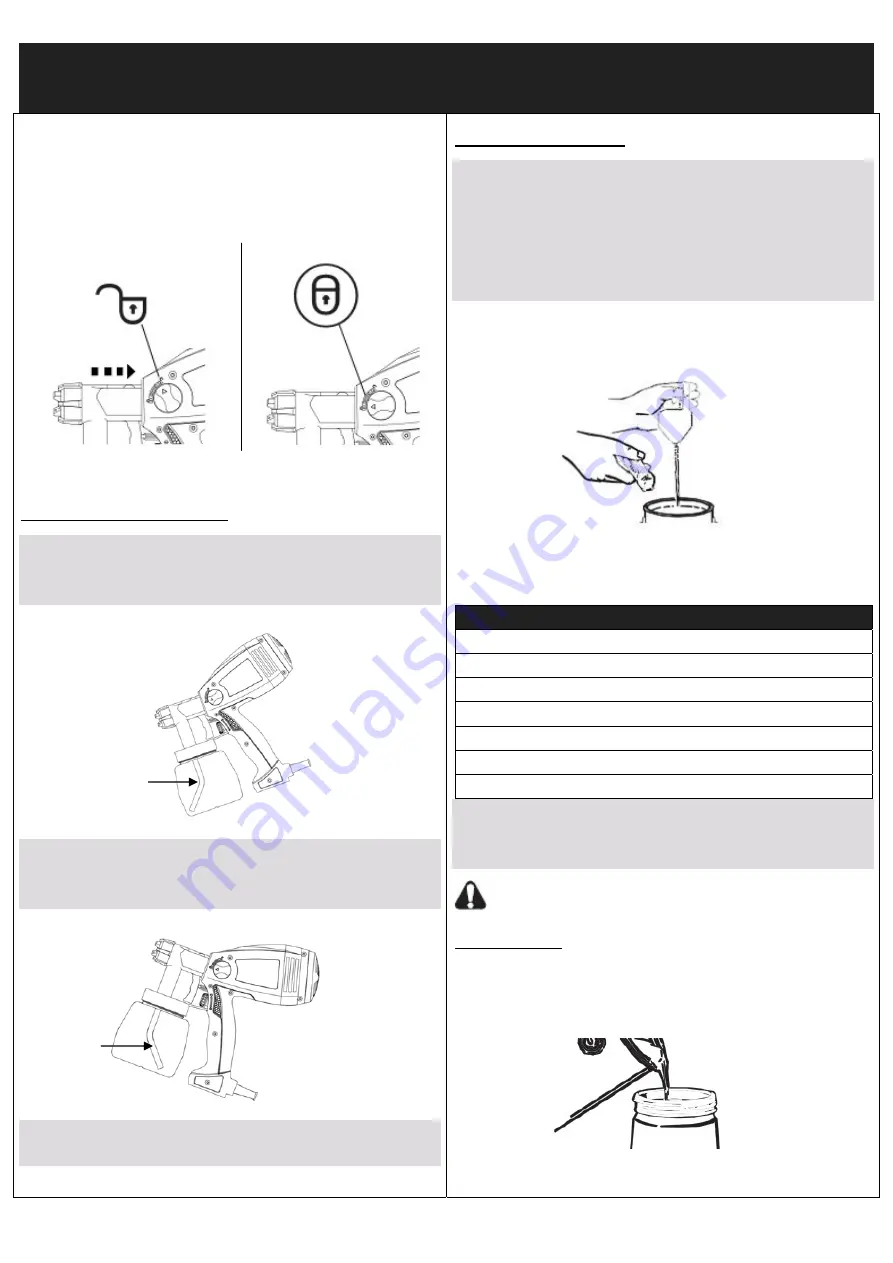
Turn
both
knobs
on
both
sides
of
the
Air
Compressor
Assembly
to
the
“Unlock”
position,
and
Insert
the
spray
gun
into
the
Air
Compressor
Assembly
into
place,
2.
Turn
both
knobs
on
both
sides
of
the
Air
Compressor
Assembly
to
the
“Lock”
position
to
lock
the
two
pieces
into
place.
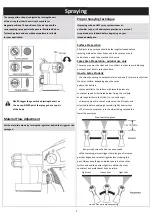
Aligning
the
Suction
Tube
If
you
are
going
to
be
spraying
in
a
downward
direction,
the
angled
end
of
the
suction
tube
should
be
pointing
toward
the
front
of
the
gun.
If
you
are
going
to
be
spraying
in
an
upward
direction,
the
angled
end
of
the
suction
tube
should
be
pointing
toward
the
rear
of
the
gun.
By
pointing
the
suction
tube
in
the
proper
direction,
you
will
not
have
to
refill
the
container
as
often..
Material
Preparation
Before
spraying,
the
material
being
used
may
need
to
be
thinned
with
the
proper
solvent
as
specified
by
the
material
manufacturer.
Never
exceed
the
thinning
advice
given
by
the
coating
manufacturer.
Do
not
use
materials
with
a
flashpoint
below
70°F
(21°C).
Follow
the
instructions
below.
1.
Stir
the
spraying
material
thoroughly
before
measuring
viscosity.
2.
Dip
the
viscosity
test
cup
completely
into
the
spraying
material.
3.
Hold
the
test
cup
up
and
measure
the
time
in
seconds
until
the
liquid
empties
out.
This
time
is
referred
to
below
as
Runout
Time.
Thinning
Chart
Material
Runout
Time
1)
Oil
enamel
25
‐
40
2)
Oil
based
primer
30
‐
45
3)
Oil
stain
No
thinning
required
4)
Clear
sealer
No
thinning
required
5)
Polyurethane
No
thinning
required
6)
Varnish
20
‐
50
Material
to
be
sprayed
should
always
be
strained
to
remove
any
impurities
in
the
paint
which
may
enter
and
clog
the
system.
Impurities
in
the
paint
will
give
poor
performance
and
a
poor
finish.
MATERIAL
FLASH
POINT
MUST
BE
70°F
(21°C)
OR
HIGHER.
Fill
Container
1.
Unscrew
the
cup
from
the
spray
gun.
2.
After
the
material
has
been
properly
thinned
and
strained,
fill
the
container
to
the
top
of
the
neck.
3.
Carefully
screw
the
cup
back
onto
the
spray
gun.
4


