


Operation
214811
23
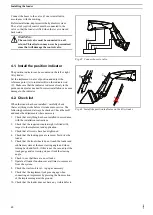
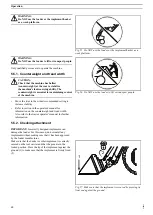
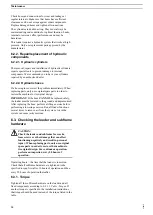
Fold the parking stands (B) down to the ground. The
parking stands are installed in the front part of the loader.
Fix the stay (C) in each parking stand.
B
C
Fig. 48 Lower the parking stands.
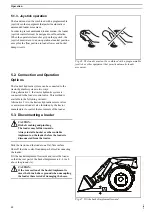
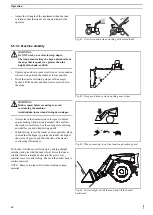
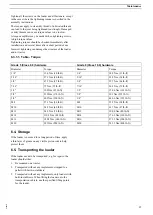
Remove the securing pin (D) from locking pin (E) and
remove locking pin (E) from the subframe on the left/right
bearing boxes.
Operating the tractor:
•
Release the parking brake and your foot from the brake
pedal(s).
•
Move the control lever to the lowering position, so that
the lifting cylinders are completely retracted.
E
D
E
D
Alt. 1
Alt. 2
Fig. 49 Remove the locking pin.
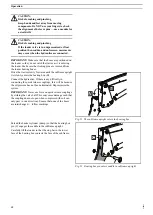
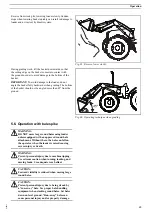
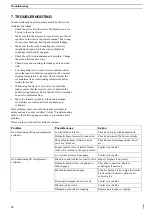
Carefully tilt the implement upward (roll back) until it sits
flat on the ground. This will cause the rear of the loader to
lift and disconnect from the subframe.
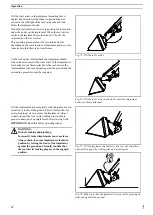
•
Stop the tractor and eliminate the oil pressure to the
loader cylinders using the control valve.
•
Disconnect the hoses and place them in a safe parking
position. Install dust guards on the quick release
couplings.
•
Reverse the tractor carefully until it is completely free
from the loader.
•
Refit the locking pins on both sides.
IMPORTANT:
Make sure that you position the hoses so
that they do not hook onto the tractor when reversing from
the loader.
Fig. 50 Carefully tilt the implement upwards (roll back).
5.4. Connecting a loader
CAUTION:
Risk of crushing and pinching
Air in hydraulic hoses and cylinders can cause
erratic operation.
Run the engine at low speed and make slow
movements with the joystick to purge any air
from the hydraulic system.
Summary of Contents for 611TL
Page 2: ......


