7 - MAINTENANCE
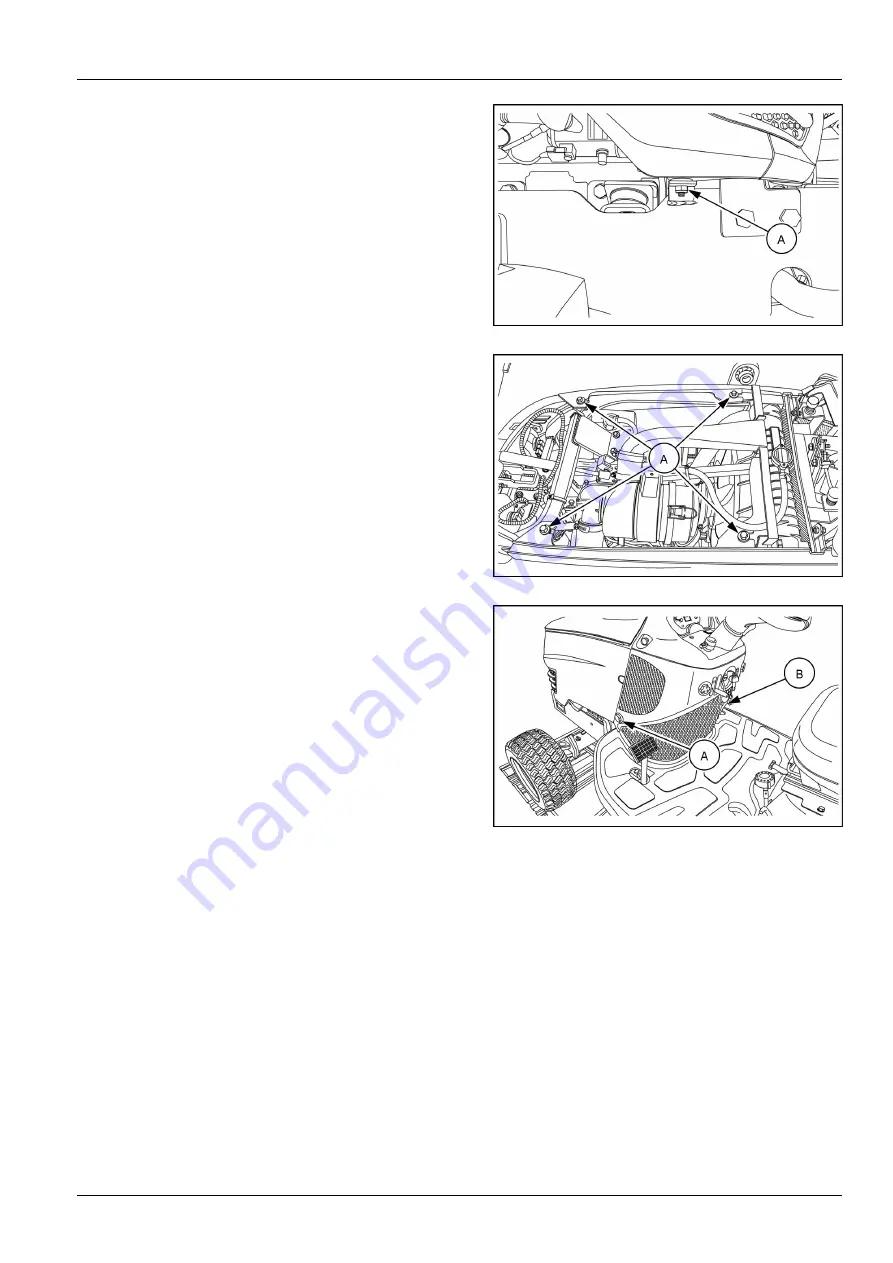
10. Install the nut
(A)
on each side of the engine side
panel and tighten the hardware.
NOTE:
Right-hand side shown, left-hand side loca-
tion is similar.
NHIL17CT01303AA
8
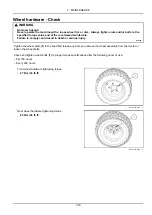
11. Install the four bolts
(A)
and tighten the hardware.
NHIL17CT01297AA
9
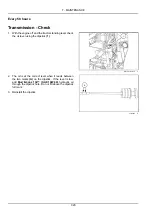
12. Install the two M8 bolts with hand knob
(A)
and
tighten the hardware.
NOTE:
Left-hand side shown, right-hand side hard-
ware
(B)
location is similar
NHIL17CT00474AA
10
7-5
Summary of Contents for Workmaster 25S
Page 20: ...1 GENERAL INFORMATION 1 14 ...
Page 102: ...3 CONTROLS AND INSTRUMENTS 3 40 ...
Page 118: ...4 OPERATING INSTRUCTIONS 4 16 ...
Page 186: ...7 MAINTENANCE 7 50 ...
Page 199: ...9 SPECIFICATIONS NHIL17CT01125FA 1 NHIL17CT01124FA 2 9 9 ...
Page 200: ...9 SPECIFICATIONS 9 10 ...


