62
XII Operation
A. General Information
This boiler uses the microprocessor based Honeywell R7910B (“boiler control”) to manage all boiler functions including
flame supervision and modulation. Two set point or “target” boiler supply temperatures are stored in the control’s memory;
one for space heating (CH) and one for domestic hot water (DHW) production. If an outdoor temperature sensor is connected
to the boiler, and enabled, the space heating supply set point will automatically shift downward as the outdoor temperature
increases. For more information on this feature see the discussion on boiler water reset below. The control modulates the boiler
input by varying the fan speed. As the fan speed increases, so does the amount of gas drawn into the blower. As a result, a fairly
constant air-fuel ratio is maintained across all inputs. The control determines the input needed by looking at both current and
recent differences between the supply temperature and the set point temperature. As the supply temperature approaches the set
point temperature, the fan will slow down and the input will drop. The minimum input is approximately 1/5 of maximum input.
This boiler control also monitors boiler return and flue temperatures. In addition, all other safety controls are connected into the
R7910B. The R7910B uses inputs from all of these controls to either shut down the boiler when an unsafe condition exists or, in
some cases, to correct the problem. Finally, the R7910B manages up to three pumps:
• Boiler pump
• DHW pump
• System pump
Refer to the Piping Section for the location of these pumps.
The boiler’s status, as well as all settings, are viewed and adjusted using the control panel (“display”) on the front of the boiler
(Figure 12.0). This display has three basic modes of operation:
1)
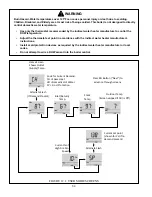
User Mode - This is the default mode of operation for the control. By default, the display shows the home screen shown
in Figure 12.0. By pressing the LH or RH buttons at the bottom of the screen, it is possible to navigate to other User
Mode screens. See Figure 12.1 for a description of all User Mode screens.
2)
Set-up Mode
– This mode is used to adjust settings, such as target water temperature. To reach Set-up Mode, hold both
the Up and DWN keys for at least 3 seconds. All Set-up Mode screens are shown in Figure 12.2 and all settings are
described in more detail in Part B of this section.
3)
Diagnostic Mode
– Diagnostic Mode is used to obtain information about recent faults, as well as to temporarily lock
the input at high or low fire for the purpose of running combustion tests. To reach Diagnostic Mode, hold both the LH
and RH keys for at least 3 seconds. All Diagnostic Mode screens are shown in Figure 12.7 and the use of these screens is
described both in this section and in Section XIV.
WARNING
This control panel is provided to enable a professional HVAC technician to set-up, check, and
troubleshoot this boiler. Attempts by others to make adjustments using this control panel could result
in death, personal injury, property damage, or unreliable operation.
B. Setting Up the Control
Enter Set-up Mode by pressing and holding both the UP and DWN buttons for at least 3s. The RH (Next) button advances
through the screens on this menu, saving any changes on the way. The LH (Done) button saves changes and returns to User Mode.
All Set-up Mode screens are shown in Figure 12.2. A description of each is as follows:
Temperature Units (S0)
– Used to select temperature units shown on the display.
CH Set point (S1) - Target water temperature when the boiler is responding to a call for space heat. If outdoor reset is enabled, this
is the maximum target water temperature, regardless of outdoor temperature. See the Odr section below, as well as Figure 12.3,
for more information on outdoor reset.
Odr (S2)
– Outdoor reset function status. This screen indicates whether the Odr function is on or off by alternately flashing “Odr”
and either “On” or “OFF”.
Summary of Contents for GHE Series
Page 10: ...9 Figure 5 1 Wall Layout Mounting Hole Location...
Page 11: ...10 Figure 5 2 Boiler Mounting Bracket Installation Boiler Wall Mounting...
Page 17: ...16 FIGURE 7 4 WALL PENETRATION CLEARANCES FOR PVC VENT PIPE...
Page 34: ...33 FIGURE 7 24 INSTALLATION OF IPEX AND DIVERSITECH CONCENTRIC TERMINAL THROUGH ROOF...
Page 41: ...40 FIGURE 9 2 NEAR BOILER PIPING HEATING ONLY BOILER LOOP PIPING SHOWN SHADED...
Page 42: ...41 FIGURE 9 3a NEAR BOILER PIPING HEATING PLUS INDIRECT WATER HEATER...
Page 43: ...42 FIGURE 9 3b NEAR BOILER PIPING HEATING PLUS INDIRECT WATER HEATER...
Page 47: ...46 This page is intentionally left blank...
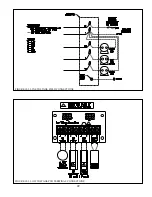
Page 50: ...49 FIGURE 10 2 LINE VOLTAGE FIELD CONNECTIONS FIGURE 10 3 LOW VOLTAGE PCB TERMINAL CONNECTIONS...
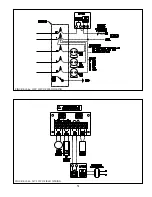
Page 52: ...51 FIGURE 10 4a 120V LWCO FIELD WIRING FIGURE 10 4b 24V LWCO FIELD WIRING...
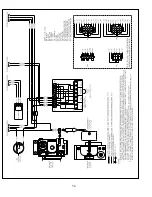
Page 54: ...53 FIGURE 10 6 INTERNAL WIRING CONNECTIONS DIAGRAM...
Page 55: ...54...
Page 62: ...61 Lighting and Operating Instructions...
Page 82: ...81 FIGURE 14 6 CONTROLS LOCATION FIGURE 14 7 PRESSURE SWITCH TUBING CONNECTIONS...
Page 87: ...86 Blower Gas Valve Assembly for 150 180...
Page 90: ...89...
Page 103: ...102...


