background image

24

Decide which days and what times you want this policy 

8. 

to be enforced. Select the individual days during which 

the  policy  will  be  in  e

ff

ect,  or  select  Everyday.  Then 

enter a range of hours and minutes during which the 

policy will be in e

ff

ect, or select 24 Hours.

You can also block access by URL address by entering 

9. 

it  in  the Website  Blocking  by  URL  Address 

fi

eld  or  by 

Keyword by entering it in the Website Blocking by Key-

word 

fi

eld. Click the >> button to add a selection to the 

Blocked Applications list.
You  can 

fi

lter  access  to  various  applications  accessed 

10. 

over the Internet, such as FTP or telnet, by selecting up 

to three applications from the drop-down menus under 

Applications. If the application you want to block is not 

listed or you want to edit an application’s settings, then 

create a new one by entering an Application Name, Port 

Range, and Protocol. Then, click Add.

Once you are done changing the settings, click the Save Set-

tings button to apply your changes or Cancel Changes to re-

vert to what they were before.

Port Range Forwarding

The Port Range Forwarding screen allows you to set up public 

services on your network, such as web servers, ftp servers, e-

mail servers, or other specialized Internet applications. Before 

using forwarding, you should assign static IP addresses to the 

designated PCs.

Port Range Forwarding

To forward a service from local network, please 

fi

ll in the rel-

evant information on each 

fi

eld.

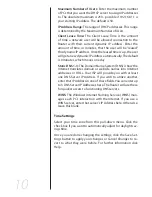
Application Name

In this 

fi

eld, enter the name you wish to give the applica-

tion.

Start/End

This is the port range. Enter the port number or range of 

external  ports  used  by  the  server  or  Internet  application. 

Check with the software documentation of the Internet ap-

plication for more information.

Summary of Contents for MAXPower

Page 1: ...User Manual MaxPower 802 11n g bWireless Guide ...

Page 2: ...eless Configuration 14 Wireless Security 15 Wireless MAC Filter 16 Advanced Wireless Settings 18 Wireless WDS Settings 21 VPN Passthrough 22 Internet Access Policy 23 Port Range Forwarding 24 Port Range Triggering 26 DMZ 27 Management 28 Log 29 Diagnostics 30 Factory Defaults 31 Router Status 32 Local Network Status 33 Wireless Network Status 34 Troubleshooting 35 Contacting Tech Support Customer ...

Page 3: ...ickly Setup of the Newer Technology MaxPower 802 11n g b Wire less Router is straightforward but you do need to follow this guide for proper setup We suggest reading through the whole manual before hooking up the MaxPower 802 11n g bWireless Router Package Contents MaxPower 802 11n g b Wireless Router t User Guide CD ROM t Three dipole 2dBi RSMA detachable Antennas t AC DC Power Adapter t User Man...

Page 4: ... startup diagnosis and firmware updating Also indicates when system is functioning abnormally Internet LAN 1 4 Green These indicators will light up when a link has been established Data transmission is indicated by rapid blinking Rear Panel Power The power adapter attaches here WAN Your broadband internet connection attaches here LAN 1 4 These ports connect the router to your networked PCs and oth...

Page 5: ... Router s Power port Then connect the other end to an electrical outlet Only use the power adapter supplied with the unit Use of a different adapter may cause product damage The Hardware installation is completed You may now 7 configure the unit Router Configuration You will need to use a modern web browser in order to con figure your MaxPower 802 11n g b Wireless Router Open a Web browser window ...

Page 6: ...ou enter broadband specific information into this device such as User Name Password IP Address Default Gateway Address or DNS IP Address for Internet access This informa tion can be obtained from your ISP if required More detailed information about the different options for different settings follows Internet Setup Internet Connection Type Automatic Configuration DHCP t This is default connection ...

Page 7: ...ct on Demand The Max Idle Time is allows the Router to disconnect the Internet connection if there is no traffic through this Router during a specified period of time If your Internet connection has been terminated due to going over this idle time the Connect on Demand option will trigger the Router to automatically re estab lish your connection as soon as you try to access the In ternet again Kee...

Page 8: ...you to input a host and domain name for the Router Some ISPs re quire these names as identification You may have to check with your ISP to see if your broadband Internet service has been configured with a host and domain name In most cases leaving these fields blank will work MTU MTU is the Maximum Transmission Unit It specifies the largest packet size permitted for Internet transmission Select Ma...

Page 9: ...sign this IP field and enter the MAC address of the computer in the To this MAC field Then click the Enabled checkbox When you have finished your entries click the Save Settings button to save your changes or click the Cancel Changes button to cancel your changes To exit this screen click the Close button How to set a DHCP client as Static DHCP client Click the DHCP Client Table button can see a l...

Page 10: ...DNS 1 3 The Domain Name System DNS is how the Internet translates domain or website names into Internet addresses or URLs Your ISP will provide you with at least one DNS Server IP Address If you wish to utilize another enter that IP Address in one of these fields You can enter up to 3 DNS Server IP Addresses here The Router will use these for quicker access to functioning DNS servers WINS The Wind...

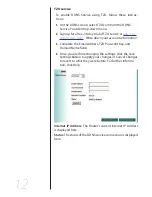
Page 11: ...e providers DynDNS org or TZO DynDNS service To enable DDNS Service using DynDNS org follow these in structions On the DDNS screen select DynDNS org from the DDNS 1 Service Provider drop down menu Sign up for DynDNS service at 2 www dyndns org for applying one DDNS account Write down your account information Complete the User Name Password and Host Name 3 fields Once you are done changing the sett...

Page 12: ...Write down your account information Complete the Email Address TZO Password Key and 3 Domain Name fields Once you are done changing the settings click the Save 4 Settings button to apply your changes or Cancel Changes to revert to what they were before For further informa tion click Help Internet IP Address The Router s current Internet IP Address is displayed here Status The status of the DDNS se...

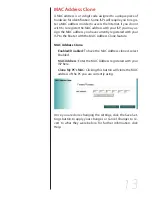
Page 13: ...rently registered with your ISP to the Router with the MAC Address Clone feature MAC Address Clone Enabled Disabled To have the MAC Address cloned select Enabled MAC Address Enter the MAC Address registered with your ISP here Clone My PC s MAC Clicking this button will clone the MAC address of the PC you are currently using Once you are done changing the settings click the Save Set tings button to...

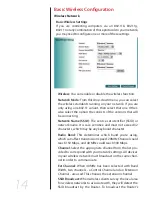
Page 14: ...ID or network name It is case sensitive and must not exceed 32 characters which may be any keyboard character Radio Band This determines which band you re using which can affect transmission speed 20MHz Channel could reach 150 Mbps and 40 MHz could reach 300 Mbps Channel Select the appropriate channel from the list pro vided to correspond with your network settings All devices in your wireless net...

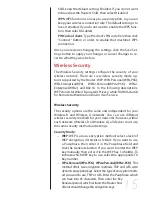
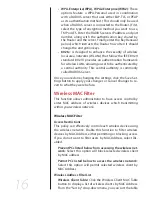
Page 15: ...s for Wired Equivalent Privacy while RADIUS stands for Remote Authentication Dial In User Service Wireless Security The security options are the same and independent for your Wireless B and Wireless G networks You can use different wireless security methods for your networks however within each network Wireless B or Wireless G all devices must use the same security method and settings Security Mod...

Page 16: ...you are done changing the settings click the Save Set tings button to apply your changes or Cancel Changes to re vert to what they were before Wireless MAC Filter This function allows administrator to have access control by enter MAC address of wireless devices which transmitting within your wireless network Wireless MAC Filter Access Restrictions This policy can effectively control each wireless ...

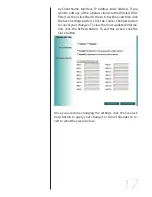
Page 17: ... checkbox and then click the Save Settings button Click the Cancel Changes button to cancel your changes To view the most updated informa tion click the Refresh button To exit this screen click the Close button Once you are done changing the settings click the Save Set tings button to apply your changes or Cancel Changes to re vert to what they were before ...

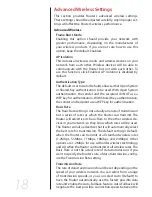
Page 18: ...e a WEP key for authentication Basic Rate The Basic Rate setting is not actually one rate of transmission but a series of rates at which the Router can transmit The Router will advertise its Basic Rate to the other wireless de vices in your network so they know which rates will be used The Router will also advertise that it will automatically select the best rate for transmission The default setti...

Page 19: ... to catch all Wireless G transmissions but will severely decrease performance If you do not want to use CTS Protection Mode at all select Disabled Beacon Interval The default value is 100 The Beacon Interval value indicates the frequency interval of the beacon A beacon is a packet broadcast by the Router to synchronize the wireless network DTIM Interval This value indicates the interval of the Del...

Page 20: ... Request to Send RTS frames to a particular receiving station and negotiates the sending of a data frame After receiving an RTS the wireless station responds with a Clear to Send CTS frame to acknowledge the right to begin transmission The RTS Threshold value should remain at its default value of 2312 Once you are done changing the settings click the Save Set tings button to apply your changes or ...

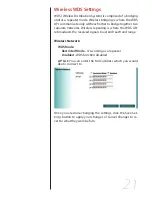
Page 21: ... Wireless repeating is where the WDS APs rebroadcasts the received signals to extend reach and range Wireless Network WDS Mode Restricted Mode It s working as a repeater Disabled WDS function disabled AP List You can enter the MAC address which you would like to connect to Once you are done changing the settings click the Save Set tings button to apply your changes or Cancel Changes to re vert to ...

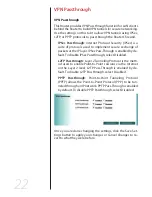
Page 22: ...ed by de fault To disable IPSec Passthrough select Disabled L2TP Passthrough Layer 2 Tunneling Protocol is the meth od used to enable Point to Point sessions via the Internet on the Layer 2 level L2TP Pass Through is enabled by de fault To disable L2TP Passthrough select Disabled PPTP Passthrough Point to Point Tunneling Protocol PPTP allows the Point to Point Protocol PPP to be tun neled through ...

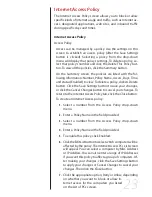
Page 23: ... Save Settings button to save your changes or click the Cancel Changes button to cancel your changes To return to the Internet Access Policy tab click the Close button To create an Internet Access policy Select a number from the Access Policy drop down 1 menu Enter a Policy Name in the field provided 2 Select a number from the Access Policy drop down 3 menu Enter a Policy Name in the field provide...

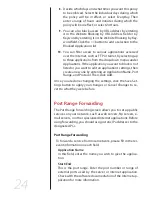
Page 24: ...an application s settings then create a new one by entering an Application Name Port Range and Protocol Then click Add Once you are done changing the settings click the Save Set tings button to apply your changes or Cancel Changes to re vert to what they were before Port Range Forwarding The Port Range Forwarding screen allows you to set up public services on your network such as web servers ftp s...

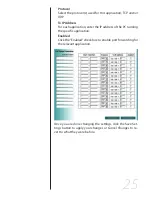
Page 25: ...tion enter the IP address of the PC running the specific application Enabled Click the Enabled check box to enable port forwarding for the relevant application Once you are done changing the settings click the Save Set tings button to apply your changes or Cancel Changes to re vert to what they were before ...

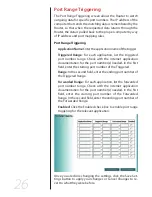
Page 26: ... application documentation for the port number s needed In the first field enter the starting port number of the Triggered Range In the second field enter the ending port number of the Triggered Range Forwarded Range For each application list the forwarded port number range Check with the Internet application documentation for the port number s needed In the first field enter the starting port num...

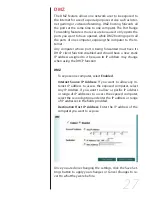
Page 27: ...and should have a new static IP address assigned to it because its IP address may change when using the DHCP function DMZ To expose one computer select Enabled Internet Source IP Address If you want to allow any In ternet IP address to access the exposed computer select Any IP Address If you want to allow a specific IP address or range of IP addresses to access the exposed computer select the seco...

Page 28: ...network select Enabled Otherwise leave it set to Disabled Remote Upgrade If you want to be able to upgrade the Router remotely from outside of local network select En abled You must have the Remote Management feature enabled as well Otherwise leave it set to Disabled Allow Remote IP Address If you want to be able to access the Router from outside with any external IP address select Any IP Address ...

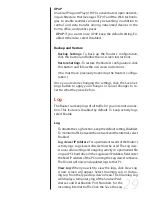
Page 29: ...anges to re vert to what they were before Log The Router can keep logs of all traffic for your Internet connec tion This feature is disabled by default To keep activity logs select Enable Log To disable the Log function keep the default setting Disabled To monitor traffic between the network and the Internet select Enabled LogviewerIPAddress ForapermanentrecordoftheRouter s activity logs Log viewe...

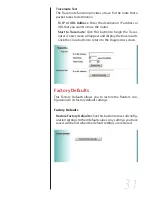
Page 30: ...ck the Save Set tings button to apply your changes or Cancel Changes to re vert to what they were before Diagnostics The diagnostics function provides two ways to check Router s status of Internet connection Diagnostics Ping Test This utility verifies configurations and tests IP connectivity between two computers Ping sends an ICMP request from the source computer and the destination computer re s...

Page 31: ...the Tracer outer A new screen will appear and display the trace results Click the Close button to return to the Diagnostics screen Factory Defaults This Factory Defaults allows you to restore the Router s con figuration to its factory default settings Factory Defaults Restore Factory Defaults Click this button to reset all config uration settings to their default values Any settings you have saved...

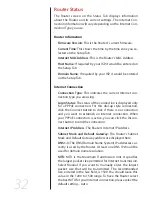
Page 32: ... this dial up style connection click the Connect button to click if there is no connection and you want to establish an Internet connection When your PPPoE connection is active you can click the Discon nect button to end the connection Internet IP Address The Router s Internet IP Address Subnet Mask and Default Gateway The Router s Subnet Mask and Default Gateway address are displayed here DNS1 3 ...

Page 33: ...h a new IP address Click the Refresh button to update the on screen information Local Network Status The Local Network screen on the Status Tab displays the status of your network Local Network Local MAC Address This is the Router s local MAC Address Router IP Address This is the Router s local IP Address Subnet Mask This is the Router s local subnet mask DHCP Server DHCP Server The Router s embed...

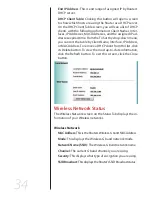
Page 34: ...rface IP Address or MAC Address To remove a DHCP client from this list click its Delete button To view the most up to date information click the Refresh button To exit this screen click the Close button Wireless Network Status The Wireless Network screen on the Status Tab displays the in formation of your Wireless networks Wireless Network MACAddress ThisistheRouter sWireless GbandMACAddress Mode ...

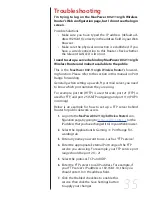
Page 35: ...port numbers they are using For example port 80 HTTP is used for web port 21 FTP is used for FTP and port 25 SMTP outgoing and port 110 POP3 incoming Below is an example for how to set up a FTP server behind Router for public network access Log on to the 1 MaxPower802 11n g bWirelessRouter s con figuration page by going to http 192 168 1 1 or the IP address that you have changed it to in yourWeb b...

Page 36: ...tself Double check all connections making sure all points are securely attached I can t access the MaxPower 802 11n g b Wireless Router from a wireless client Usually inability to connect to the MaxPower802 11n g bWire less Router is caused by one of the following issues Settings are not the same among each wireless adapter t Out of range t IP Address is not set correctly t Make sure that the mode...

Page 37: ...e If you still need support there are two ways to contact Techni cal Support Customer Service Phone t 815 308 7001 8am 9pm CST Monday Friday 9am 4pm CST Saturday email t You can Submit your email support request at http helpcenter newertech com ...

Page 38: ...ich the receiver is connected t Consult the dealer or an experienced radio TV technician for help t FCC Caution Any changes or modifications not expressly approved by the party responsible for compliance could void the user s authority to operate this equipment This device complies with Part 15 of the FCC Rules Operation is subject to the following two conditions 1 This device may not cause harmfu...

Page 39: ... General Use Precautions Donotexposethewirelessproducttotemperaturesoutsidetherangeof5 Cto40 C 41 Fto104 F Doing t so may damage the drive or disfigure its casing Avoid placing your wireless product near a source of heat or exposingittosunlight eventhroughawindow Inversely placingyourwirelessproductinanenvironment that is too cold or humid may damage the unit Always unplug the wireless product fro...

Page 40: ...NWTMAN802NRTR 2007 Newer Technology Inc All Rights Reserved Revision 1 11 07 MCS ...

Reviews: