background image


33 


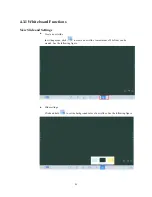
Pen Type 

On the whiteboard, two types of pens are supported: hard pen and highlighter. Their icons are 

  and 


Hard pen: used to write. 


Highlighter: used to comment. Characters covered by comments are visible. 

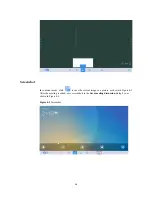
Line Type and Color 

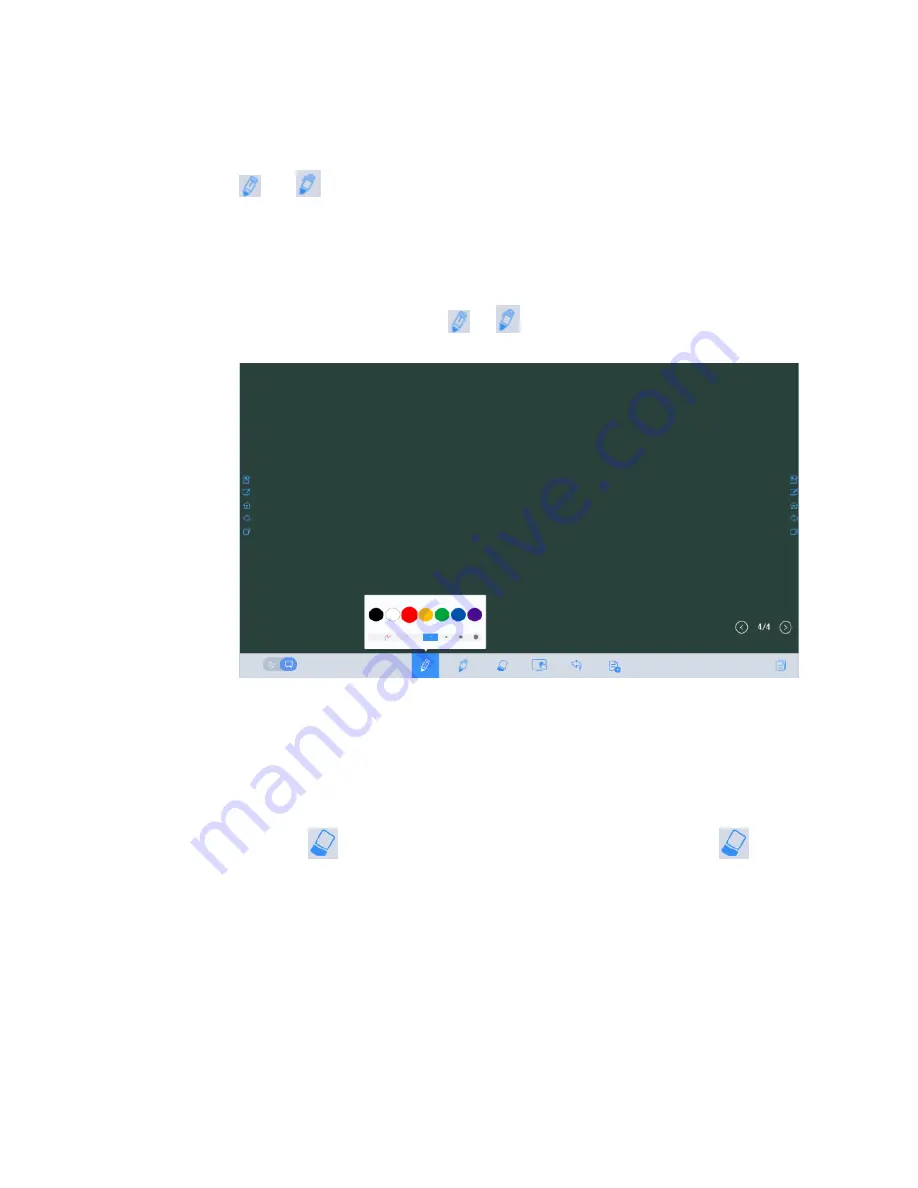
On the whiteboard, click and hold 

  or 

. The line type and color selection page is 

displayed. You can select the line type and color for writing. See the following figure. 


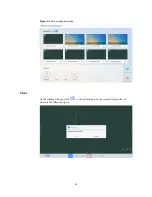
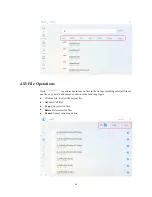
Eraser 

Two methods are available to erase written errors or content as follows:   


Five-finger gesture: touch the screen with five fingers at the same time. A circle shows 
and indicates the area for eraser. Move the circle with fingers to erase written contents.   


Click 

  to clear wrong or unnecessary content. You can click and hold 

  to set 

the radius of the eraser. See the following figure. 

Summary of Contents for BNL16X5

Page 1: ...Collaboration Touch Screen User Manual Newline Interactive Inc www newline interactive com...

Page 2: ...mmunications However there is no guarantee that interference will not occur in a particular installation If this equipment does cause harmful interference to radio or television reception which can be...

Page 3: ...er Off 18 3 3 Positioning 20 4 Operating the Touch Screen 23 4 1 Home Page 23 4 2 Assistant Meeting 25 4 2 1 Newline Assistant 25 4 2 2 Switch Applications 25 4 2 3 Add or Delete Applications 25 4 3 W...

Page 4: ...coupler is used as the disconnect device the disconnect device shall remain readily operable In the preceding scenarios do not continue to use the product disconnect power supply immediately and conta...

Page 5: ...re that it is properly grounded Pull out the power plug from the socket if the product is not used for a long period Before you move the product disconnect all external connections and separate all to...

Page 6: ...not install the product near heat source such as the radiator the heat reservoir the stove or other heating devices Do not expose the product under sunlight which may cause high temperature and subseq...

Page 7: ...e distance which is 3 to 7 times of the screen height should be kept and it is the best distance to protect eyes and prevent eyestrain Adjust the volume to an appropriate level especially at night Use...

Page 8: ...not need additional devices installation and wiring and commissioning and maintenance Dedicated software is customized for the assistant meeting It can meet requirements of various meeting modes impl...

Page 9: ...8 The top and bottom cameras cannot be used at the same time The indicators of the top and bottom cameras are turning white when in use and off when not in use Rear Elevation...

Page 10: ...9 1 3 Ports Front Ports...

Page 11: ...10 Rear Ports Front Buttons...

Page 12: ...Decrease volume Long press for more than 1 second Decrease volume continuously Short press Increase volume Long press for more than 1 second Increase volume continuously Short press Open the menu Shor...

Page 13: ...12 1 4 Remote Control Buttons Functions Power On Off Start the Default UC Programs Mute Microphone Mute Up Down Left Right Confirm OK...

Page 14: ...Open the Menu Switch to Top Camera Switch to Bottom Camera Increase Volume Decrease Volume Settings Switch Source to HDMI Front Switch Source to HDMI Rear Switch Source to VGA Switch Source to Interna...

Page 15: ...14 2 Installation Guide 2 1 Safety Precautions Installation Environment...

Page 16: ...on Precautions Weight Loading The back of the panel is equipped with holes in VESA standard Please use a VESA standard mounting system When using a mobile cart please ensure the mobile cart has no les...

Page 17: ...tion and or air conditioning environment We recommend to keep certain distance from the side of the unit to the wall or panels Ventilation requirement is showed in following figure 2 3 Installation Th...

Page 18: ...17...

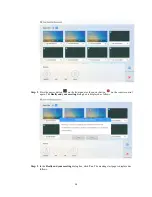
Page 19: ...e ensure the power is in the range of 100V 240Vwith frequency at 50Hz 60Hz 5 The power current must be grounded Step 2 Turn on the general power switch located on the side of the unit 3 2 Power Off St...

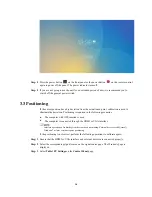
Page 20: ...n the front panel or the power button on the remote control again The Really end your meeting dialog box is displayed as follows Step 3 In the Really end your meeting dialog box click Yes The meeting...

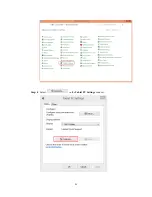
Page 21: ...oning is required in the following scenarios The computer with OPS inserted is used The computer is connected through the HDMI or VGA interface Interface operation on Android system does not need posi...

Page 22: ...21 Step 4 Select in the Tablet PC Settings window...

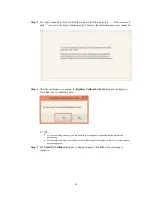
Page 23: ...is complete the Digitizer Calibration Tool dialog box is displayed Click Yes to save calibration data To ensure writing accuracy you are advised to use the pencil released with the product for positi...

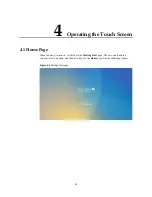
Page 24: ...creen 4 1 Home Page When the unit is turned on it will show the Meeting Start page The user can touch the screen to start a meeting and the unit will go to the Home page See the following figures Figu...

Page 25: ...of the four sources to display including HDMI Front HDMI Rear Internal PC and VGA External Storage Open up the file manager to open files from external USB disk End Press End to end a meeting Users w...

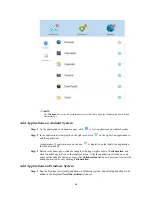
Page 26: ...ucts Software to download Newline Assistant installation package Step 5 Install Newline Assistant as instructed 4 2 2 Switch Applications On the home page click Collaboration to start applications use...

Page 27: ...ns can be added is displayed on the right of an application that has been added Step 3 Return to the home page click the triangle at the upper right corner of Collaboration and click the added applica...

Page 28: ...27 Step 2 Click to return to the home page Click the triangle at the upper right corner of Collaboration and select Add on the displayed menu The customization page is displayed...

Page 29: ...28 Step 3 On the customization page click to view all Windows applications added using Newline Assistant in Step 1...

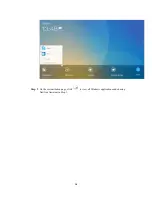
Page 30: ...Return to the home page click the triangle at the upper right corner of Collaboration and click the added application on the displayed menu After the application is started once its name will be adde...

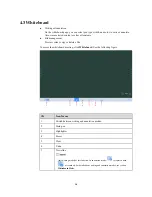
Page 31: ...Preview select copy or delete a file To access the whiteboard meeting click Whiteboard See the following figure SN Icon Name 1 Switch between writing and annotation modes 2 Hard pen 3 Highlighter 4 Er...

Page 32: ...e and Settings Create a new slide In writing mode click to create a new slide A maximum of 20 slides can be created See the following figure Slide settings Click and hold to set the background color o...

Page 33: ...The background is transparent and the real time image of the current signal source is displayed You can comment on presentation content such as Office documents and pictures as required See the follow...

Page 34: ...election page is displayed You can select the line type and color for writing See the following figure Eraser Two methods are available to erase written errors or content as follows Five finger gestur...

Page 35: ...In comment mode click to save the current image as a picture as shown in Figure 4 3 After the meeting is ended save screenshots in the Save meeting discussion dialog box as shown in Figure 4 4 Figure...

Page 36: ...35 Figure 4 4 Save meeting discussion Clear On the whiteboard page click to clear all contents on the current writing slide as shown in the following figure...

Page 37: ...eated writing slide Slide Preview Click at the lower right corner of the whiteboard All writing slides are displayed Click one slide to switch to the slide for other operations See the following figur...

Page 38: ...elected slides Click Buttons on the left are replaced with Click to close the Navigation page 4 4 Signal Source On the home page click Sources The signal source selection page is displayed You can pre...

Page 39: ...ernal storage page you can view files stored in all external storage devices for example the USB flash disk and SD card and preview select copy delete and search content in each storage device 4 5 1 E...

Page 40: ...pecified external storage device See the following figure 4 5 3 File Filtering For your convenience the system displays files by category for example document picture audio and video You can click the...

Page 41: ...search box Files matching the key word are listed The system supports second filtering for searched files Click the filtering tool bar below the search box to filter searched files based on PPT PDF D...

Page 42: ...s in the storage including select all files or one file copy delete and cancel as shown in the following figure Click the file to select the current file All Select all files Copy Copy selected files...

Page 43: ...ted icons in the Save to area are in gray When an external USB flash disk or SD card is connected icons in the Save to area will turn into blue Click the USB or SD card icon in blue The system stores...

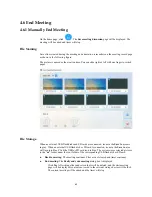
Page 44: ...SB drive or SD card smaller than 32GB and change the file system into FAT 32 format 4 6 2 Automatically End Meeting If the period without operations on the screen exceeds 90 minutes the system will lo...

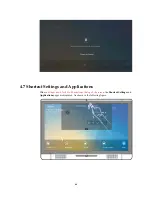
Page 45: ...44 4 7 Shortcut Settings and Applications Slide one finger down for 40 to 80 mm from the top of the screen the Shortcut Settings and Applications pages are displayed As shown in the following figure...

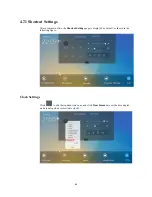
Page 46: ...top down slide the Shortcut Settings page is displayed by default as shown in the following figure Clock Settings Click to add the required time zone and click Time Formats to set the time display mod...

Page 47: ...Adjustment Drag the slider beside the icon to adjust the brightness Volume Adjustment Drag the slider beside the icon to adjust the volume Microphone Mute Mode Click to enable or disable the micropho...

Page 48: ...Wi Fi Settings Click to enter the system settings page and select the Wi Fi hotspot to be connected Wired Network Settings Click to enter system settings page and set information about the wired netwo...

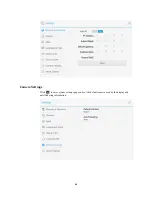
Page 49: ...48 Camera Settings Click to enter system settings page and set the default camera used by the display and anti flickering information...

Page 50: ...ing items are shown in the following figure 4 7 2 Applications In the assistant meeting click Applications to fast select and start applications on Android system and slide right and left on the scree...

Page 51: ...01 CF 00 Power off 7F 08 99 A2 B3 C4 02 FF 01 01 CF 7F 09 99 A2 B3 C4 02 FF 01 01 01 CF Mute 7F 08 99 A2 B3 C4 02 FF 01 02 CF 7F 09 99 A2 B3 C4 02 FF 01 02 01 CF Signal source 7F 08 99 A2 B3 C4 02 FF...

Page 52: ...02 FF 01 1D 01 CF Auto ADJ 7F 08 99 A2 B3 C4 02 FF 01 20 CF 7F 09 99 A2 B3 C4 02 FF 01 20 01 CF OK 7F 08 99 A2 B3 C4 02 FF 01 2B CF 7F 09 99 A2 B3 C4 02 FF 01 2B 01 CF 7F 08 99 A2 B3 C4 02 FF 01 2C CF...

Page 53: ...B3 C4 02 FF 01 41 01 CF Switch cameras 7F 08 99 A2 B3 C4 02 FF 08 XX CF XX 01 indicates that the top camera is enabled XX 02 indicates that the bottom camera is enabled 7F 09 99 A2 B3 C4 02 FF 08 XX 0...

Page 54: ...45 XX CF XX 01 indicates that the microphone is mute XX 02 indicates that the microphone is not mute Read the value of backlight brightness 7F 08 99 A2 B3 C4 02 FF 01 49 CF 7F 09 99 A2 B3 C4 02 FF 01...

Page 55: ...olution 1920 1080Pixel Display Colors 8 bit 16 7M colors Brightness 370nit Contrast 4000 1 Viewing Angle 178 Response Time 8ms Life Time 30000h Speaker Speaker Position Forward Rated Impedance 8 15 Fr...

Page 56: ...Power Consumption Maximum 120W Standby Mode 0 5W Working Voltage AC 100V 240V 50Hz 60Hz Touch Touch Surface Chemically strengthened soda lime glass Transparency 89 Haze 0 Surface Hardness 8H Touch Tec...

Page 57: ...VGA 1 USB Touch 2 Audio 1 AV Outputs 3 5mm Line out x 1 HDMI x 1 only video Other USB2 0 2 RS232 1 RJ45 1 USB3 0 1 SD Reader OPS Slot Speciality Intelligent thermos protector Yes Build in WIFI Yes Rem...

Page 58: ...re Input Resource Preview Yes On Screen Annotation Yes Discussion Board Yes The above mentioned specifications are for reference only Newline may change the specs without additional notice Contact loc...

Page 59: ...nformation Please visit www newline interactive com Contact Us for Support Please email us at support newline interactive com Newline Interactive Inc 101 East Park Blvd Suite 807 Plano TX 75074 Tel 1...

Page 60: ...inst harmful interference in a residential installation This equipment generates and can radiate radio frequency energy and if not installed and used in accordance with the instructions may cause harm...

Reviews: