Page 2
Raymor Showers / Pivot Door Set
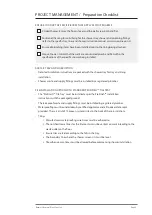
PROJECT MANAGEMENT / Preparation Checklist
ENSURE YOU TICK THE SPECIFIC BOXES THAT APPLY AS YOU PROGRESS
2 Sided Shower: Ensure the floor is level and the walls are plumb and flat.
Position all framing for solid fixing for the shower tray, shower and plumbing fittings
(refer to the specific tray, liner and shower instruction manual at www.newline.co.nz).
Ensure all plumbing items have been installed prior to the lining being attached.
Alcove Shower: Critical that the walls are constructed plumb and flat within the
specifications of the specific shower being installed.
ACRYLIC TRAY AND LINER OPTION
• Detailed installation instructions are packed with the shower tray for tray and lining
installation.
• Shower waste and supply fittings must be installed by a registered plumber.
TILE INSTALLATION OPTION WITH STANDARD PROFINISH
TM
TILE TRAY
• The “ProFinish
TM
Tile Tray” must be installed as per the ProFinish
TM
installation
instructions with the packaged product.
• The leak proof waste and supply fittings must be installed by registered plumber.
• Waterproofing must be undertaken by certified applicator and a Producer Statement
provided. There is a list of 14 proven systems listed in the back of these instructions.
• Tiling:
1.
Manufacturers waterproofing cure times must be adhered to.
2.
The notched trowel lines for the tile mortar must be vertical on walls & leading to the
waste outlet on the floor.
3.
Ensure tiles are laid according to the falls in the tray.
4.
The boundary line where the shower screen sits must be level.
5.
Tile adhesive cure times must be allowed before commencing shower installation.


