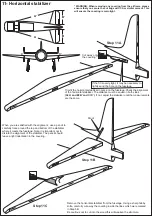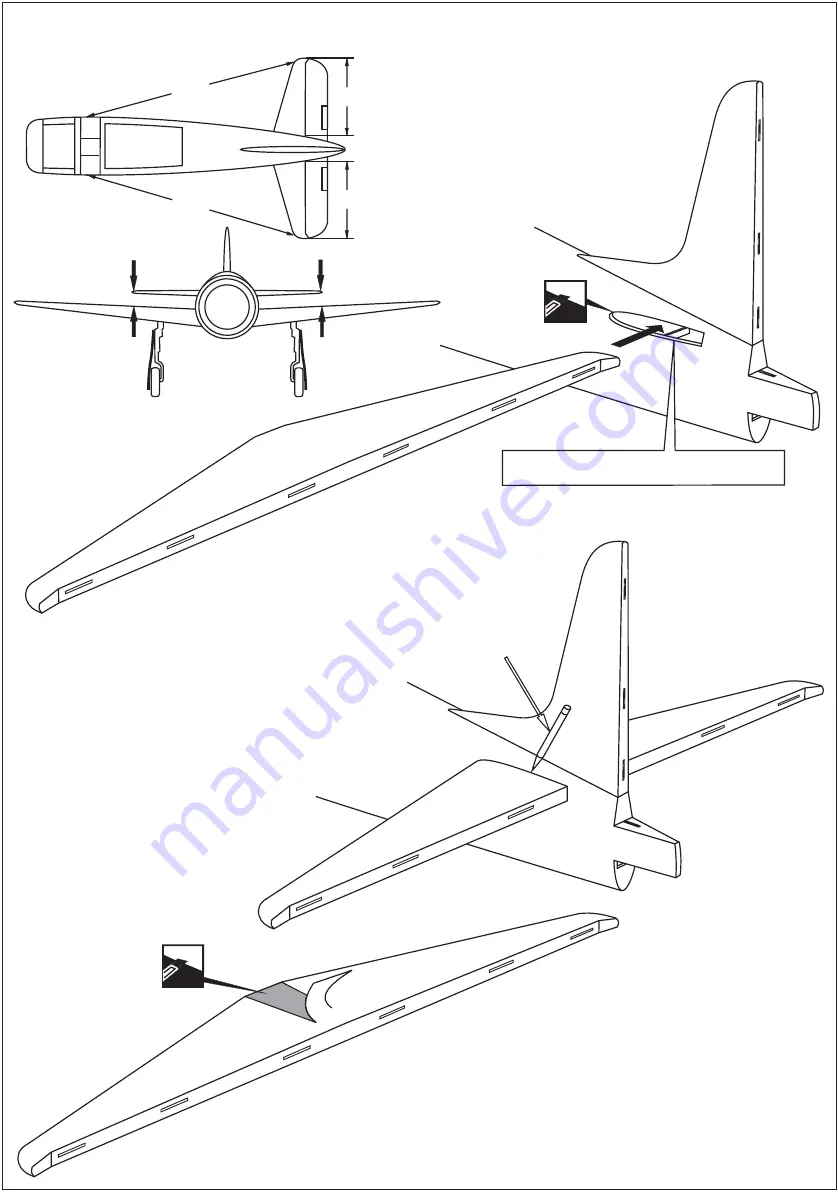
When you are satisfied with the alignment , use a pencil to
carefully trace around the top and bottom of the stabilizer
where it meets the fuselage. Note, it is important not to
disturb the alignment of the stabilizer. The pencil should
leave a light indentation in the covering.
Remove the horizontal stabilizer from the fuselage. Using a sharp hobby
knife, carefully cut away the covering inside the lines which were marked
in Step 5B.
Be cautious not to cut into the wood-this will weaken the structure.
Step 11C
Trial fit the horizontal stabilizer in place on the fuselage. Check the alignment
of the horizontal stabilizer. The distance must be equal on both sides
(A=A’ and B=B’ and C=C’)
. If not, adjust the stabilizer until the measurements
are the same.
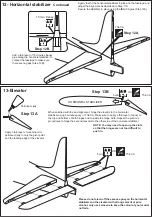
If the fit is overly tight, it may be necessary to
lightly sand the hole on the fuselage.
Step 11A
* WARNING: When removing any covering from the airframe, please
ensure that you secure the cut edge with CA or similar cement. This
will ensure the covering remain tight.
Cut away only
the covering*
A
A’
B
B’
C
C’
Pencil
Step 11B
11- Horizontal stabilizer


