background image

Copyright © 2011 NEXCOM International Co., Ltd. All Rights Reserved.

22

Chapter 2: Jumpers and Connectors

DNA 1120/1120A User Manual

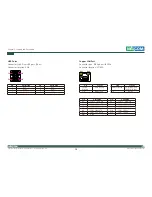
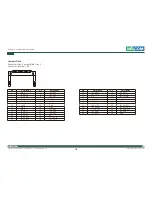
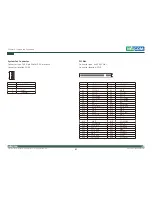
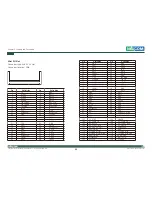
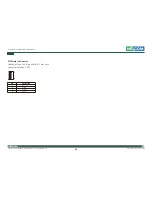
Pin

Definition

Pin

Definition

A27

       VCC3

B27

        PCI_AD23

A28

       PCI_AD22

B28

        GND

A29

       PCI_AD20

B29

        PCI_AD21

A30

       GND

B30

        PCI_AD19

A31

       PCI_AD18

B31

        VCC3

A32

       PCI_AD16

B32

        PCI_AD17

A33

       VCC3

B33

        PCI_CBE#2

A34

       PCI_FRAME#

B34

        GND

A35

       GND

B35

        PCI_IRDY#

A36

       PCI_TRDY#

B36

        VCC3

A37

       GND

B37

        PCI_DEVSEL#

A38

       PCI_STOP#

B38

        GND

A39

       VCC3

B39

        PCI_LOCK

A40

       SDONE

B40

        PCI_PERR#

A41

       SBC#

B41

        VCC3

A42

       GND

B42

        PCI_SERR#

A43

       PCI_PAR

B43

        VCC3

A44

       PCI_AD15

B44

        PCI_CBE#1

A45

        VCC33

B45

        PCI_AD14

A46

        PCI_AD13

B46

        GND

A47

        PCI_AD11

B47

        PCI_AD12

A48

        GND

B48

        PCI_AD10

A49

        PCI_AD9

B49

        GND

A52

        PCI_CBE#0

B52

        PCI_AD8

A53

        VCC3

B53

        PCI_AD7

A54

        PCI_AD6

B54

        VCC

A55

        PCI_AD4

B55

        PCI_AD5

A56

        GND

B56

        PCI_AD3

A57

        PCI_AD2

B57

        GND

A58

        PCI_AD0

B58

        PCI_AD1

A59

        VCC5

B59

        VCC5

A60

        PCI_REQ64#

B60

        PCI_ACK64#

A61

        VCC5

B61

        VCC5

A62

        VCC5

B62

        VCC5

Summary of Contents for DNA 1120

Page 1: ...NEXCOM International Co Ltd NEXCOM International Co Ltd Published April 2014 www nexcom com Network and Communication Solutions Network Security Appliance DNA 1120 1120A User Manual ...

Page 2: ...e Contents xii Ordering Information xiii Chapter 1 Product Introduction Overview 1 Key Features 1 Hardware Specifications 2 Getting to Know DNA 1120 1120A 3 Front Panel 3 Rear Panel 4 Chapter 2 Jumpers And Connectors Before You Begin 5 Precautions 5 Jumper Settings 6 Locations of the Jumpers and Connectors 7 DNB 1120 7 Jumpers 8 Clear CMOS Select 8 CF Card Master Slave Select 8 H W Reset 9 Power T...

Page 3: ...talling a SATA Hard Drive 30 Installing a PCI Card 35 Installing a Mini PCI Card 38 Installing the System into a Rack Cabinet 40 Rackmount Instructions 40 Chapter 4 BIOS Setup About BIOS Setup 42 When to Configure the BIOS 42 Default Configuration 43 Entering Setup 43 Legends 43 BIOS Setup Utility 44 Main 44 Advanced 45 PCIPnP 57 Boot 58 Security 61 Chipset 62 Exit 65 Appendix A Watchdog Timer Wat...

Page 4: ...es if it has a CE marking For computer systems to remain CE compliant only CE compliant parts may be used Maintaining CE compliance also requires proper cable and cabling techniques Copyright This publication including all photographs illustrations and software is protected under international copyright laws with all rights reserved No part of this manual may be reproduced copied translated or tra...

Page 5: ...and Polybrominated diphenyl Ethers PBDE 0 1 or 1 000ppm In order to meet the RoHS compliant directives NEXCOM has established an engineering and manufacturing task force in to implement the introduction of green products The task force will ensure that we follow the standard NEXCOM development procedure and that all the new RoHS components and new manufacturing processes maintain the highest indus...

Page 6: ...s not responsible for the devices parts Customers are responsible for the safe packaging of defective products making sure it is durable enough to be resistant against further damage and deterioration during transportation In case of damages occurred during transportation the repair is treated as Out of Warranty Any products returned by NEXCOM to other locations besides the cus tomers site will be...

Page 7: ...ian uses parts specified by the manufacturer Avoid using the system near water in direct sunlight or near a heating device The load of the system unit does not solely rely for support from the rackmounts located on the sides Firm support from the bottom is highly necessary in order to provide balance stability The computer is provided with a battery powered real time clock circuit There is a dange...

Page 8: ...be greater than the voltage and current rating marked on the product 11 All cautions and warnings on the equipment should be noted 12 If the equipment is not used for a long time disconnect it from the power source to avoid damage by transient overvoltage 13 Never pour any liquid into an opening This may cause fire or electri cal shock 14 Never open the equipment For safety reasons the equipment s...

Page 9: ... 2 Maintenance to keep the unit clean use only approved cleaning prod ucts or clean with a dry cloth 3 CompactFlash Turn off the unit s power before inserting or removing a CompactFlash storage card Conventions Used in this Manual Warning Information about certain situations which if not observed can cause personal injury This will prevent injury to yourself when performing a task Caution Informat...

Page 10: ...16F No 250 Sec 2 Chongde Rd Beitun Dist Taichung City 406 R O C Tel 886 4 2249 1179 Fax 886 4 2249 1172 Email sales nexcom com tw www nexcom com tw Japan NEXCOM Japan 9F Tamachi Hara Bldg 4 11 5 Shiba Minato ku Tokyo 108 0014 Japan Tel 81 3 5419 7830 Fax 81 3 5419 7832 Email sales nexcom jp com www nexcom jp com China NEXCOM China 1F 2F Block A No 16 Yonyou Software Park No 68 Beiqing Road Haidian...

Page 11: ... Tel 44 1908 267121 Fax 44 1908 262042 Email sales uk nexcom eu www nexcom eu Shenzhen Office Room1707 North Block Pines Bldg No 7 Tairan Rd Futian Area Shenzhen 518040 China Tel 86 755 8332 7203 Fax 86 755 8332 7213 Email sales nexcom cn www nexcom cn Wuhan Office 1 C1804 1805 Mingze Liwan No 519 South Luoshi Rd Hongshan District Wuhan 430070 China Tel 86 27 8722 7400 Fax 86 27 8722 7400 Email sa...

Page 12: ... 1111 ALS20ABK 11 1mm H 10 8mm TPS BLACK 4 5 6012200052X00 PE ZIPPER BAG 8 170x240mm W China RoHS SYMBOL 1 6 6012200053X00 PE ZIPPER BAG 3 100x70mm W China RoHS SYMBOL 1 7 6023309081X00 CABLE EDI 232091081804 RS COM PORT DB9 FEMALE TO RJ45 8P8C L 1800mm 1 8 60233PW187X00 SATA POWER CABLE TC C T105048150923 2 SATA 15P MOLDING 90D TO HOUSING 4P PIT 2 54mm L 60mm 1 9 602DCD0311X00 N DNA1120 CD DRIVER...

Page 13: ...NA 1120 P N 10L00112000X0 Intel Atom D425 Single Core 1 8GHz processor 1 DDR3 memory slot 4 Gigabit LAN ports with one pair bypass CompactFlash socket 1 VGA 2 USB 1 Mini PCI slot 1 PCI expansion slot DNA 1120A P N 10L00112001X0 Intel Atom D525 Dual Core 1 8GHz processor 1 DDR3 memory slot 4 Gigabit LAN ports with one pair bypass CompactFlash socket 1 VGA 2 USB 1 Mini PCI slot 1 PCI expansion slot ...

Page 14: ...on Chapter 1 Product Introduction Overview Key Features Desktop Network Platform Intel Atom D525 Dual Core D425 Single Core 1 8GHz processor Supports one DDR3 800MHz memory up to 2GB 4 GbE LAN ports Supports LAN Bypass Rear 2 USB ports 1 PCI expansion 32 bit 33 MHz Onboard CompactFlash socket 1 internal 2 5 HDD bay Front ...

Page 15: ... link speed LAN Bypass 1 pair Expansion 1 PCI slot 1 Mini PCI slot I O Interface Front Power status LED HDD status LED LAN status LED I O Interface Rear 1 power button 1 RJ45 type Console port 2 USB 2 0 ports 4 Copper LAN ports 1 PCI expansion slot Storage 1 onboard CompactFlash socket 1 internal 2 5 HDD drive bay Power Input This product is intended to be supplied by a Listed Power Adapter rated ...

Page 16: ...DNA 1120 1120A User Manual Chapter 1 Product Introduction Getting to Know DNA 1120 1120A Front Panel Power LED Indicates the power status of the system HDD LED Indicates the status of the hard drive LAN LEDs Indicates the status of the LAN Power LED HDD LED LAN LEDs ...

Page 17: ...ansion slot VGA Port Used to connect an analog VGA monitor 12V DC in Used to plug a DC power cord Power Switch Press to power on or power off the system RJ45 Type Console LAN Port Used to connect RJ45 type Console port USB Ports Used to connect USB 2 0 1 1 devices Copper LAN Ports Used to connect LAN network devices Expansion Slot Used to install a PCI slot Supports one 32 bit 33MHz PCI card Max 1...

Page 18: ... touching any internal components by touching a metal object Static electricity can damage many of the elec tronic components Humid environment tend to have less static electric ity than dry environments A grounding strap is warranted whenever danger of static electricity exists Precautions Computer components and electronic circuit boards can be damaged by discharges of static electricity Working...

Page 19: ...tting the jumpers ensure that the jumper caps are placed on the correct pins When the jumper cap is placed on both pins the jumper is short If you remove the jumper cap or place the jumper cap on just one pin the jumper is open Refer to the illustrations below for examples of what the 2 pin and 3 pin jumpers look like when they are short on and open off Two Pin Jumpers Open Left and Short Right Th...

Page 20: ... Chapter 2 Jumpers and Connectors DNA 1120 1120A User Manual Locations of the Jumpers and Connectors DNB 1120 The figure below is the DNB 1120 main board which is the main board used in the DNA 1120 1120A system It shows the locations of the jumpers and con nectors ...

Page 21: ...0 1120A User Manual Jumpers Clear CMOS Select Connector type 1x3 3 pin header 2 54 mm pitch Connector location JP3 1 3 Pin Definition 1 NC 2 ICH_RTCRST_N 3 Battery GND CF Card Master Slave Select Connector type 1x3 3 pin header 2 54 mm pitch Connector location JP4 Pin Definition 1 Slave 2 GND 3 Master 3 1 ...

Page 22: ...DNA 1120 1120A User Manual H W Reset Connector type 1x2 2 pin header 2 54mm M 180 Connector location JP5 Pin Description 1 ICH_SYS_RESET_N_R 2 GND 2 1 Power Type Select Connector type 2x2 dip switch Connector location SW2 SW2 Pin Definition Pin Definition 1 PWRBT_R 2 GAL_AT _ATX 3 GND 4 ICH_PWRBTN_N ...

Page 23: ...itions VGA Connector Connector type 2x8 16 pin box header 2 0 mm pitch Connector location CN1 Pin Definition Pin Definition 1 VGA_R_CON 9 VGA_VCC 2 VGA_G_CON 10 GND 3 VGA_B_CON 11 NC 4 NC 12 VGA_I2CDAT_CON 5 GND 13 VGA_HSYNC_CON 6 GND 14 VGA_VSYNC_CON 7 GND 15 VGA_I2CCLK_CON 8 GND 1 5 11 15 1 2 15 16 12V DC in Connector location CN2 Pin Definition 1 GND 2 GND 3 VCC12 ...

Page 24: ...ual Power Switch Connector location SW1 Pin Definition 1 GND 2 NC 3 PWRST_R 4 NC C1 PLED_N A1 PLED_P MH1 NC MH2 NC RJ45 Type Console Port RS232 only Connector type RJ45 port Connector location LAN1 Pin Definition Pin Definition 1 SP_RTS1_R 2 SP_DTR1_R 3 SP_TXD1_R 4 COM1_GND 5 SP_DCD1_R 6 SP_RXD1_R 7 SP_DSR1_R 8 SP_CTS1_CON ...

Page 25: ...B1 4 GND 8 GND 1 5 4 8 Copper LAN Port Connector type RJ45 port with LEDs Connector location CON1A Act Status Yellow Blinking Data Activity Off No Acitivity Link Status Always Lighted 1G Green and 100MB Yellow Off No link Pin Definition Pin Definition A1 PORT1_TXP0_CN A2 PORT1_TXN0_CN A3 PORT1_TXP1_CN A4 PORT1_TXN1_CN A5 PORT1_TXP2_CN A6 PORT1_TXN2_CN A7 PORT1_TXP3_CN A8 PORT1_TXN3_CN A9 LAN1_LINK...

Page 26: ...2_LED_ACT B12 LAN2_LED2 MH2 GND Copper LAN Port Connector type RJ45 port with LEDs Connector location CON1C Pin Definition Pin Definition C1 PORT3_TXP0_CN C2 PORT3_TXN0_CN C3 PORT3_TXP1_CN C4 PORT3_TXN1_CN C5 PORT3_TXP2_CN C6 PORT3_TXN2_CN C7 PORT3_TXP3_CN C8 PORT3_TXN3_CN C9 LAN3_LINK1G C10 LAN3_LED1 C11 LAN3_LED_ACT C12 LAN3_LED2 MH3 GND Act Link Act Status Yellow Blinking Data Activity Off No A...

Page 27: ...tor location CON1D Pin Definition Pin Definition D1 PORT4_TXP0_CN D2 PORT4_TXN0_CN D3 PORT4_TXP1_CN D4 PORT4_TXN1_CN D5 PORT4_TXP2_CN D6 PORT4_TXN2_CN D7 PORT4_TXP3_CN D8 PORT4_TXN3_CN D9 LAN4_LINK1G D10 LAN4_LED1 D11 LAN4_LED_ACT D12 LAN4_LED2 MH4 GND Act Link Act Status Yellow Blinking Data Activity Off No Acitivity Link Status Always Lighted 1G Green and 100MB Yellow Off No link ...

Page 28: ...ser Manual Internal Connectors SATAII Port Connector type Standard Serial ATAII 1 27mm Connector location J1 Pin Definition 1 GND 2 TXP0 3 TXN0 4 GND 5 RXN0 6 RXP0 7 GND 1 7 SATAII Port Connector type Standard Serial ATAII 1 27mm Connector location J3 Pin Definition 1 GND 2 TXP1 3 TXN1 4 GND 5 RXN1 6 RXP1 7 GND 1 7 ...

Page 29: ...ctors DNA 1120 1120A User Manual SATA Power Connector Connector type 1x4 4 pin Wafer 2 5 mm pitch Connector location CN3 1 4 Pin Definition 1 VCC12 2 GND 3 GND 4 VCC5 SATA DOM Power Connector Connector type 1x2 2 pin boxed header 2 5 mm JST Connector location J6 1 2 Pin Definition 1 VCC5 2 GND ...

Page 30: ... location J4 1 2 9 10 Pin Definition Pin Definition 1 VCC5 2 GND 3 SIO_GPIN10 4 SIO_GPOUT14 5 SIO_GPIN11 6 SIO_GPOUT15 7 SIO_GPIN12 8 SIO_GPOUT16 9 SIO_GPIN13 10 SIO_GPOUT17 COM2 Connector RS232 Connector type 2x5 10 pin boxed header 2 0 mm Connector location CN8 1 2 9 10 Pin Definition Pin Definition 1 SP_DCD2 2 SP_RXD2 3 SP_TXD2 4 SP_DTR2 5 COM2_GND 6 SP_DSR2 7 SP_RTS2 8 SP_CTS2 9 SP_RI2 10 COM2...

Page 31: ... 7 IDE_CS1_N 8 GND 9 GND 10 GND 11 GND 12 GND 13 VCC5 14 GND 15 GND 16 GND 17 GND 18 IDE_DA2 19 IDE_DA1 20 IDE_DA0 21 IDE_DD0 22 IDE_DD1 23 IDE_DD2 24 NC 25 IDE_CD2 26 CF_CD1_N 27 IDE_DD11 28 IDE_DD12 Pin Description Pin Description 29 IDE_DD13 30 IDE_DD14 31 IDE_DD15 32 IDE_CS3_N 33 NC 34 IDE_DIOR_N 35 IDE_DIOW_N 36 VCC5 37 IDE_IRQ14 38 VCC5 39 CF_SEL_N 40 NC 41 IDE_RST_N 42 IDE_DIORDY 43 IDE_DDR...

Page 32: ... 1 VCC 2 USB2 3 USB2 4 USB3 5 USB3 6 GND Parallel Connector Connector type 1x13 26 pin box header 2 0 mm pitch Connector location CN9 1 14 13 26 Pin Definition Pin Definition 1 LPT_STB R 14 GND 2 LPT_AFD R 15 LPT_PDR6 3 LPT_PDR0 16 GND 4 LPT_ERR 17 LPT_PDR7 5 LPT_PDR1 18 GND 6 LPT_INIT R 19 LPT_ACK R 7 LPT_PDR2 20 GND 8 LPT_SLIN R 21 LPT_BUSY 9 LPT_PDR3 22 GND 10 GND 23 LPT_PE 11 LPT_PDR4 24 GND 1...

Page 33: ...se Connector Connector type 2x4 8 pin header 2 54 mm Connector location J7 1 2 7 8 Pin Definition Pin Definition 1 VCC5 2 VCC5 3 KB_DATA 4 LM_DATA 5 KB_CLK 6 LM_CLK 7 GND 8 GND GAL Programming Connector Connector type 1x6 6 pin header 2 54 mm Connector location J8 6 1 Pin Definition 1 3VSB 2 GND 3 GAL_TCK_2 4 GAL_TDO_2 5 GAL_TDI_2 6 GAL_TMS_2 ...

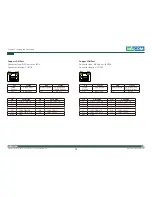
Page 34: ...n A1 PCI_TRST B1 VCC12N A2 VCC12 B2 PCI_TCK A3 PCI_TMS B3 GND A4 PCI_TDI B4 PCI_TDO A5 VCC5 B5 VCC5 A6 PCI_IRQ A B6 VCC5 A7 PCI_IRQ C B7 PCI_IRQ B A8 VCC5 B8 PCI_IRQ D A9 NA B9 NA A10 VCC5 B10 PCI_REQ 1 A11 PCI_GNT 1 B11 PCI_AD19 A12 GND B12 GND A13 GND B13 GND A14 3VSB B14 PCI_CLK1 A15 PCI_RST B15 GND A16 VCC5 B16 PCI_CLK0 A17 PCU_GNT 0 B17 GND A18 GND B18 PCI_REQ 0 A19 PCI_PME B19 VCC5 A20 PCI_A...

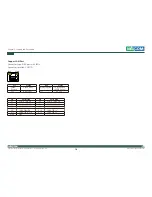
Page 35: ...PCI_IRDY A36 PCI_TRDY B36 VCC3 A37 GND B37 PCI_DEVSEL A38 PCI_STOP B38 GND A39 VCC3 B39 PCI_LOCK A40 SDONE B40 PCI_PERR A41 SBC B41 VCC3 A42 GND B42 PCI_SERR A43 PCI_PAR B43 VCC3 A44 PCI_AD15 B44 PCI_CBE 1 A45 VCC33 B45 PCI_AD14 A46 PCI_AD13 B46 GND A47 PCI_AD11 B47 PCI_AD12 A48 GND B48 PCI_AD10 A49 PCI_AD9 B49 GND A52 PCI_CBE 0 B52 PCI_AD8 A53 VCC3 B53 PCI_AD7 A54 PCI_AD6 B54 VCC A55 PCI_AD4 B55 ...

Page 36: ...BE 3 46 AD24 47 AD23 48 IDSEL Pin Definition Pin Definition 49 GND 50 GND 51 AD21 52 AD22 53 AD19 54 AD20 55 GND 56 PAR 57 AD17 58 AD18 59 CBE 2 60 AD16 61 IRTY 62 GND 63 3 3V 64 FRAME 65 CLKRUN 66 TRDY 67 SERR 68 STOP 69 GND 70 3 3V 71 PERR 72 DEVESEL 73 CBE 1 74 GND 75 AD14 76 AD15 77 GND 78 AD13 79 AD12 80 AD11 81 AD10 82 GND 83 GND 84 AD9 85 AD8 86 CBE 0 87 AD7 88 3 3V 89 3 3V 90 AD6 91 AD5 92...

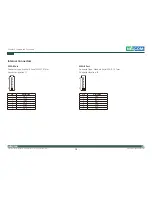
Page 37: ...tional Co Ltd All Rights Reserved 24 Chapter 2 Jumpers and Connectors DNA 1120 1120A User Manual PCI Power Connector Connector type 1x4 4 pin Wafer 2 5 mm pitch Connector location CN10 1 4 Pin Definition 1 VCC12 2 GND 3 GND 4 VCC5 ...

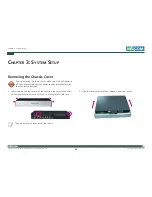
Page 38: ...ving the chassis cover make sure the unit s power is off and disconnected from the power sources to prevent electric shock or system damage 2 Slide the cover backward then remove it from the chassis 1 The screws around the cover are used to secure the cover to the chas sis Remove these screws and put them in a safe place for later use The dots denote the locations of the screws ...

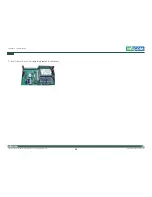
Page 39: ... socket Grasping the module by its edges align the module with the socket so that the notch on the module is aligned with the key on the socket The key ensures the module can be plugged into the socket in only one direction Notch on the module Key on the socket DIMM socket 1 Push the ejector tabs which are at the ends of the socket outward This indicates that the socket is unlocked ...

Page 40: ...Chapter 3 System Setup DNA 1120 1120A User Manual 3 Seat the module vertically pressing it down firmly until it is completely seated in the socket The ejector tabs at the ends of the socket will au tomatically snap into the locked position to hold the module in place ...

Page 41: ...served 28 Chapter 3 System Setup DNA 1120 1120A User Manual Installing a CompactFlash Card 2 With the CompactFlash card s label facing up position the card to the socket CompactFlash socket CompactFlash card 1 Locate for the CompactFlash socket on the board ...

Page 42: ...Copyright 2011 NEXCOM International Co Ltd All Rights Reserved 29 Chapter 3 System Setup DNA 1120 1120A User Manual 3 Insert the card until it is completely seated in the socket ...

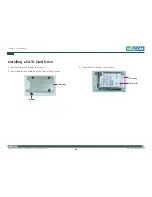
Page 43: ...ed 30 Chapter 3 System Setup DNA 1120 1120A User Manual Installing a SATA Hard Drive Drive bay Damper 3 Place the SATA drive on the drive bay Drive bay SATA drive 1 Remove the drive bay from the chassis 2 Insert the provided dampers on the sides of the drive bay ...

Page 44: ...em Setup DNA 1120 1120A User Manual Connector side of the SATA drive 4 Turn to the other side of the bay then use the provided mounting screws to secure the SATA drive to the drive bay Mounting screw 5 The photo below shows the screws mounted in place SATA drive located underneath ...

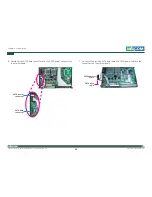
Page 45: ...tup DNA 1120 1120A User Manual 7 Connect the provided SATA data cable and SATA power cable to the connectors on the motherboard 6 Locate for the SATA data connector and the SATA power connector on the motherboard SATA data connector SATA power connector SATA power cable SATA data cable ...

Page 46: ... 33 Chapter 3 System Setup DNA 1120 1120A User Manual 8 Locate for the mounting studs on the board Mounting stud 9 Align the mounting holes of the drive bay with the mounting studs on the board then use the provided mounting screws to secure the drive bay in place ...

Page 47: ...Copyright 2011 NEXCOM International Co Ltd All Rights Reserved 34 Chapter 3 System Setup DNA 1120 1120A User Manual 10 Connect the SATA data cable and SATA power cable to the SATA drive ...

Page 48: ...Rights Reserved 35 Chapter 3 System Setup DNA 1120 1120A User Manual Installing a PCI Card 2 Remove the mounting screws that secure the L shaped bracket to the chassis 1 The PCI slot is attached on an L shaped bracket L shaped bracket Mounting screw ...

Page 49: ... Ltd All Rights Reserved 36 Chapter 3 System Setup DNA 1120 1120A User Manual 3 Remove the slot cover Slot cover removed 4 Align the PCI card with the PCI slot then push it firmly until it is com pletely seated in the slot PCI card PCI slot ...

Page 50: ... Rights Reserved 37 Chapter 3 System Setup DNA 1120 1120A User Manual 5 Secure the card with a mounting screw Mounting screw 6 Install the bracket back into the chassis then secure the bracket with the mounting screws you removed in step 2 PCI card ...

Page 51: ...ard Mini PCI socket 2 Insert the Mini PCI card into the socket at an approximately 30 degrees angle Apply firm even pressure to each end of the card until it slips into the socket The gold plated connector on the edge of the card will almost completely disappear inside the socket Mini PCI card 1 Locate for the Mini PCI socket on the board ...

Page 52: ...ights Reserved 39 Chapter 3 System Setup DNA 1120 1120A User Manual 3 Push the card down until the clips on both sides of the socket lock into position You will hear a distinctive click indicating the card is cor rectly locked into position Clip Clip ...

Page 53: ...nt in an environment compatible with the maximum ambient temperature Tma specified by the manufacturer 6 Reduced Air Flow Installation of the equipment in a rack should be such that the amount of air flow required for safe operation of the equipment is not compromised 7 Mechanical Loading Mounting of the equipment in the rack should be such that a hazardous condition is not achieved due to uneven ...

Page 54: ...Copyright 2011 NEXCOM International Co Ltd All Rights Reserved 41 Chapter 3 System Setup DNA 1120 1120A User Manual Rackmount ear Rackmount ear Rackmount Ears Attached ...

Page 55: ...ith the values found in CMOS With easy to use pull down menus you can configure such items as Hard drives diskette drives and peripherals Video display type and display options Password protection from unauthorized use Power management features The settings made in the setup program affect how the computer per forms It is important therefore first to try to understand all the Setup options and sec...

Page 56: ...itional options are available for that field To display the submenu move the highlight to that field and press Enter Default Configuration Most of the configuration settings are either predefined according to the Load Optimal Defaults settings which are stored in the BIOS or are auto matically detected and configured without requiring any actions There are a few settings that you may need to chang...

Page 57: ...time is based on the 24 hour military time clock For example 1 p m is 13 00 00 Hour displays hours from 00 to 23 Minute displays minutes from 00 to 59 Second dis plays seconds from 00 to 59 System Date The date format is day month date year Day displays a day from Sunday to Saturday Month displays the month from January to De cember Date displays the date from 1 to 31 Year displays the year from 1...

Page 58: ...s used to configure the hardware monitoring events such as temperature fan speed and voltages ACPI Configuration This section is used to configure the Advanced ACPI configuration AHCI Configuration This section is used to configure the AHCI configuration MPS Configuration This section is used to configure the multi processor table Remote Access Configuration This section is used to configure remot...

Page 59: ...COM International Co Ltd All Rights Reserved 46 Chapter 4 BIOS Setup DNA 1120 1120A User Manual USB Configuration This section is used to configure USB devices Network Configuration This section is used to configure LAN ...

Page 60: ...t Item Change Option F1 General Help F10 Save and Exit ESC Exit Max CPUID Value Limit Set this field to Disabled when using Windows XP Set this field to Ena bled when using legacy operating systems so that the system will boot even when it doesn t support CPUs with extended CPUID function Execute Disable Bit Capability When this field is set to Disabled it will force the XD feature flag to al ways...

Page 61: ...es The options are Disabled Compatible and Enhanced Configure SATA As IDE This option configures the Serial ATA drives as Parallel ATA physi cal storage device AHCI This option configures the Serial ATA drives to use AHCI Ad vanced Host Controller Interface AHCI allows the storage driver to enable the advanced Serial ATA features which will increase storage performance v02 61 C Copyright 1985 2006...

Page 62: ...Parallel Port Address 378 Parallel Port Mode Normal Parallel Port IRQ IRQ7 Advanced v02 61 C Copyright 1985 2006 American Megatrends Inc Serial Port1 Address and Serial Port2 Address Auto The system will automatically select an I O address for the on board serial port 3F8 IRQ4 2F8 IRQ3 3E8 IRQ4 2E8 IRQ3 Allows you to manually select an I O address for the onboard serial port Disabled Disables the ...

Page 63: ...3o F Fan Speed 4687 RPM Fan2 Speed N A Vcore 1 177 V 1 5Vin 1 516 V 3 3Vin 3 370 V 12Vin 11 552 V 5Vin 5 080 V Advanced Hardware Health Configuration This section is used to configure the hardware monitoring events such as temperature fan speed and voltages H W Health Function Enables or disables the hardware monitoring function Fan Speed Control Enables or disables the fan speed control Enables H...

Page 64: ...it ACPI Settings Advanced ACPI Configuration Chipset ACPI Configuration Advanced Advanced ACPI Configuration This section is used to configure the advanced ACPI features Enable RSDP pointers to 64 bit Fixed System Description Tables BIOS SETUP UTILITY v02 61 C Copyright 1985 2006 American Megatrends Inc Select Screen Select Item Change Option F1 General Help F10 Save and Exit ESC Exit Advanced ACP...

Page 65: ...sabled Disabled Energy Lake Features The options are Enabled and Disabled APIC ACPI SCI IRQ Enables or disables the APIC ACPI SCI IRQ High Performance Event Timer Enables or disables the event timer Enabled Disabled Options AHCI Configuration This section is used to configure the AHCI features While entering setup BIOS auto detects the presence of IDE devices This displays the status of auto detec...

Page 66: ...rting Technology hard drives SMART is a reliability prediction tech nology for ATA IDE and SCSI drives The drive will provide sufficient notice to the system or user to backup data prior to the drive s fail ure The default is Disabled If you are using hard drives that support S M A R T set this field to Enabled SMART is supported in ATA 33 or later hard drives The options are Auto Enabled and Disa...

Page 67: ...r BIOS POST Disabled Terminal Type ANSI VT UTF8 Combo Key Support Enabled Advanced Remote Access Enables or disables the remote access feature Serial Port Number Selects the serial port Base Address IRQ Selects an IRQ for the serial port Serial Port Mode Selects a mode for the serial port Flow Control Selects the flow control of the remote access The options are Hardware Software and None Redirect...

Page 68: ...2 0 Controller Mode HiSpeed BIOS EHCI Hand Off Enabled Advanced Legacy USB Support Due to the limited space of the BIOS ROM the support for legacy USB keyboard in DOS mode is by default set to Disabled With more BIOS ROM space available it will be able to support more advanced features as well as provide compatibility to a wide variety of peripheral devices If a PS 2 keyboard is not available and ...

Page 69: ...nds Inc Select Screen Select Item Change Option F1 General Help F10 Save and Exit ESC Exit Network Configuration PXE Function Disabled ByPass mode after PWR ON Disabled ByPass mode after PWR OFF Disabled Advanced PXE Function Enables or disables the PXE function ByPass Mode After PWR ON Enables or disables the ByPass function after power on ByPass Mode After PWR OFF Enables or disables the ByPass ...

Page 70: ... Plug and Play operating system BIOS SETUP UTILITY Exit Chipset v02 61 C Copyright 1985 2006 American Megatrends Inc Select Screen Select Item Change Option F1 General Help F10 Save and Exit ESC Exit Boot Security Main Advanced PCIPnP Advanced PCI PnP Settings WARNING Setting wrong values in below sections may cause system to malfunction Plug Play O S No PCI Latency Timer 64 PCI Latency Timer This...

Page 71: ...guration Boot Device Priority Hard Disk Drives Boot Boot Settings Configuration This section is used to configure settings during system boot BIOS SETUP UTILITY v02 61 C Copyright 1985 2006 American Megatrends Inc Select Screen Select Item Change Option F1 General Help F10 Save and Exit ESC Exit Boot Settings Configuration Quick Boot Quiet Boot AddOn ROM Display Mode Bootup Num Lock PS 2 Mouse Sup...

Page 72: ...d the system displays the Press DEL to run Setup message during POST Interrupt 19 Capture When enabled it allows the optional ROM to trap interrupt 19 Boot Device Priority This section is used to select the boot priority sequence of the devices BIOS SETUP UTILITY v02 61 C Copyright 1985 2006 American Megatrends Inc Select Screen Select Item Change Option F1 General Help F10 Save and Exit ESC Exit ...

Page 73: ...ct Screen Select Item Change Option F1 General Help F10 Save and Exit ESC Exit Hard Disk Drives 1st Drive 2nd Drive 3rd Drive SATA SM 2GB ATA F1 HDD 3M 128M SATA PM Hitachi HT Specifies the boot sequence from the available devices 1st Boot Device to 3rd Boot Device Selects the drive to boot first second and third in the 1st Boot Device 2nd Boot Device and 3rd Boot Device fields respectively The BI...

Page 74: ...u forgot the password you can clear the password by erasing the CMOS RTC Real Time Clock RAM using the RTC Clear jumper Refer to chapter 2 for more information Change User Password This field is used to set or change the user password To set a new password 1 Select the Change User Password field then press Enter 2 Type your password in the dialog box then press Enter You are lim ited to eight lett...

Page 75: ...Configuration North Bridge Configuration This section is used to configure the north bridge features BIOS SETUP UTILITY v02 61 C Copyright 1985 2006 American Megatrends Inc Select Screen Select Item Change Option F1 General Help F10 Save and Exit ESC Exit North Bridge Chipset Configuration PCI MMIO Allocation 4GB to 3072MB DRAM Frequency Auto Configure DRAM Timing by SPD Enabled Initiate Graphic A...

Page 76: ...deo Function Configuration This section is used to configure the north bridge features BIOS SETUP UTILITY v02 61 C Copyright 1985 2006 American Megatrends Inc Select Screen Select Item Change Option F1 General Help F10 Save and Exit ESC Exit Video Function Configuration DVMT Mode Select DVMT Mode DVMT FIXED Memory 256MB Fixed Mode DVMT Mode Options Chipset DVMT Mode Select The options are Fixed mo...

Page 77: ...PCIE Port 5 IOxAPIC Enable Disabled USB Functions Enables or disables USB devices USB 2 0 Controller This field is used to enable or disable the Enhanced Host Controller Inter face USB 2 0 Disabled Enabled Chipset SMBUS Controller Enables or disables the SMBUS Power Supply Type Selects the type of power used Restore on AC Power Loss Power Off When power returns after an AC power failure the system...

Page 78: ...ess ESC to exit without saving the changes Discard Changes To discard the changes select this field then press Enter A dialog box will appear Confirm by selecting Yes to discard all changes made and restore the previously saved settings Load Optimal Defaults Loads the optimal default values from the BIOS ROM Exit system setup after saving the changes F10 key can be used for this operation BIOS SET...

Page 79: ...alue Writing a non zero value to this register causes the counter to load the value to Watchdog Counter and start counting down If Bit 7 and Bit 6 are set any Mouse Interrupt or Keyboard Interrupt event will also cause the reload of previously loaded non zero value to Watchdog Counter and start count ing down Reading this register returns current value in Watchdog Counter instead of the Watchdog t...

Page 80: ...V AL 87H OUT DX AL OUT DX AL MOV AL 07H POINT TO LOGICAL DEVICE NUMBER REG OUT DX AL INC DX MOV AL 08H OUT DX AL SET UNITS MOV DX 2EH MOV AL 0F5H OUT DX AL INC DX IN AL DX AND AL NOT 8 SECEND MODE OUT DX AL SET TIME OUT VALUE MOV DX 2EH MOV AL 0F6H OUT DX AL MOV AL NUMBER OF TIME OUT VALUE IN SECENDS 0 255 INC DX OUT DX AL EXIT THE SIO CONFIGURATION MODE MOV DX 2EH MOV AL 0AAH OUT DX AL ...

Page 81: ...eployed at the gateway for example it is crucial that they provide LAN bypass functional ity to ensure that hardware failure on these appliances will not bring down the entire network Appendix B Bypass Specifications BTCR Bypass Timer Configuration Register 0XF2 Bit 7 Bit 6 Bit 5 Bit 4 Bit 3 Bit 2 Bit 1 Bit 0 R X X X X RW RW RW Timer expired Not used Not used Not used Not used Global timeout value...

Page 82: ...closed to form bypass segments It is the responsibility of the software to keep track of the time to ensure writes to this register occur no greater than TimerValueInSeconds 2 A write of the timer value will automatically reset the expiration timer and set it to the value expressed in bit 2 0 Bit Field Name Value 3 Not used No activity taken if written value is undetermined and not needed on read ...

Page 83: ...undetermined and not needed on read operation 3 Not used No activity taken if written value is undetermined and not needed on read operation 4 Not used No activity taken if written value is undetermined and not needed on read operation 5 Not used No activity taken if written value is undetermined and not needed on read operation 7 6 Bypass mode These two bits defined the bypass mode for one or mor...

Reviews: