background image

34

NXS-H Owner’s Manual

Features and Use

Using Safety Features

Nexersys will alert you when you are hitting the machine too hard with a warning buzz. If you continue to hit 
too hard, the machine will automatically pause and warn you to adjust your stance and your power. Hitting 
too hard does not help improve the effectiveness of your workout. Additionally, excessive force can cause 
premature wear and tear, damage your machine, and cause injury to you.  

DISCLAIMER: Sparring is about exercise, technique and form.


Interactive Feedback and Cues

Nexersys provides many visual and auditory cues detailed below to prompt and respond to your action, as 
well as performance summaries at the conclusion of each workout.

Visual Cues

Visual cues include pad history, strike icons, a combo counter, and a combo tracker. 

Audio Cues

•  Double Clap – 

happens 10 seconds before the first bell to indicate your workout is about to start. It 

happens again 30 seconds before the last bell to indicate that it’s time to give it all you’ve got for the 
last 30 seconds.

•  Single Bell – 

the single bell starts the 3 minute round.

•  Double Bell – 

the double bell ends the 3 minute round.

•  Buzzer – 

indicates that you have hit too hard. 

Pad History

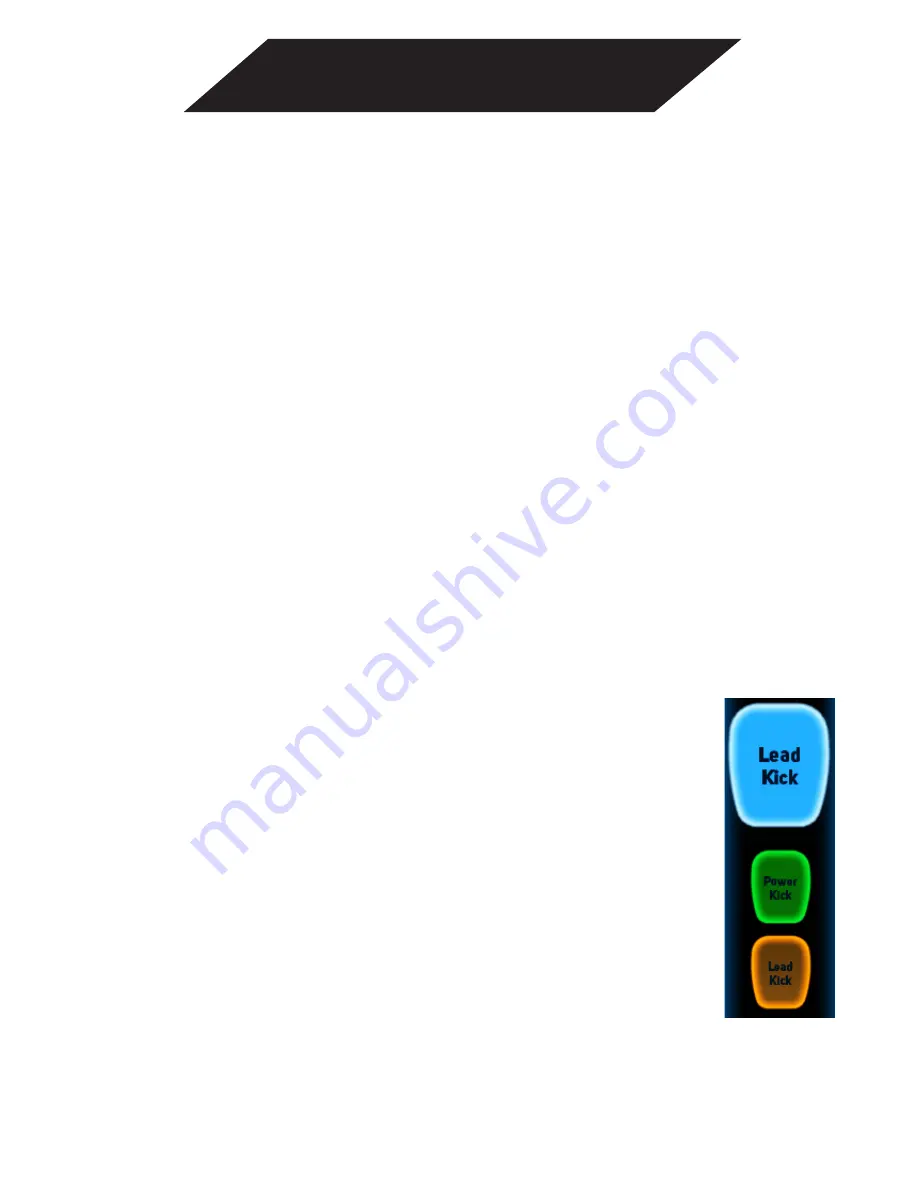
The pad history consists of three pads in descending order. In pad history you will see 
what strike you should throw now as well as the prior two. The first pad indicates the 
current strike that should be thrown, and will appear on the side you use to throw the 
strike. Facing the screen, in Traditional stance, the Jab would appear on the left side of 
the screen.The current pad will be blue and has the strike name written on it as seen 
in Figure 1. If you land your strike in time, the current pad will turn green.  If you fail to 
land your strike in time, it will turn orange. The current pad will then move down, as 
either green or orange, as the next strike pad pops up. Figure 1 shows the pad history. 

Figure 1. Pad History

Summary of Contents for NXS-H

Page 1: ...Nexersys Home NXS H Owner s Manual...

Page 2: ...ing Caution 14 FCC Notice 15 Parts Reference Guide 16 Step 4 Connect Audio Video USB Cables 18 Step 5 Connect AC Power Supply 19 Step 6 Connect DC Power Cables to CPU and Monitor 20 Step 7 Insert SD C...

Page 3: ...trike combinations Inexperienced strikers will learn new skills while engaging in active cardio striking and core intensive workouts and experienced strikers alike will pick up some new techniques whi...

Page 4: ...the step When tightening a locknut on a bolt use a combination wrench to grip the locknut and ensure that it is fastened securely When attaching two pieces gently lift and look through the bolt holes...

Page 5: ...wn Set up this Nexersys on a solid level horizontal surface Do not try to change the design or functionality of this machine This could compromise the safety and can void the warranty If replacement p...

Page 6: ...the Nexersys on a solid level surface Do not rock the unit Do not attempt to service the Nexersys yourself other than the assembly and in a manner found in the maintenance instructions of this manual...

Page 7: ...18 Custom built computer utilizing TI OMAP Processor Custom Nexersys software running on Linux Operating System 3 axis accelerometer on PCB mounted in each pad to capture strike data Software Features...

Page 8: ...6 NXS H Owner s Manual 54 52 65 56 66 68 70 64 91 90 71 72 Parts Reference Guide...

Page 9: ...ize 6 Wrench Hex Key size 5 32 M8 Flat Washer M10 Nylock Nut M10 25mm Bolt Hex Key size 5 M8 Lock Washer M8 20mm Bolt M10 Flat Washer M10 75mm Bolt M10 105mm Bolt Description Quantity 1 1 1 1 1 4 5 10...

Page 10: ...8 NXS H Owner s Manual Parts Reference Guide 15 16 1 2 4 5 6 7 8 10 11 12 14 13 9 3...

Page 11: ...Pad Spine Rubber Gasket Right Base Edge DC Power Cable Sit Up Bar Right Kick Pad Right Body Pad Kidney Pad Left Body Pad Kidney Pad Left Head Pad Spine Support Plate 1 Center Base Connector Left Base...

Page 12: ...sembly and Base Assembly Parts Needed Left Base Edge Right Base Edge Plate 1 Rubber Gasket Spine Support Hardware Needed 4 M10 75mm Bolt 52 8 M10 Flat Washer 64 4 M10 Nylock Nut 65 6 52 64 64 65 4 5 N...

Page 13: ...upport Assembly Position the Spine horizontally so that the Center Base Connector can be attached to the Spine Parts Needed Spine Rubber Gasket Center Base Connector Hardware Needed 4 M10 25mm Bolt 56...

Page 14: ...eeded Upper Spine Assembly Base Assembly Hardware Needed 6 M10 25mm Bolt 56 8 M10 Washer 64 1 M10 105mm Bolt 54 1 M10 Nylock Nut 65 7 Note Now tighten the M10 75mm Bolts from step 1 connecting the spi...

Page 15: ...Nexersys CPU Monitor...

Page 16: ...ficient magnitude to constitute a risk of electric shock to persons The exclamation point within an equilateral triangle is intended to alert the user to the presence of important operating and mainte...

Page 17: ...e with the instructions may cause harmful interference to radio communications However there is no guarantee that interference will not occur in a particular installation Caution Changes or modificati...

Page 18: ...16 NXS H Owner s Manual A B C E D F G Parts and Reference Guide...

Page 19: ...XS H Owner s Manual Quantity Item Description A 4 C 1 M6 Nylon Lock Nut 19 LCD Monitor B 4 D 1 E 1 F G 1 1 M3 5 Flat Washer AC Cable HDMI to DVI Cable AC Power Brick Audio Cable Parts and Reference Gu...

Page 20: ...nual Step 4 Mount CPU and Monitor to Nexersys Note Both the lock washer and flat washer are required for proper assembly Warning Be sure to install washers per instructions to avoid potential damage t...

Page 21: ...H Owner s Manual Step 5 Connect Accelerometer Cables Note Plug in left to right 1 7 when facing back of monitor Monitor Make sure the clip on the accelerometer cable faces the monitor when installed A...

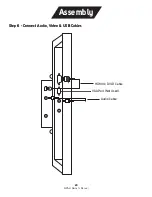
Page 22: ...20 NXS H Owner s Manual Step 6 Connect Audio Video USB Cables VGA Port Not Used Audio Cable HDMI to DVI D Cable Assembly...

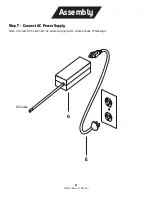
Page 23: ...21 NXS H Owner s Manual Step 7 Connect AC Power Supply Note Connect DC Cable from AC power supply to DC cable at base of Nexersys G E DC Cable Assembly...

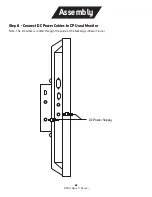
Page 24: ...22 NXS H Owner s Manual Step 8 Connect DC Power Cables to CPU and Monitor Note The DC cable is routed through the spine of the Nexersys iPower Trainer DC Power Supply Assembly...

Page 25: ...23 NXS H Owner s Manual Step 9 Insert SD Card Note Insert SD card into slot fully until spring mechanism locks SD card into place SD Card Assembly...

Page 26: ...24 NXS H Owner s Manual Step 10 Turn On Power Note Please wait at least 20 seconds for software license screen CPU Power Switch Monitor Power Switch Assembly...

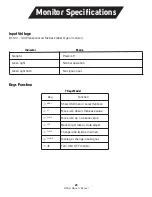
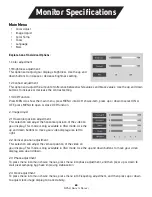
Page 27: ...7 Keys Model Mode No light Show OSD menu select function Move icon down decrease value Move icon up increase value Back to last menu Auto adjust Change ratio wide or normal Display or change input sig...

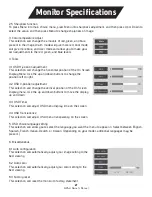
Page 28: ...or close DCR function 2 Image Adjust 2 1 Horizontal position adjustment This selection will adjust the horizontal position of the video on your display This mode is only available in VGA mode Use the...

Page 29: ...ft to right 4 2 OSD V position adjustment This selection will change the vertical position of the On Screen Display menu Use the up and down buttons to move the display up and down 4 3 OSD Timer This...

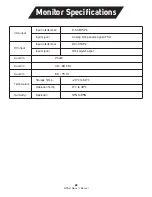
Page 30: ...Input interference D SUB 15Pin Input signal 10bit digital signal Input signal Analog 0 7pp anode signal 75 Audio In 2X2W Audio In 30 80 KHz Audio In 60 75 Hz Temperature Humidity Operation 10 to 85 O...

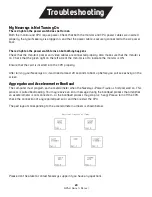
Page 31: ...monitor is ON Ensure that the card is inserted into the CPU properly After turning your Nexersys on it will need at least 20 seconds to boot up before you will see activity on the screen Aggregator an...

Page 32: ...and CPU side Video does not fill the screen The aspect ratio on the monitor may be set wrong The SCALE will toggle the display from 4 3 aspect ratio to 16 10 I cannot hear any sound coming from my Ne...

Page 33: ...a disk repair My Nexersys is not saving my workout data Check that the switch on the SD card is up meaning the card is unlocked Software 1 Power down Nexersys remove the SD card reinsert it and power...

Page 34: ...MMA or Boxing gloves every time you use your Nexersys If you want additional protection for your hands wrap them first and then put on gloves Monitor CPU Every time you use Nexersys make sure the moni...

Page 35: ...t can also cause serious injury to users and bystanders Clean Pads MAINTENANCE Inspect Frame bolts Tighten if needed Inspect CPU Monitor mount and bolts Tighten if needed Inspect Pad bolts Tighten if...

Page 36: ...t bell to indicate your workout is about to start It happens again 30 seconds before the last bell to indicate that it s time to give it all you ve got for the last 30 seconds Single Bell the single b...

Page 37: ...They will pop up next to the strike zone where you should throw your strike For instance the knee icon will appear at the waistband the hook icon next to the head and the kick icon next to the legs Fi...

Page 38: ...s burned and total points scored as relevant for that round Figure 5 is a screenshot of a typical round wrap up At the end of a program 1 15 rounds you will receive a workout wrap up that provides a s...

Page 39: ...d instruction on more challenging rotational strikes including knees elbows lead and power sweep kicks and more complex combinations There are two technique training videos in the Intermediate level t...

Page 40: ...Weight is balanced in the center and your knees are slightly bent Right hand is your lead hand left hand is your power hand Both hands are in a fist arms are bent fists are up by your face protecting...

Page 41: ...ad pad Step in and strike through the pad with your elbow Lead hand comes under and up into the center body pad Tight strike Power hand comes under and up into the center body Tight strike Lead knee t...

Page 42: ...y Nexersys Corporation and sold through an authorized agent and used in the United States or Canada Terms Mechanical and Electronic Parts CPU monitor accelerometers cables power supply 1 year Wear Par...

Page 43: ...ees or affiliates Damage caused by hitting the machine too hard as noted in the Owner s Manual and on the Warning Label Damage due to normal usage and wear and tear This warranty does not extend to an...

Page 44: ...you specific legal rights You may also have other rights which vary from state to state Expirations If the warranty has expired Nexersys Corporation may assist with replacements or repairs to parts a...

Page 45: ...be returned within the Satisfaction period specified Products returned must be received no later than two 2 weeks after we have provided your Return Authorization Number RMA Products must be returned...

Page 46: ...will not be subject to a refund or credit and Nexersys will discard the product The customer assumes all shipping and handling charges for any unauthorized return Important Warranty Information Please...

Reviews: