background image

• Have your LP gas tank filled by a reputable 

propane gas dealer and visually inspected and re-
qualified at each filling.

• Do not store a spare LP gas tank under or  
• near this appliance.
• Never fill the tank beyond 80 percent full . If this 

information is not followed exactly a fire causing 
death or serious injury may occur.

• Always keep LP gas tanks in an upright position.
• Do not store (or) or use gasoline or other 

flammable vapors and liquids in the vicinity of this 
gas grill.

• Do not subject the LP gas tank to excessive heat.
• Never store an LP gas tank indoors. If you store 

your gas grill in the garage or other indoor 
location, 

always

disconnect the LP gas tank first 

and store it safely outside.

• Place dust cap on cylinder valve outlet whenever 

the cylinder is not in use.  Only install the type of 
dust cap on the cylinder valve outlet that is 
provided with the cylinder valve.  Other types of 
caps or plugs may result in leakage of propane. 

• LP gas tanks must be stored outdoors in a well-

ventilated area and out of reach of children. 
Disconnected LP gas tanks must not be stored in 
a building, garage or any other enclosed area.

• When your gas grill is not in use the gas must be 

turned off at the LP gas tank.

• The regulator and hose assembly must be 

inspected before each use of the grill. If there is 
excessive abrasion or wear or if the hose is cut, it 
must be replaced prior to the grill being used 
again.

• Keep the gas regulator hose away from hot grill 

surfaces and dripping grease. Avoid unnecessary 
twisting of hose. Visually inspect the hose prior to 
each use for cuts, cracks, excessive wear or 
other damage. If the hose appears damaged do 
not use the gas grill. Call 1-800-913-8999 for a 
replacement hose.

Never

light your gas grill with the lid closed or 

before checking to ensure the burner tubes are 
fully seated over the gas valve orifices.

Never

allow children to operate your grill.

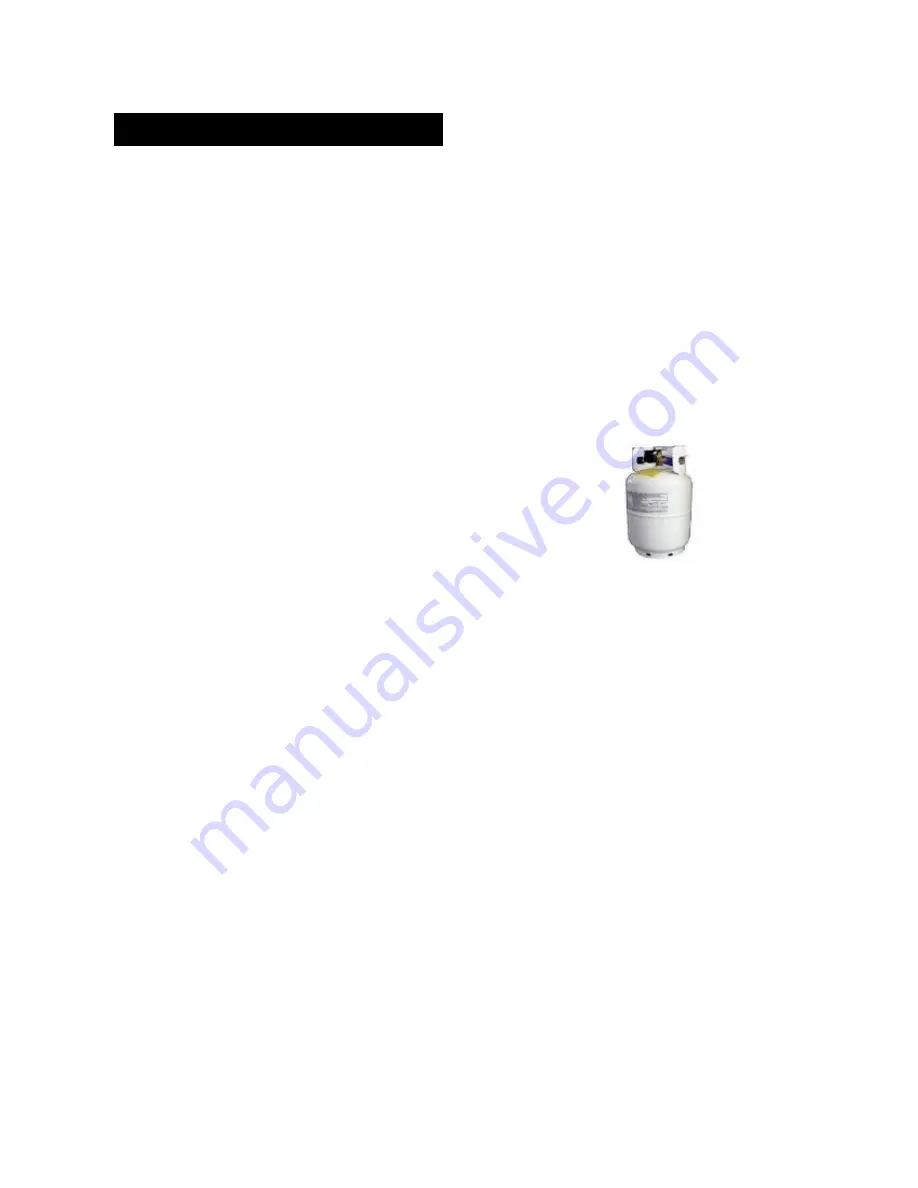
A tank of approximately 12 inches in diameter by 18-
1/2 inches high is the maximum size LP gas tank to 
use. 

You must use an OPD gas tank which offers 

an Overfill Prevention Device.

This safety feature prevents the tank from being 
overfilled which can cause malfunction of the LP gas 
tank, regulator and/or grill.

The LP gas tank must be constructed and marked in 
accordance with specifications of the U.S. Dept. of 
Transportation (DOT). In Canada, the LP gas tank 
must meet the National Standard of Canada ,Can 
CSA –B339 , Cylinders , spheres and Tubes for 
Transportation of Dangerous Goods and 
Commission .
1. The LP gas tank must have a shutoff valve, 
terminating in an LP gas supply tank valve outlet, 
that is compatible with a Type 1 tank connection 
device. The LP gas tank must also have a safety 
relief device that has a direct connection with the 
vapor space of the tank.
2. The tank supply system must be arranged for 
vapor withdraw.
3. The LP gas tank used must have a collar to 
protect the tank valve.

Proper Placement and Clearance of Grill 
Never

use your gas grill in a garage, porch, shed, 

breezeway or any other enclosed area. Your gas grill 
is to be used 

outdoors only, 

at least 24 inches from 

the back and side of any combustible surface. Your 
gas grill should not be used under overhead 
combustible construction . Do not obstruct the flow of 
ventilation air around the gas grill housing.
• Do not install this outdoor gas grill in or on 
recreational vehicles or boats
• Keep outdoor gas grill area clear and free from 
combustible materials, gasoline and other flammable 
vapors and liquids
• Do not obstruct the flow of combustion and 
ventilation air. Check for this each time prior to using 
grill.

Never

connect an unregulated LP gas tank to your 

gas grill. The gas regulator assembly supplied with 
your gas grill is adjusted to have an outlet pressure 
of 11” water column (W.C.) for connection to an LP 
gas tank.
• Only use the regulator and the hose assembly 
supplied with your gas grill. Replacement regulators 
and hose assemblies must be those specified in this 
manual.

3

Precautions

Summary of Contents for 720-0719R

Page 1: ... injury or death Grill Information Center Missing Parts Assembly Questions Operation Problems Before returning grill to store call 1 800 913 8999 Tools needed for assembly Adjustable wrench not provided Screwdriver not provided 7 16 Combination wrench not provided Use Care Guide This Grill is for Outdoor Use Only SAVE THESE INSTRUCTIONS Safety Parts Use and Care Assembly Liquid Propane Gas Grill M...

Page 2: ...s may result in serious bodily injury WARNING 1 Do not store or use gasoline or other flammable liquids or vapors in the vicinity of this or any other appliance 2 An LP cylinder not connected for use shall not be stored in the vicinity of this or any other appliance DANGER If you smell gas 1 Shut off gas to the appliance 2 Extinguish any open flame 3 Open lid 4 If odor continues keep away from the...

Page 3: ... your grill A tank of approximately 12 inches in diameter by 18 1 2 inches high is the maximum size LP gas tank to use You must use an OPD gas tank which offers an Overfill Prevention Device This safety feature prevents the tank from being overfilled which can cause malfunction of the LP gas tank regulator and or grill The LP gas tank must be constructed and marked in accordance with specification...

Page 4: ...fe operating condition for the user Although an obstructed burner tube is not the only cause of FLASH BACK it is the most common cause To reduce the chance of FLASH BACK you must clean the burner tubes before assembling your grill and at least once a month in late summer or early fall when spiders are most active Also perform this burner tube cleaning procedure if your grill has not been used for ...

Page 5: ...nel 1pc L Wheel 2pcs K Wheel Axle 1pc J Cart Brace Right 1pc I Side panel Right 1pc H Cart Leg Back Right 1pc G Cart Leg Front Right 1pc F Cart Brace Left 1pc E Side panel Left 1pc D Cart Leg Foot 2pcs C Cart Leg Back Left 1pc B Cart Leg Front Left 1pc A Firebox 1pc PACKAGE CONTENTS LIST 5 50 100 200 300 C 400 500 600 700 F 50 150 250 350 ...

Page 6: ... ZD Heat Diffuser 4pcs ZC Grease Cup 1pc ZB Grease Tray 1pc ZA 1 5 Volt AA Size Alkaline Battery 1pc Z Control Knob 1pc Y Bezel 1pc X Side Shelf Front Panel 1pc W Side Shelf 1pc V Side Burner Front Panel 1pc U Side Burner 1pc T Cart Beam Back 1pc S Cart Beam Front 1pc 6 ...

Page 7: ...ver not included and Wrench not included Note The grill left and right sides of the grill are on your left and right as you face the front of the grill Hardware Pack Contents 8 1 4 in x 65 mm Round Head Screw FF 8 1 4 in Flat Washer GG 1 Allen Key EE 16 1 4 in Lock Washer DD 16 1 4 in x 10 mm Round Head Screw CC 38 5 32 in Lock Washer BB 38 5 32 in x 8 mm Round Head Screw AA Required for assembly ...

Page 8: ...Contents on page 5 6 and 7 when assembling Grill Cart 1 Grill Cart Assembly a Insert a Cart Leg Foot D into the Cart Leg Front Left B and into Cart Leg Back Left C See Fig 1 b Use 4 AA Round Head Screws and 4 BB Lock Washers to attach Side Panel Left E to Cart Leg Back Left C and Cart Leg Front Left B Attach so that flat surface of Side Panel will be on Grill exterior See Fig 2 c Use 4 CC Round He...

Page 9: ...ight H Place Wheel L cone side facing Leg on each end of Axle Secure Wheels to Axle with previously removed Washers and Nuts See Fig 6 3 Bottom Panel Assembly a Use 4 FF Round Head Screws 4 DD Lock Washers and 4 GG Flat Washers to attach and securely tighten the bottom of the left cart legs B C to the Bottom Panel M See Fig 7 b Repeat step 3a to attach securely tighten Bottom Panel M to Right Cart...

Page 10: ...age Assembly a Use 2 AA Round Head Screws and 2 BB Lock Washers to attach the Tool Storage Handle Q to Tool Storage Front Panel P See Fig 10 b Slide holes at bottom corners of Tool Storage Front Panel P over hinge pins on Front Right Cart Leg G and Front Left Cart Leg B as shown in Fig 11 c Use 2 AA Round Head Screws and 2 BB Lock Washers to secure right side of Front Panel to Front Right Cart Leg...

Page 11: ...f Slides to Cart Legs See Fig 12 7 Cart Beam Front and Cart Beam Back Assembly a Use 4AA Round Head Screws and 4 BB Lock Washers to connect the Cart Beam Front S to Front Left Cart Leg B and Front Right Cart Leg G See Fig 13 NOTE Attach Cart Beam so that flat surface in on Cart exterior b Use 4 AA Round Head Screws and 4 BB Lock Washers to connect the Cart Fame Back T to Back Left Cart Leg C and B...

Page 12: ...e Fig 15 9 Side Burner Shelf Assembly a Use 2 AA Round Head Screws and 2 BB Lock Washers to attach Side burner front panel V to Side Burner U See Fig 16 b Align the holes on Side Burner U with the holes on the side of Front Right Cart Leg G and Rear Right Cart Leg H and attach with 4 AA Round Head Screws and 4 BB Lock Washers See Fig 17 Note Do not fully tighten the four screws at this point c Ali...

Page 13: ...Cart Leg C and attach using 4 AA Round Head Screws and 4 BB Lock Washers See Fig 20 c Align the holes on Side Shelf W with the holes inside of Firebox and attach from inside of firebox using 2 CC Round Head Screws and 2 DD Lock Washers See Fig 21 d Connect Side Shelf Front Panel X to Main Control Panel With 1 AA Round Head Screw 1 BB Lock Washer and 1 GG Flat Washer See Fig 21 13 Fig 19 BB AA W X ...

Page 14: ...em through front panel hole and then insert Side Burner Valve into hole in end of Side Burner Tube Place the Bezel Y over the Valve Control Stem and attach Bezel to Front Panel and Valve with previously removed 2 screws and washers See Fig 23 c Push Side Burner Control Knob Z onto Valve Control Stem Insert supplied Allen Key EE into set screw in Knob and tighten to Stem See Fig 24 d Connect the ig...

Page 15: ...Panel 15 Installing Cooking Components Important Before cooking on your grill the first time wash cooking grids and cooking rack with warm soapy water Rinse and dry thoroughly Season with cooking oil regularly After cooking is completed turn grill to HIGH setting for 3 to 5 minutes to burn off excess grease or food residue a Install Heat Diffusers ZD above burners so that holes in diffuser corners...

Page 16: ...ng nut clockwise to a full stop Fig 30 Do not use a wrench to tighten because it could damage the quick coupling nut and result in a hazardous condition 6 Open tank valve fully counterclockwise once tank and regulator are securely connected Use a soapy water solution to check all connections for leaks before attempting to light your grill If a leak is found turn tank valve off and do not use your ...

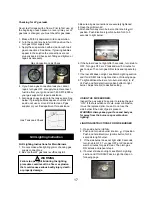
Page 17: ... do not use or move it Contact an LP gas supplier or your fire department for assistance Grill Lighting Instructions for Main Burners 1 Do not smoke while lighting grill or checking gas supply connections 2 Be sure that LP gas tank is sufficiently full WARNING Failure to open grill lid during the lighting procedure could result in a fire or explosion that could cause serious bodily injury death or...

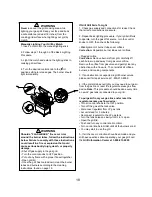
Page 18: ...xcess gas flow device Turn all control knobs to the OFF position Turn off the gas at the tank valve Disconnect regulator from LP gas tank Let unit stand for 5 minutes Reconnect regulator to the LP gas tank Turn the tank valve on slowly until to open Open the grill lid Push and turn any control knob to HIGH Turn control knobs to HIGH until all the burners are lit You may start to use the grill 5 If...

Page 19: ...gas source and observe burner flame for correct operation Cleaning Exterior Surface We suggest you wash your grill using a mild soap and warm water solution You can use a wash cloth or sponge for this process Do not use abrasives or a brush that might remove finish during the cleaning process Cleaning Exterior Stainless Steel Surfaces Weathering and extreme heat can cause exterior stainless steel ...

Page 20: ... for damage cracks or holes and if such damage is found order and install a new burner After installation check to ensure that gas valve orifices are correctly placed inside the ends of the burner tubes Troubleshooting PROBLEMS WHAT TO DO Check to see if LP tank is empty Clean wires and or electrode by rubbing with alcohol and clean swab Wipe with dry cloth Make sure the wire is connected to elect...

Page 21: ...ature settings will vary with the temperature and the amount of wind outside your home Direct Cooking The direct cooking method can be used with the supplied cooking grids and food placed directly over the lit grill Burners The method is ideal for searing and whenever you want meat poultry or fish to have and open flame barbecued taste Deep frying and smoking are also best cooked in this manner be...

Page 22: ...e or until desired amount of doneness Do not leave hamburgers unattended since a flare up could occur quickly Ribs 1 2 or full rack Medium 20 to 40 minutes Grill turning occassionally During last few minutes brush with barbecue sauce turn several times Hot dogs NA Medium 5 to 10 minutes Grill turning four times 2 4 minutes on each of four sides Poultry Cut 1 4 to 1 2 pounds Low or Medium 20 to 40 ...

Page 23: ... 50 100 200 300 C 400 500 600 700 F 50 150 250 350 48 36 05 01 05 47 40 23 02 26 30 30 35 37 39 38 57 27 31 31 32 33 34 28 20 28 18 24 18 36 19 22 25 29 21 25 03 03 04 55 56 54 50 53 52 51 06 10 11 07 08 12 13 14 15 17 16 41 42 49 44 45 46 ...

Page 24: ...ront Baffle 1 36 Wheel 2 7 Main Gas Valve 4 37 Wheel Axle 1 8 Pulse Igniter Module 1 38 Side Burner Bracket A 1 9 Regulator LP 1 39 Side Burner Bracket B 1 10 Side Manifold 1 40 Side Burner Igniter Wire 1 11 Side Burner Hose 1 41 Side Burner Igniter Pin 1 12 Main Manifold 1 42 Side Burner Pipe Assembly 1 13 Main Control Panel 1 43 Side Gas Valve 1 14 Bezel 5 44 Side Burner Front Panel 1 15 Control...

Page 25: ...ted warranty ITEMS MANUFACTURER WILL NOT PAY FOR Service calls to your home Repairs when your product is used for other than normal single family household or residential use Damage resulting from accident alteration misuse lack of maintenance cleaning abuse fire flood acts of God improper installation and installation not in accordance with electrical or plumbing codes or use of products not appr...

Reviews: