Nexland Pro: Appendix
Nexland Pro: Appendix
Manually Resetting the Pro
Backing Up Your Configuration Settings
Sometimes by making an incorrect setting in the LAN IP & DHCP screen or forgetting
your configuration password will prevent you from accessing the unit. Pressing the
reset button on the unit will not restore these default IP settings or erase the password.
You must follow the steps below to regain connectivity with the Pro.
This procedure does the following:
Restores the unit’s IP address to the default: 192.168.0.1
Restores the unit’s network mask to the default: 255.255.255.0
Clears the interface password
Enables the DHCP Server
Read these steps completely before trying.
…
You’ll need a paper clip for this
1. First remove Power from the Pro by pulling the adapter plug from the back.
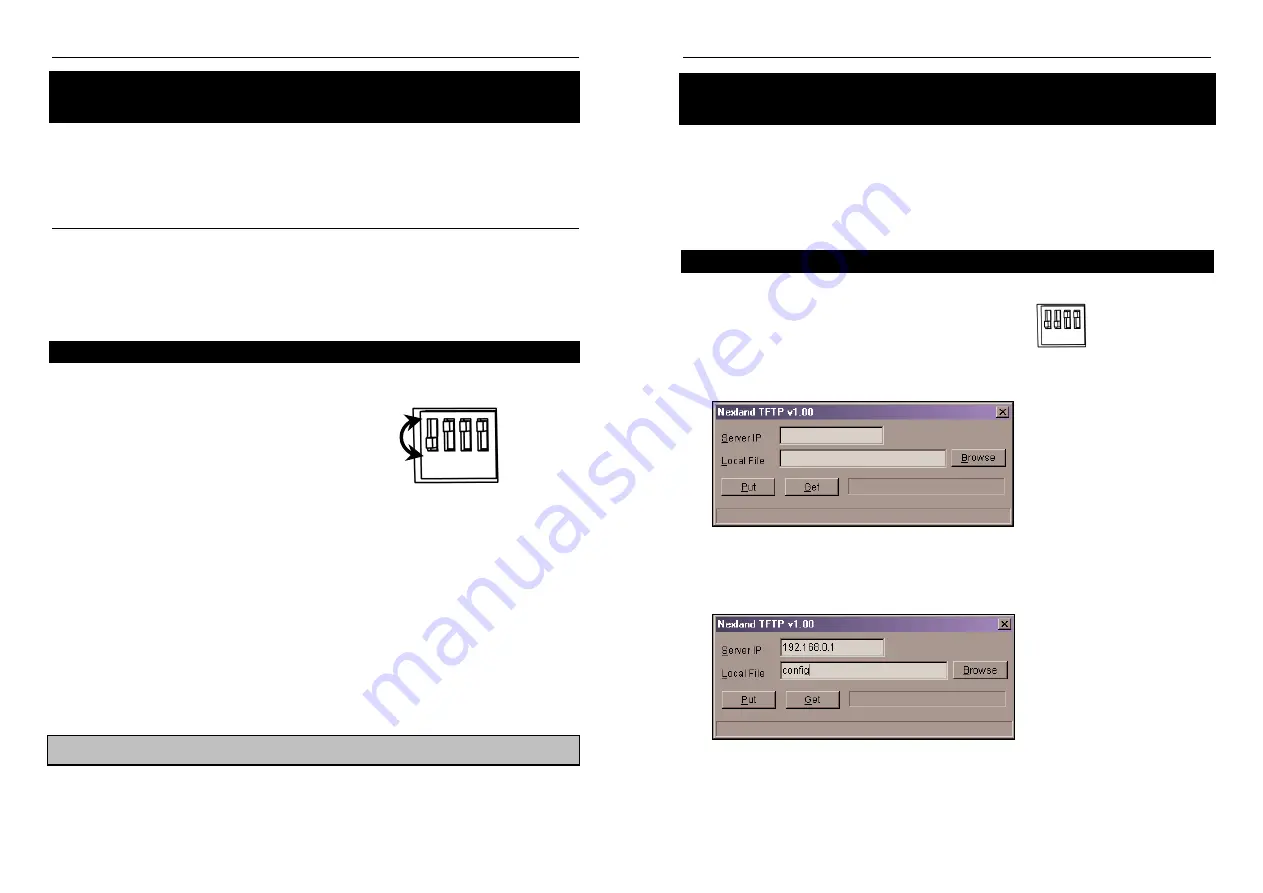
2. Set DIP switch 1 to ON (down)
3. Insert the power plug back into the unit and
WAIT 4 SECONDS
4.
Then Immediately, using the paper clip…
Flip DIP switch 1 OFF (UP),
Then flip DIP switch 1 ON (DOWN) again.
Finally, Flip DIP switch 1 OFF (UP).
1 2 3 4
This whole sequence should be completed within 10 seconds of plugging in the
power to the Pro (during it’s boot sequence).
5. You should see the Reset Sequence begin again (LAN Link LEDs will flash). The
Unit is now reset…
6. Pull the power out, wait for a moment and re-insert the power plug.
It is important that you don’t wiggle the switch to quickly, use slow smooth
movements.
Practice Step 4 with the power off before trying for the first time.
The unit should now have its IP & network mask defaults and password cleared.
64
The Pro lets you back up the configuration settings you made through its interface
should something happen to the unit. This procedure results in a small file that can be
put on a floppy and into a firesafe box or other safe place.
To perform these steps, you’ll need the “
nxtftpw
” utility available on the CD in the
Utilities directory (there are two commands a Windows and a DOS version – we’ll use
the Windows version here… it works on Win95/98/ME/NT & 2000).
Retrieving the Backup File
1. Power off the unit by pulling the adapter plug from the back of the Pro.
2. Flip DIP switch 1 & 2 to the ON position (DOWN)
3. Put the power plug back into the Pro.
1 2 3 4
4. Copy
the
nxtftpw
utility from the CD to a folder on your hard drive.
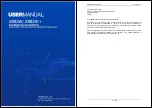
5. Double-click
the
nxtftpw
icon. You’ll see a window pop up like below.
6. Enter the IP address of the Pro into the
Server IP
field (should be 192.168.0.1
unless you changed it).
7. Enter any filename for the backup file into Local File (“config” works). You
should have entries similar to below now.
8. Press
the
Get
button… after a moment; a file named config will appear into the
same folder that the nxtftpw application was in. You can now take this file and
copy it to a floppy for safe keeping.
9. You’re Done. You can now return DIP switches 1 & 2 to OFF.
65


