Radio
Set Up a NexSens Radio Network
Each XBEE radio module that ships with a NexSens radio X2 has a unique identifier. Both the base and field
nodes use this identifier to establish connections throughout the radio network. All field radios in the network
must have the identifier information for the base station as a destination for their logged data. An
and the Digi XCTU software provides a means of writing the base radio identifier into each field
node on the network. Once the field nodes recognize the base station, WQData LIVE can force the base to
detect all nodes in the network. The process below outlines setting up this network of NexSens radio X2’s.
Download the XCTU Software and Connect to the RF transceiver
1.
2. Open the software and connect the RF transceiver to an open USB port.
a. The red LED on the transceiver should blink continuously while powered.
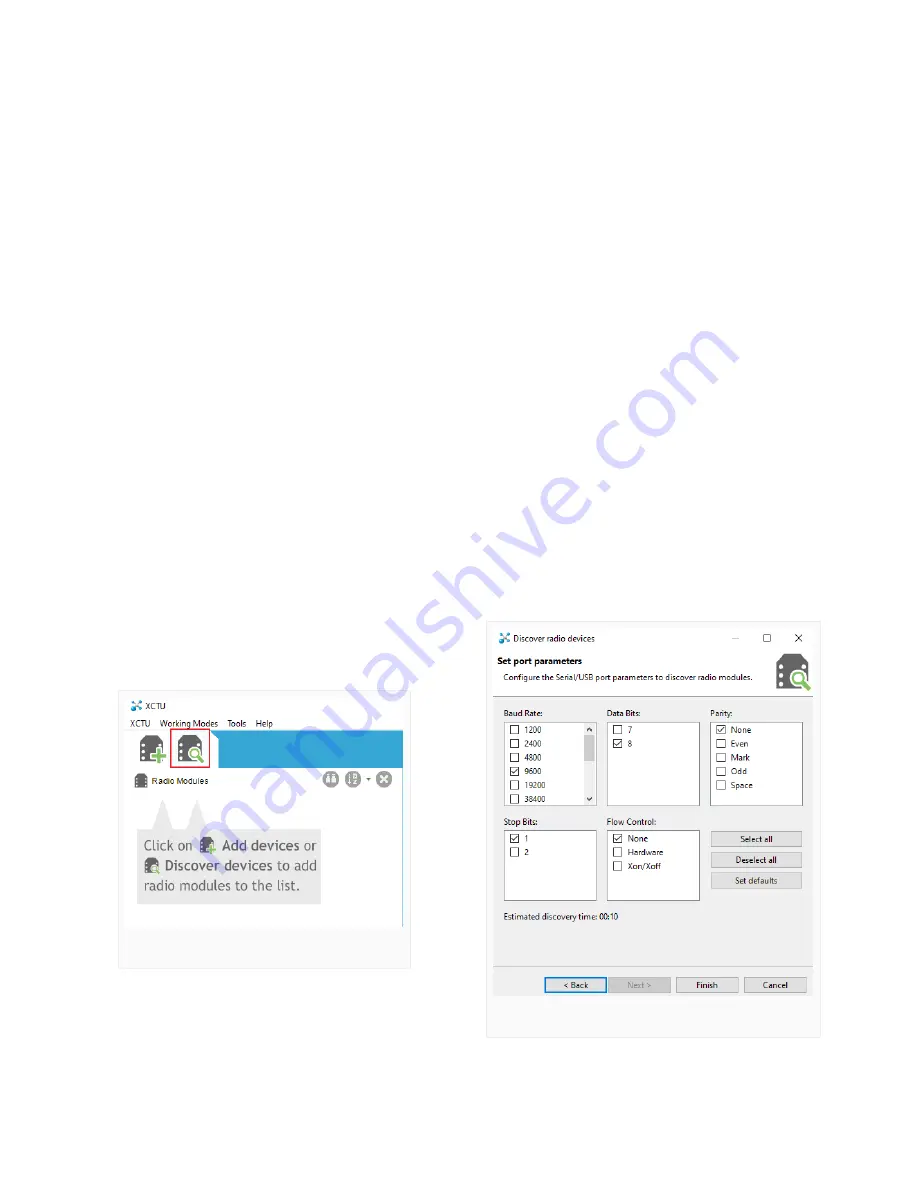
3. Click the magnifying glass icon in the top left to select the proper COM port and communication settings.
a. Baud Rate: 9600
b. Data Bits: 8
c. Parity: None
d. Stop Bits: 1
e. Flow Control: None
4. Click the plus icon to the left of the magnifying glass to actively search for the Digi radio device using the
previously set communication settings.
Discover available radios.
Radio communication settings.
49
Summary of Contents for X2-CB
Page 11: ...Select sensors from drop down list 11...
Page 17: ...Cellular X2 C to WQData LIVE 17...
Page 18: ...Iridium X2 I to WQData LIVE 18...
Page 19: ...Radio to Cellular X2 RC to WQData LIVE 19...
Page 48: ...Iridium X2 data flow 48...
Page 94: ...Rotate the antenna bushing counterclockwise to remove the antenna 94...
Page 108: ...13 Remove the Main SD Card Main SD Card Location 108...


