background image

SHOULDER HEIGHT MARKERS AND

A GROWING CHILD

SHOULDER HEIGHT MARKERS AND

THE NEXT STEP

7

         IMPORTANT: Follow this advice.

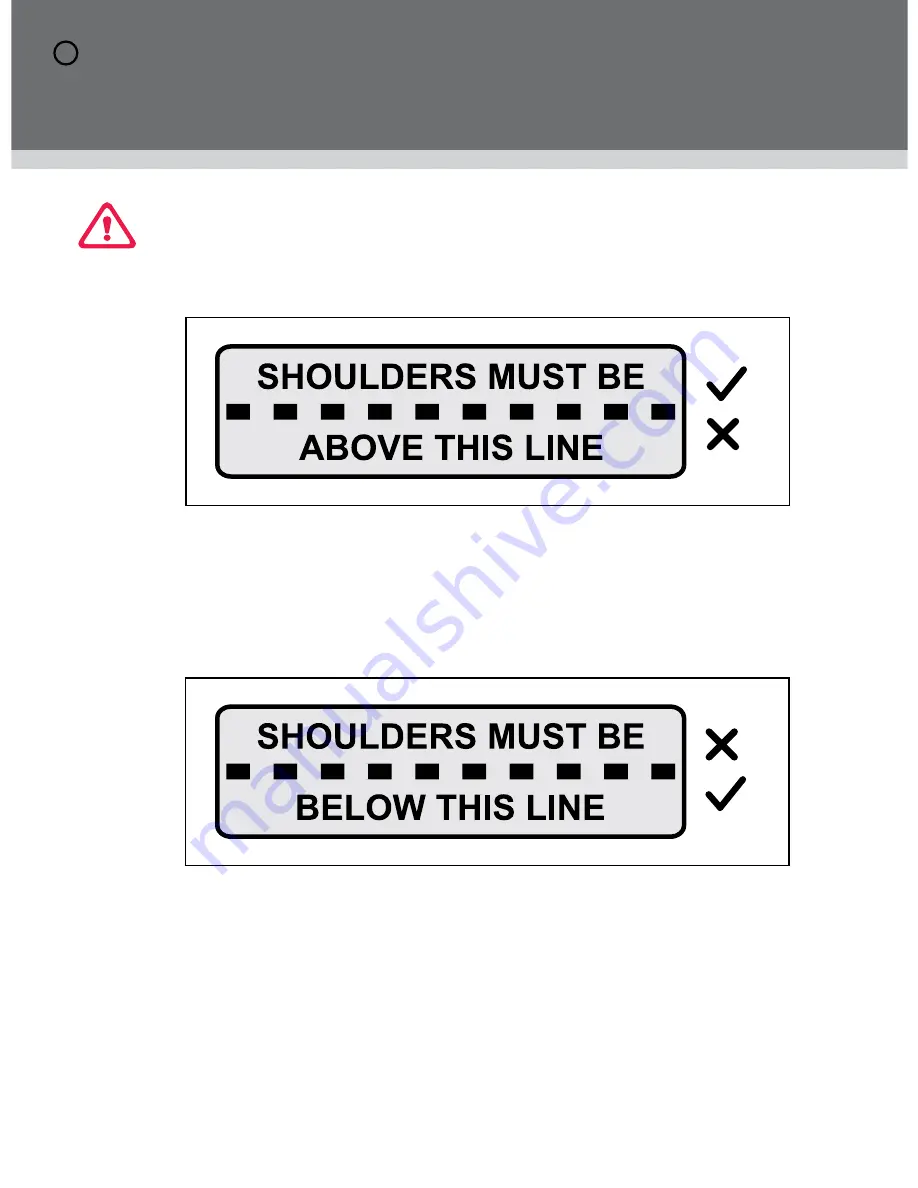
LOWER SHOULDER HEIGHT MARKER : Label A

The child’s shoulders must be in-line or above this marker. Approximately 4 years of age. 
If the child’s shoulders are below then the child should remain in their previous child 
restraint.

When the child’s shoulders reach this upper marker, or the child no longer fits in the 
child restraint, approximately 6 to 8 years of age, then the child must be moved to the 
next form of child restraint, see next page.

The child restraint is unsuitable for the occupant when the shoulders are below the lower 
marker or above the upper height marker. The child needs to be moved into the next form 
of restraint when they reach the top shoulder height. 

UPPER SHOULDER HEIGHT MARKER : Label B 

Summary of Contents for 4050/A/2013

Page 1: ...CHILD BOOSTER SEAT Instructions for Installation Use Series No 4050 A 2013 IMPORTANT KEEP THIS BOOK IN THE PLACE PROVIDED ON THE CHILD RESTRAINT...

Page 2: ...NTRODUCTION WARNINGS SHOULDER HEIGHT MARKERS AND A GROWING CHILD SHOULDER HEIGHT MARKERS AND THE NEXT STEP FEATURES HOW TO SETUP HOW TO USE CARE AND MAINTENANCE ACCESSORIES IN CASE OF CRASH 3 4 7 9 10...

Page 3: ...seatbelt is not recommended for children that have outgrown this seat Use a larger booster seat Carefully read all the instructions for installation If in doubt about the method of installation consu...

Page 4: ...lap sash seatbelt The lap part of the seatbelt must be firmly across the thighs and the sash belt fitted diagonally across the chest and on the shoulder Regularly check the condition of the restraint...

Page 5: ...tender then ensure that the seatbelt buckle does not contact the child Do not use in a front seat unless your child is over 4 years of age or in accordance with the applicable Road Rules in your regio...

Page 6: ...below the Lower Shoulder Height Marker From approximately 4 years of age TALLER CHILD Shoulders must not be above the Upper Shoulder Height Marker To approximately 6 to 8 years of age Height label wil...

Page 7: ...traint When the child s shoulders reach this upper marker or the child no longer fits in the child restraint approximately 6 to 8 years of age then the child must be moved to the next form of child re...

Page 8: ...d When your child has outgrown the seat you can then use either restraint methods as follows Just the car s lap sash seatbelt Lower leg must hang over the edge of the seat cushion Or you can use a lar...

Page 9: ...icle 1 Shoulder Height Markers 2 Car Seatbelt 3 Padded Cover for Comfort 4 BOOSTER SEATBELT PATH label each side for lap belt 5 KeepSafe guide 6 Sash guide 7 BOOSTER SEATBELT PATH label each side for...

Page 10: ...right mode Normal backrest angle Backrest angle too reclined UNFOLDING THE BOOSTER SEAT If the seat is in a folded position grip the Booster seat back and seat base and unfold till you hear it lock in...

Page 11: ...JUSTING THE KEEPSAFE GUIDE The crotch strap can be adjusted so that it fits the seatbelt correctly to the child The crotch strap length adjuster can be found under the seat A Adjust the crotch straps...

Page 12: ...is attached to a strap at the back of the seat cover C Align the sash guide with the slot just below the child s shoulder and on the same side as the sash belt is connected to the car Thread the sash...

Page 13: ...nd chest Feed the adjusting strap into the slot on the cover that is just below the child s shoulder Adjust the height of the sash guide so that the guide is above the child s shoulder ALWAYS USE THIS...

Page 14: ...oulders must be between the lower and upper shoulder height markers C Pull the seatbelt out fully and place the lap belt over the child s hips and thighs across the red BOOSTER SEATBELT PATH label eng...

Page 15: ...rectly position the sash portion of the lap sash seat over the child s shoulder and across the chest Continue to adjust the height of the sash guide so that the guide is above the child s shoulder as...

Page 16: ...ogo facing forward The KeepSafe guide must be used at all times to prevent the child slumping sliding forward at base of seat as the lap belt on the abdomen is dangerous in the event of a crash F Tigh...

Page 17: ...or poorly positioned lap belt can allow the lap belt to ride up into the abdomen and can cause serious injuries in a crash DO NOT LEAVE CHILDREN UNATTENDED IN THE CAR G The seatbelt must fit firmly b...

Page 18: ...child and KeepSafe guide When the booster seat is not being used secure in position by engaging seatbelt around the booster seat or store in a safe place to prevent it becoming a projectile in a cras...

Page 19: ...TO CLEAN Use only mild soap and water with a moist cloth to clean all metal and plastic parts of the booster seat Do not use harsh cleaners polishes oils bleach or other chemicals COVER The booster s...

Page 20: ...unclip clips D and feed KeepSafe guide E through the cover and peel away from seat TO REPLACE COVER 1 To replace the main cover align trim to slots and lift elastic A over top of seat clip the clips...

Page 21: ...in of the car seat A Hook and loop attachment referred in some instruction books are no longer required to fit this model of Messy Mat seat protector The pocket if fitted is only for small light items...

Page 22: ...e is obvious Some insurance companies offer vehicle insurance which covers or partially covers the replacement of your child restraint Contact your insurance company for further details Your insurance...

Page 23: ...et Sunshine Victoria 3020 Phone No 1300 363 358 New Zealand Phone No 0508 688 822 23 Manufactured to AS NZS 1754 2010 and 2013 VERY IMPORTANT Only use this child restraint with the cover supplied or a...

Page 24: ...Hipod trademark is the property of Next Generation Nursery Products Pty Ltd 2013 Next Generation Nursery Products Pty Ltd P No 2201575 A...

Reviews: