background image

- 13 - 


System Connection


Connecting to AV Signal Source 

This player supports AV input function. Using the supplied audio/video cable to connect 
the player to the external AV output signal source.   
Plug one end into the AV In jack on the left panel of the player   
Plug the other end into the output jack of the external AV signal source, such as a DVD, as 
shown on the below figure: 


Summary of Contents for MC3007 20GB

Page 1: ...from the apparatus 11 Only use attachments accessories specified by the manufacturer 12 Use only with the cart stand tripod bracket or table specified by the manufacturer or sold with the apparatus W...

Page 2: ...oice via the microphone Audio Video Output It could be connected with TV LCD and slide projector via AV cable LCD Liquid Crystal Display Screen 7 Color LCD screen provide clear image Audio Video Input...

Page 3: ...player NOTE If you find that the accessories are not in accordance with the items listed in the manual book please contact the local sales person or the department store Picture Name Number User s Man...

Page 4: ...Connecting to AV Signal Source Connecting to DC adapter Connecting to PC Connecting to USB Connecting to Earphone System Setup Setting Menu Movie Setup Music Setup Photos Setup File Manager File Mana...

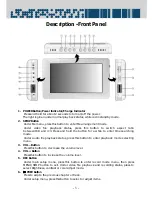
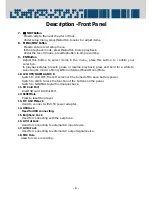
Page 5: ...e button for a while to enter time searching mode Under audio file playback status press this button to enter playback mode selecting menu 3 VOL Button Press this button to decrease the volume level 4...

Page 6: ...ld for a while to select audio mode L Mono R Mono Stereo Mixed Mono Mute 10 LCD OFF NORMAL LOCK Switch to LCD OFF the LCD screen will be turned off to save battery power Switch to LOCK to lock the fun...

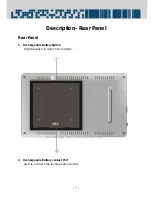
Page 7: ...7 Description Rear Panel Rear Panel 1 Rechargeable Battery Switch Push this switch to detach the battery 2 Rechargeable Battery contact Port Used to connect the rechargeable battery...

Page 8: ...0 degree room temperature Under room temperature 25 degree a fully charged battery delivers about 3 5 hours of use The using time of the battery will be shortened if it is used under an over heated or...

Page 9: ...into the battery slot at which you will hear a slight click As shown on the below Charging The Rechargeable Battery The battery must be attached to the player to charge it 1 Attach the battery to the...

Page 10: ...or a long period of time you d better detach the battery from the player in order to prolong the life span of the battery Take the following steps to detach the battery Detaching the battery Slant the...

Page 11: ...ower Adapter The player is supplied with an AC adapter for powering the unit and charging the battery 1 Connect AC adapter to the left side of the player in the jack marked DC 9 5V IN as shown on the...

Page 12: ...tion Using the supplied audio video cable to connect the player to the external AV input device such as a TV Plug one end into the AV Out jack on the left panel of the player Plug the other end into t...

Page 13: ...ction Using the supplied audio video cable to connect the player to the external AV output signal source Plug one end into the AV In jack on the left panel of the player Plug the other end into the ou...

Page 14: ...of the player 2 Plug the other end into the Vehicle DC Outlet Cigarette Lighter Socket as shown below Note Do not operate the unit or view video software while driving a vehicle Place the unit in a p...

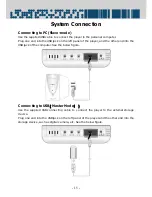
Page 15: ...panel of the player and the other end into the USB jack of the computer See the below figure Connecting to USB Master Mode Use the supplied USB connecting cable to connect the player to the external s...

Page 16: ...see the below figure This method is to use the supplied USB cable with one bigger USB cord and one smaller USB cord to connect the USB device that support MINI USB connecting method Connecting to Ear...

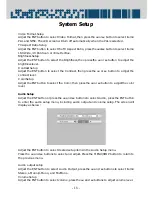
Page 17: ...yer Information Password Setting Reset and Format HDD In the Setting menu adjust the ENT button or press the or button on the panel to select items which you prefer then press the ENT button to confir...

Page 18: ...r button to adjust the contrast level Color Setup Adjust the ENT button to select the Color then press the or button to adjust the color level Audio Setup Adjust the ENT button or press the and button...

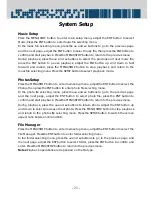
Page 19: ...ayback Mode Adjust the ENT button to select the Play Mode then press the and buttons to select items including Off Play All One Time Repeat All Slideshow with Music When selecting the playback mode of...

Page 20: ...n saver time or Off Sleep Timer Setup Adjust the ENT button to select the sleeping clock Press the and buttons to select the time or Off Player Information Adjust the ENT button or press the and butto...

Page 21: ...lect the ENTER and press ENT button to confirm input If you select the Click To Lock Unit After Next Reboot column you should input password when restart the player Press the MENU STOP button to retur...

Page 22: ...ust the ENT button to select Movie then press the ENT button to enter the movie file selecting menu In the movie file selecting menu press the and buttons to go to the previous page and the next page...

Page 23: ...then press the ENT button to enter photo file selecting menu In the photo file selecting menu press the and buttons to go to the previous page and the next page adjust the ENT button to select photo f...

Page 24: ...TOP button to return to the previous menu New folder In the File Manager setup menu first press the SETUP button then adjust the ENT button to select the New Folder and press the ENT button to confirm...

Page 25: ...the ENT button again to enter setup the screen will display as below In the playlist adjust the ENT button to select the file press the ENT button to move the file Press buttons to select Select File...

Page 26: ...button to select Copy Press the ENT button again to enter setup The screen will display as below In the file Copy menu adjust the ENT button up and down to select the file press the ENT button to conf...

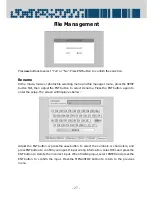
Page 27: ...Rename Press the ENT button again to enter the setup The screen will display as below Adjust the ENT button or press the button to select the numbers or characters and press ENT button to confirm you...

Page 28: ...DE file should be copied on the harddisk directly without compressing or copying on other folder Or else the system will not be upgraded normally 2 Most of the AVI files of MPDG4 format VOB files of M...

Page 29: ...an be used as the host and the other one can be used as the slave Using SD CARD The player is equipped with SD card port it can be connected to the SD card When the SD card is not inserted into the pl...

Page 30: ...previewing status Press the ENT button again to start another file recording Press the MENU STOP button to exit the recording mode The new recording file will be stored in the file named as record The...

Page 31: ...ss the SETUP button the screen will display a selecting menu adjust the ENT button to select Upgrade BIOS Press the ENT button the screen will display an indication select the Yes or No and press the...

Page 32: ...on z Make sure the LCD OFF NORMAL LOCK switch is not switched to LCD OFF z Make sure that file format is supported by this player The LCD screen is too bright or too dark z Adjust the brightness of th...

Page 33: ...70dB 1kHz Channel Separation 70dB 1kHz Dynamic Range 80dB 1kHz Audio Out Output Level 1 5V 0 2 1 0 Load 10k Video Out Output Level 1VP P 0 2 Load 75 Unbalanced Negative Power AC100 240V 50 60Hz Dimens...

Reviews: