8
Assembly and Mounting Instructions – You Are Ready to Start
Please perform the following steps, in order:
Step 1:
Inventory the Parts List.
Carefully inspect all items, making sure you have everything shown in the Parts List.
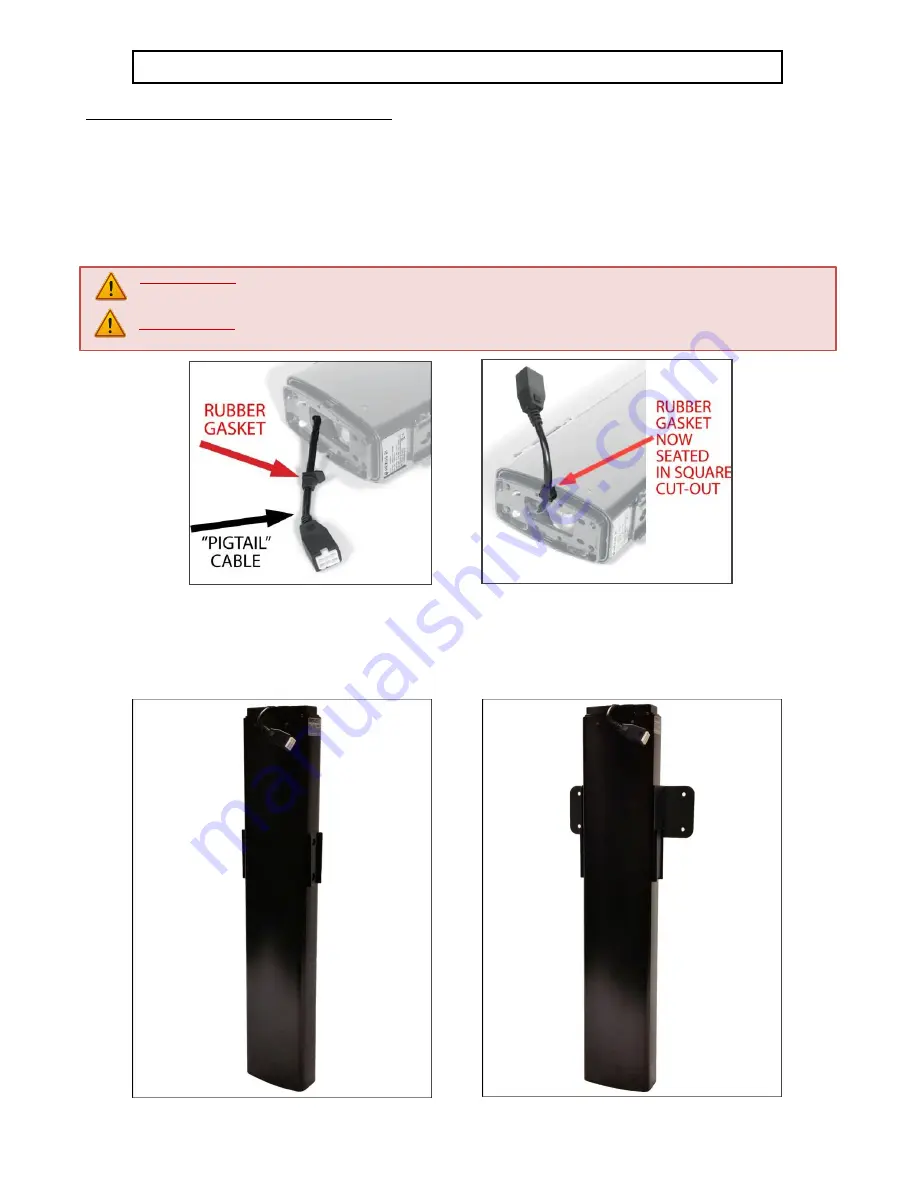
Step 2: Seat the “pigtail” cable properly on the top of the Lift Column.
Take the Lift Column (Part #1) and find the end
with the short black cable (this cable is called the “pigtail”). This end will become the BOTTOM of the Lift Column. Before
you begin to assemble the system, you must position the pigtail properly. Look at the bottom edge of the Lift Column.
You will see two square cut-out channels, notched into the steel, one on either side of the pigtail. Choose one of the cut-
outs (it does not matter which one), and seat the pigtail into the cut-out, using the rubber gasket attached to the cable.
IMPORTANT NOTE:
IF THE PIGTAIL CABLE IS NOT PROPERLY SEATED, IT MAY BE DAMAGED WHEN YOU ATTACH THE SCREEN SUPPORT
BRACKET (Part #4), CAUSING LOSS OF POWER TO THE LIFT COLUMN.
IMPORTANT NOTE:
The pigtail now hangs over one side of the Lift Column. From this point forward, that side will be referred to as the
“Front” of the Lift Column.
BEFORE (pigtail is loose)
AFTER (pigtail is properly seated)
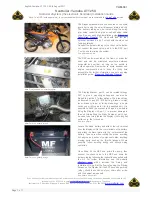
Step 3a: Attach the Bayonet Bracket to the Lift Column.
Slide the
Bayonet Bracket (Part #3)
onto the
Lift Column (Part
#1).
Stand the Lift Column up. Gently slide the
Bayonet Bracket
into the tapered, welded slots on either side of the
Lift
Column
(on the opposite side of the pigtail cable).


