background image

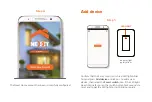
Add device 

Step 1

Confirm that the 3-way smart switch red LED light blinks 

fast and press Add device or click on + to add a new 

device, then select the Smart switch icon. If the LED light 

doesn’t blink fast, press the switch button for 5 seconds to 

reset and to get the LED light to start blinking rapidly.

60 %

9:41 AM

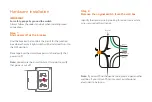
Indicator light

rapidly blinks

LED LIGHT

Step 4

The Nexxt Home account has been successfully configured.

Summary of Contents for NHE-S300

Page 1: ...WARRANTY nexxtsolutions com warranty YEAR 2 Smart Wi Fi 3 way switch...

Page 2: ...through a hard wiring process This smart electrical fixture requires 110 240 volt AC This device has been tested by the manufacturer according to all international electrical standards However every s...

Page 3: ...ght switch is on No internet connection available LED light Status Description Turn power off at the circuit breaker or fuse Use only when it s installed with a residual current device RCD or current...

Page 4: ...e install or operate this product Estimated installation time about 30 minutes Tools that may be required but are not included for installation 1 Phillips screwdriver 2 Flathead screwdriver 3 Pliers 4...

Page 5: ...n IMPORTANT For safety properly ground the switch Always follow the code standards when installing wired connections Step 1 Shut power off at the breaker Find the breaker that controls the circuit for...

Page 6: ...reference only and therefore they must not be used as a standard Step 4 Mount the smart switch The installation only requires one smart switch per electrical circuit Using the correct polarity match e...

Page 7: ...ire nut then twist each nut full turns until the connection is fully secured Repeat this step for each cable assembly 2 Neutral wire white on the smart switch to neutral on junction box 3 Ground wire...

Page 8: ...completing the process Proceed to align the smart switch to the base on the junction box so that it is oriented correctly Insert the two center screws through the switch and into the mounting hole on...

Page 9: ...or Apple App Store and create a new account 60 9 41 AM Nexxt Home Nexxt Solutions Home App Cancel GET Accvent LLC Log in with existing account Create New Account S O L U T I O N S Iniciar sesi n con...

Page 10: ...Step 3 Create a new password and then select Done Step 2 Enter the verification code you received...

Page 11: ...k on to add a new device then select the Smart switch icon If the LED light doesn t blink fast press the switch button for 5 seconds to reset and to get the LED light to start blinking rapidly 60 9 41...

Page 12: ...rapidly blinking and then click on Next 60 9 41 AM Step 2 You must connect to a 2 4GHz Wi Fi network Enter your network password Make sure you enter the correct password otherwise the device will not...

Page 13: ...nd 30 seconds to add the device depending on the Wi Fi connection 60 9 41 AM Step 5 If pairing is successful the notification Added will be displayed on the screen The device has been added as 3 Way S...

Page 14: ...ce name To rename the device click on the pencil icon on the screen enter a different name and click Save The device is now ready to be configured through Schedule and Settings menu 60 9 41 AM 60 9 41...

Page 15: ...iguration tools Schedule Allows you to add a specific time and day for the device to turn on or off Schedule setup Click on Add Schedule to access the Add schedule screen Set the day or days you wish...

Page 16: ...hold Schedule followed by Delete 60 9 41 AM Press and hold the Schedule Settings Relay status Relay status determines the status of the switch when electrical power comes back after a power outage It...

Page 17: ...Indicator light Indicator light sets the LED light status on the switch to On or Off 60 9 41 AM Child lock Child lock allows the user to enable or disable the physical control of the switch 60 9 41 AM...

Page 18: ...on Delete A notification confirming that you no longer want to share the device with this user will be displayed Click on Confirm FCC ID X4YHAES300 Nexxt Solutions is a registered trademark All rights...

Page 19: ...i n al cableado fijo El actual accesorio el ctrico inteligente requiere una tensi n de 110 240 voltios para funcionar El dispositivo ha sido sometido a las pruebas pertinentes por el fabricante confor...

Page 20: ...limentar el interruptor de luz ADVERTENCIA Este dispositivo es de una sola banda y por consiguiente funciona solo con routers Wi Fi de 2 4GHz Rojo Rojo Rojo permanente Verde permanente Verde Parpadea...

Page 21: ...ue se podr an requerir para la instalaci n pero que no est n incluidas 1 Destornillador philips 2 Destornillador plano 3 Alicate 4 Pelador cortador de cables 5 Probador de circuito 6 Guantes de trabaj...

Page 22: ...e continuar con la instalaci n Cubra con cinta adhesiva el interruptor de cortacircuito y verifique que ya no fluye corriente a trav s de l Nota puede utilizar el probador de circuito en esta etapa pa...

Page 23: ...el cable de fase y de circuito mientras que el amarillo verde es el de conexi n a tierra Nota es posible usar un alambre de cobre pulido para representar la bajada a masa en instalaciones el ctricas e...

Page 24: ...rruptor 1 Inserte las terminaciones de cada par de cables en el conector de rosca y proceda a girar cada uno hasta asegurar debidamente el punto de conexi n Repita este paso para ensamblar el resto de...

Page 25: ...el fin de orientarla en la posici n correcta Inserte los dos tornillos centrales a trav s del interruptor hasta el agujero de montaje ubicado en la caja de empalme Coloque el interruptor de tal forma...

Page 26: ...Home de Google Play o Apple App Store y cree una cuenta 60 9 41 AM Nexxt Home Nexxt Solutions Home App Cancel GET Accvent LLC Log in with existing account Create New Account S O L U T I O N S Iniciar...

Page 27: ...Paso 3 Cree una contrase a nueva y seleccione Completo a continuaci n Paso 2 Ingrese el c digo de verificaci n que recibi...

Page 28: ...lic en para a adir un nuevo dispositivo luego elija el cono del Interruptor inteligente Si la luz LED no parpadea velozmente presione el interruptor por 5 segundos para restablecerlo y que la luz LED...

Page 29: ...ea r pidamente y luego haga clic en Siguiente 60 9 41 AM Paso 2 Debe conectarse a la red Wi Fi de 2 4GHz Ingrese la contrase a de la red Aseg rese de utilizar la clave correcta de lo contrario no se c...

Page 30: ...omar alrededor de 30 segundos dependiendo de la conexi n Wi Fi 60 9 41 AM Paso 5 Si el emparejamiento tiene xito ver la notificaci n Agregado en la pantalla El dispositivo ha sido a adido como Interru...

Page 31: ...iar la denominaci n del dispositivo haga clic en el cono del l piz en la pantalla ingrese un nombre nuevo y seleccione Guardar El dispositivo est listo para configurarse a trav s de Horario y del men...

Page 32: ...raci n Horario Le permite programar un d a y hora espec fica para conectar o desconectar el dispositivo Configuraci n del horario Haga clic en Agregar horario para ir a la pantalla de Agregar horario...

Page 33: ...rio respectivo en Android seguido de Borrar 60 9 41 AM Press and hold the Schedule Configuraci n Estado del rel Estado del rel determina el estado del interruptor cuando regresa la energ a despu s de...

Page 34: ...indicadora establece el estado de la luz LED en el interruptor a encendido o apagado 60 9 41 AM Bloqueo para ni os Bloqueo para ni os permite al usuario activar o desactivar el control f sico del inte...

Page 35: ...ic en Borrar Aparece una notificaci n en la pantalla confirmando que ya no quiere compartir el dispositivo con el usuario Haga clic en Confirmar para eliminar permanentemente el nombre del usuario FCC...

Page 36: ...Smart Wi Fi 3 way switch...

Reviews: