background image

Tools needed:  


Cordless drill 


Handsaw 


Spirit Level 


Hammer  


Shovel 


Stepladder 


Pencil 


Measuring tape 


10mm Hex bit 


PZ 2 Drill Bit 


Ground Preparation 

1.


Lay out the base, slide and the 3m swing bar in the position that you intend the climbing 
frame to be placed. Ensure the base is parallel of any buildings, fences etc. that you are 
wishing to match in with. This will give you the size of the footprint the frame will take up in 
the garden.  

2.


Allow for at least 1.8m clearance beyond the end of the slide and 1.2m clearance for the 
steps, rock module and swing module. 

3.


Once you are happy that the layout is correct, remove the swing bar and slide.  

4.


Mark out clearly the centre of all 4 cut outs of the base. Once these are marked you can lift 
the bases out of your way and then dig your holes. 

5.


If the climbing frame is on a level surface, then dig the 4 holes 

at a diameter of 12” and 

depth 12”. The tricky part is when the surface is uneven; in this case you would have to 

compensate for the slope by making some holes deeper or shallower than others (minimum 

depth of 10”). The bottoms of all 4 hole

s need to be level. 


Summary of Contents for Causeway 6ft Climbing Frame

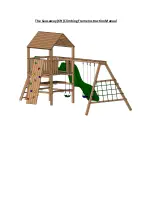
Page 1: ...The Causeway 6ft Climbing Frame Instruction Manual...

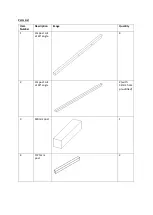
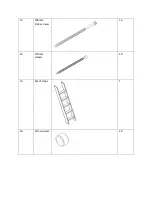
Page 2: ...Parts List Item Number Description Image Quantity 1 3m post cut at 40 angle 4 2 3m post cut at 60 angle 2 with 32mm hole pre drilled 3 420mm post 1 4 1575mm post 2...

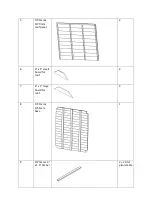
Page 3: ...5 1755mm x 1170 mm roof panel 2 6 6 x 1 small board for roof 2 7 6 x 1 large board for roof 2 8 1755mm x 1755mm base 1 9 1575mm x 3 x 1 5 timber 2 20 for picnic table...

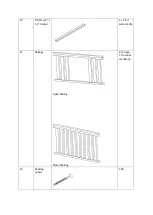
Page 4: ...10 1755mm 3 x 1 5 timber 5 2 for picnic table 11 Railings Open Railing Closed Railing 4 3 open 1 closed as standard 12 Decking screws 200...

Page 5: ...13 200mm index screws 16 14 120mm screws 20 15 Set of steps 1 16 Screw covers 20...

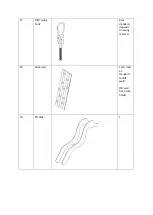
Page 6: ...17 M10 swing hook 6 as standard depends on swing choices 18 Rock wall 1 10 rocks as standard for 8ft wall 5ft wall has 5 rock holds 19 9ft slide 1...

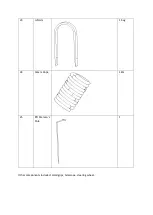
Page 7: ...20 Swing varies depending on customers choice 3 as standard 21 10ft Monkey Bars 1 holes pre drilled for swing hooks 22 3m x 3 x 1 5 2...

Page 8: ...23 U Nails 1 bag 24 16mm Rope 18m 25 8ft Fireman s Pole 1 Other components included Handgrips telescope steering wheel...

Page 9: ...1 8m clearance beyond the end of the slide and 1 2m clearance for the steps rock module and swing module 3 Once you are happy that the layout is correct remove the swing bar and slide 4 Mark out clea...

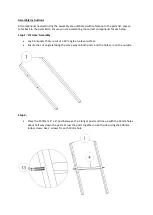
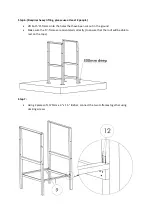
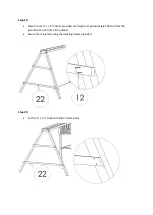
Page 10: ...step Step 1 H Frame Assembly Lay 2 3m posts that are cut at a 40 angle on a level surface Ensure the cut angle is facing the same way on both posts and the holes are on the outside Step 2 Place the 1...

Page 11: ...mark to each post 2100mm down from the top of the post Using a piece of 1755mm 3 x 1 5 timber and the 65mm decking screws screw the timber to the 3m posts at the 2 4m mark you made on the posts this i...

Page 12: ...n the top of the post and screw into place using the 65mm decking screws Steps 3 and 4 strengthen the H frame structure without this additional support at the top and bottom the frame will twist once...

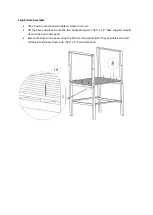
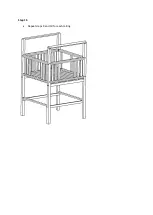
Page 13: ...H frames into the holes that have been cut out in the ground Make sure the H frames are orientated correctly to ensure that the roof will be able to rest on the tops Step 7 Using 2 pieces of 1575mm x...

Page 14: ...own Lift the base and place it onto the two horizontal posts The 3 x 1 5 base supports should sit onto the horizontal posts Secure the base to the posts using the 120mm screws provided They should be...

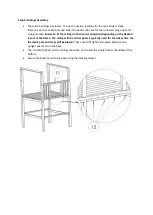
Page 15: ...railings in their correct positions depending on the desired layout of the frame The railing with 3 vertical posts is typically used for the side where the fireman s pole and steps will be placed They...

Page 16: ...sitting on them the decking screws should be screwed in from beneath at an angle between each of the 3 x 1 5 base supports Step 10 To secure each railing to the upright posts screw through the upright...

Page 17: ...Step 11 Repeat steps 9 and 10 for each railing...

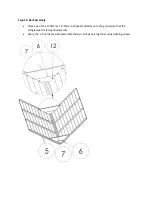
Page 18: ...Assembly Place one of the 1755mm x 1170mm roof panels directly onto the ground so that the shingled part is facing downwards Using the v boards provided assemble the two roof panels together using de...

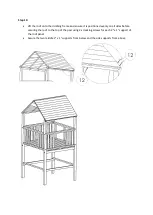
Page 19: ...e and ensure it is positioned evenly on all sides before securing the roof to the top of the post using 2 x decking screws for each 2 x 1 support of the roof panel Secure the two middle 2 x 1 supports...

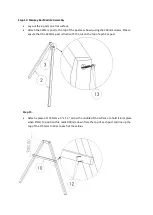
Page 20: ...the 200mm screws Please ensure that the 420mm post is flush with the cut on the top of each 3m post Step 15 Attach a piece of 1755mm x 3 x 1 5 across the middle of the A frame to hold it in its place...

Page 21: ...centre of the frame The holes on the ground should then be marked and the A frame should be sunk into its place so that the monkey bar is level If your garden is level holes about 250mm 300mm will suf...

Page 22: ...anging either side the same distance Use the 200mm screws provided to screw the monkey bars to the 3m posts of the A frame and the 120mm screws to screw down into the 420mm post Use the 120mm screws t...

Page 23: ...e 3m 3 x 1 5 timber provided at a height of approximately 200mm from the ground to the bottom of the timber Secure them in place using the decking screws provided Step 20 Cut the 3 x 1 5 flush with th...

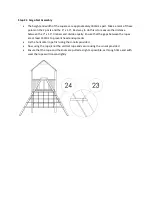
Page 24: ...between the 3 x 1 5 timbers and divide equally Ensure that the gaps between the ropes are at least 230mm to prevent head entrapments Fix the horizontal rope first using the U nails provided Now using...

Page 25: ...Assembly The steps might have to be cut or dug into place depending on the slope of your surface They are secured using decking screws through the top and sides of the steps into the base of the tower...

Page 26: ...out the same distance as the turn in the pole itself Dig a hole about 10 deep and 10 in diameter Place the fireman s pole into the hole and cut off any excess length so that the pole can be secured i...

Page 27: ...l against the top of a closed railing Measure the amount you may have to take off the bottom of the rock wall Cut the bottom of the rock wall to ensure that it fits flush onto the top of the top rail...

Page 28: ...Slide Assembly Using 2 decking screws secure the slide to the bottom timber of an open railing through the pre drilled holes in the slide Step 27 Swing Attachment Hang your chosen swings from the swin...

Page 29: ...bottom of the climbing frame Step 7 add an additional 2 x 1575mm 3 x 1 5 timbers beside these to form the seating for the picnic table Step 29 Measure 300mm above the seating and mark all 4 posts Usi...

Page 30: ...he table top itself Screw these into place using the 65mm decking screw provided again predrilling the holes Step 31 Cut 3 pieces of 1575mm x 3 x 1 5 to size to use as supports for underneath the benc...

Page 31: ...4 vertical posts that make up the H Frame and the holes on the A frame Step 33 Concreting structure Using postcrete and following the manufacturer s instructions concrete all the posts into the ground...

Page 32: ...is to put on the accessories give everything a good sand down to avoid the children getting splinters from any rough edges All screws should also be checked to ensure they are flush to the surface th...

Page 33: ...used on your climbing frame has been pressure treated This essentially means that it has been put into a pressurised vessel and has been impregnated with wood preserve With time and due exposure to w...

Reviews: