background image

18 

U-Nails 


Approx. 50 


Other components included: Handgrips, telescope, steering wheel. 

Tools needed:  


Cordless drill 


Handsaw 


Spirit Level 


Hammer  


Stepladder 


Pencil 


Measuring tape 


10mm Hex bit 


PZ 2 Drill Bit 

Ground Preparation 

1.


Lay out the base and slide in the position that you intend the climbing frame to be placed. 
Ensure the base is parallel of any buildings, fences etc. that you are wishing to match in with. 
This will give you the size of the footprint the frame will take up in the garden.  

2.


Allow for at least 1.8m clearance beyond the end of the slide and 1.2m clearance for the 
steps. 

3.


Once you are happy that the layout is correct, remove the slide.  


Summary of Contents for Star Pillar

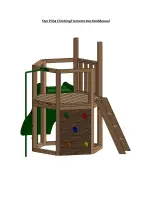
Page 1: ...Star Pillar Climbing Frame Instruction Manual...

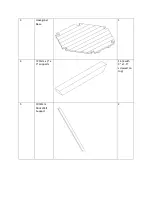
Page 2: ...Parts List Item Number Description Image Quantity 1 2 4m post 2 2 1940mm post 4...

Page 3: ...3 Hexagonal Base 1 4 720mm x 3 x 3 supports 16 4 with 3 x 1 5 screwed on top 5 1050mm Rock Wall Support 2...

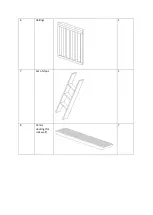
Page 4: ...6 Railings 1 7 Set of steps 1 8 32mm decking for rock wall 7...

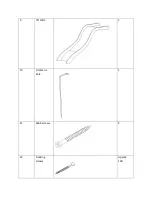
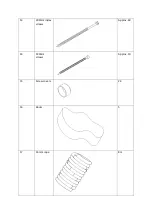
Page 5: ...9 7ft Slide 1 10 Fireman s Pole 1 11 6x60 screws 4 12 Decking screws Approx 100...

Page 6: ...13 200mm index screws Approx 60 14 120mm screws Approx 10 15 Screw covers 24 16 Rocks 5 17 16mm rope 8m...

Page 7: ...out the base and slide in the position that you intend the climbing frame to be placed Ensure the base is parallel of any buildings fences etc that you are wishing to match in with This will give you...

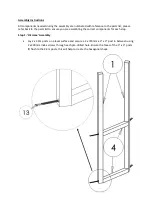
Page 8: ...t to ensure you are assembling the correct components for each step Step 1 H Frame Assembly Lay 2 x 2 4m posts on a level surface and secure a 2 x 720mm x 3 x 3 post in between using 2 x 200mm index s...

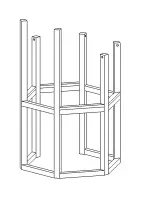
Page 9: ...rt the base decking so ensure the 3 x 1 5 is above the 3 x 3 supports NOTE You will need space for the rock wall between the posts at one side of the frame so don t secure the lower 3 x 3 support on t...

Page 10: ......

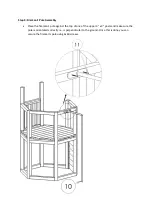
Page 11: ...x 3 supports that are opposite each other that don t have the 3 x 1 5 screwed to them Secure the base to the supports using 120mm screws through the 3 x 1 5 base supports You can also secure the base...

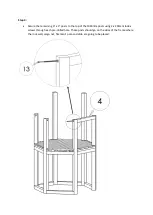
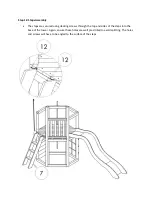
Page 12: ...3 x 3 posts to the top of the 1940mm posts using 2 x 200mm index screws through each pre drilled hole These posts should go on the sides of the frame where the rock wall cargo net fireman s pole and s...

Page 13: ......
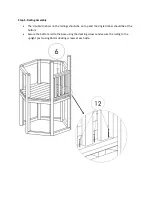
Page 14: ...le timbers on the railings should be on top and the single timber should be at the bottom Secure the bottom rail to the base using the decking screws and secure the railing to the upright posts using...

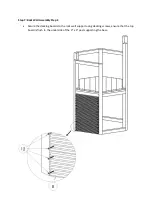
Page 15: ...Step 6 Rock Wall Assembly Step 1 Secure the 1050mm rock wall supports to the inside of the two 1940mm posts without the lower 3 x 3 support between them Use decking screws to secure them...

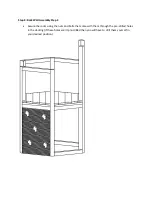
Page 16: ...Step 7 Rock Wall Assembly Step 2 Secure the decking boards to the rock wall support using decking screws ensure that the top board is flush to the underside of the 3 x 3 post supporting the base...

Page 17: ...embly Step 3 Secure the rocks using the nuts and bolts that come with them through the pre drilled holes in the decking if these holes aren t pre drilled then you will have to drill them yourself in y...

Page 18: ...ly Place the fireman s pole against the top of one of the upper 3 x 3 posts and make sure the pole is orientated correctly i e is perpendicular to the ground Once this is done you can secure the firem...

Page 19: ...rope first using the U nails provided Now using the rope knot the vertical rope and secure using the u nails provided Ensure that the rope and the knots are pulled as tight as possible as through time...

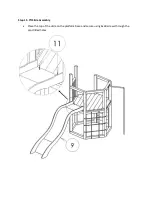
Page 20: ...Step 11 7ft Slide Assembly Place the top of the slide on the platform base and secure using 6x60 screws through the pre drilled holes...

Page 21: ...re secured using decking screws through the top and sides of the steps into the base of the tower Again ensure these holes are well pre drilled to avoid splitting The holes and screws will have to be...

Page 22: ...thing a good sand down to avoid the children getting splinters from any rough edges All screws should also be checked to ensure they are flush to the surface they are securing and the screw caps shoul...

Page 23: ...used on your climbing frame has been pressure treated This essentially means that it has been put into a pressurised vessel and has been impregnated with wood preserve With time and due exposure to w...

Reviews: