11
GB
4.4) Leaf length self-learning
After self-learning the devices, leds L3 and L4 start flashing; the control unit must self-learn the length of the gate. During this stage, the
length of the leaf is measured from the closing limit switch to the opening limit switch. This measurement is required to calculate the decel-
eration points and the partial opening point.
If the above conditions are not satisfied, immediately switch off the power supply to the control unit and check the electrical connections
more carefully. For more useful information see also chapter “7.6 Troubleshooting”.
For further information, consult the radio receiver instruction manual.
1.
Press and hold keys
[
▼
]
and
[Set]
2.
Release the keys when the manoeuvre starts (after approx. 3 s)
3.
Check the manoeuvre in progress is an opening manoeuvre. Otherwise, press the
[Stop]
key and carefully
check Paragraph “4.1 Choosing the Direction”, then repeat the process from Point 1.
4.
Wait for the control unit to open the gate until it reaches the opening limit switch; the closing manoeuvre will
start immediately afterwards.
5.
Wait for the control unit to close the gate.
4.5) Checking gate movements
On completion of self-learning of the length of the leaf, a number of
manoeuvres should be carried out to ensure correct gate travel
1.
Press the
[Open]
key to open the gate. Check that gate opening
occurs regularly, without any variations in speed. The leaf must
only slow down and stop when it is between 70 and 50 cm from
the opening mechanical stop. Then, at 2÷3 cm from the mechan-
ical opening stop the limit switch will trigger.
2.
Press the
[Close]
key to close the gate. Check that gate closing
occurs regularly, without any variations in speed. The leaf must
only slow down and stop when it is between 70 and 50 cm from
the closing mechanical stop. Then, at 2÷3 cm from the mechani-
cal closing stop the limit switch will trigger.
3.
During the manoeuvre, check that the flashing light flashes at a
speed of 0.5 seconds on and 0.5 seconds off. If present, also
check the flashes of the light connected to the open gate indica-
tor terminal: slow flashes during opening, quick flashes during
closing.
4.
Open and close the gate several times to make sure that there are
no points of excessive friction and that there are no defects in the
assembly or adjustments.
5.
Check that the fixture of the RUN gearmotor, the rack and the lim-
it switch brackets are solid, stable and suitably resistant, even if
the gate accelerates or decelerates sharply.
4.6) Preset functions
The RUN control unit has a number of programmable functions.
These functions are set to a configuration which should satisfy most
automations. However, the functions can be modified at any time by
means of a special programming procedure.
Please refer to paragraph “7.2 Programming” for further information.
20
4.7) Radio receiver
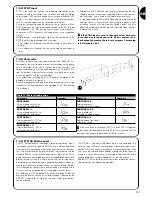
An “SM” connector for SMXI or SMXIS type optional radio receivers is fitted on the control unit to enable remote control of RUN.
Disconnect the power supply and follow the operations indicated in fig. 21 to install the radio receiver. The association between the SMXI
and SMXIS radio receiver output and the command performed by RUN is described in table 6:
21
Output N°1
STEP-BY-STEP command
Output N°2
“Partial opening” command
Output N°3
“Open” command
Output N°4
“Close” command
Table 6: commands with transmitter
This is the most important stage in the automation system installa-
tion procedure in order to ensure maximum safety levels. Testing can
also be adopted as a method of periodically checking that all the var-
ious devices in the system are functioning correctly.
Testing of the entire system must be performed by
qualified and experienced personnel who must establish
which tests to conduct on the basis of the risks involved,
and verify the compliance of the system with applicable
regulations, legislation and standards, in particular with
all the provisions of EN standard 12445 which establishes
the test methods for automation systems for gates.
!
5) Testing and commissioning


