34
(positions 0 and 1) search procedure automatically using the same method as that described above for the
"Initial Search" procedure.
7RDFWLYDWHWKHPHFKDQLFDOVWRSVVHDUFK
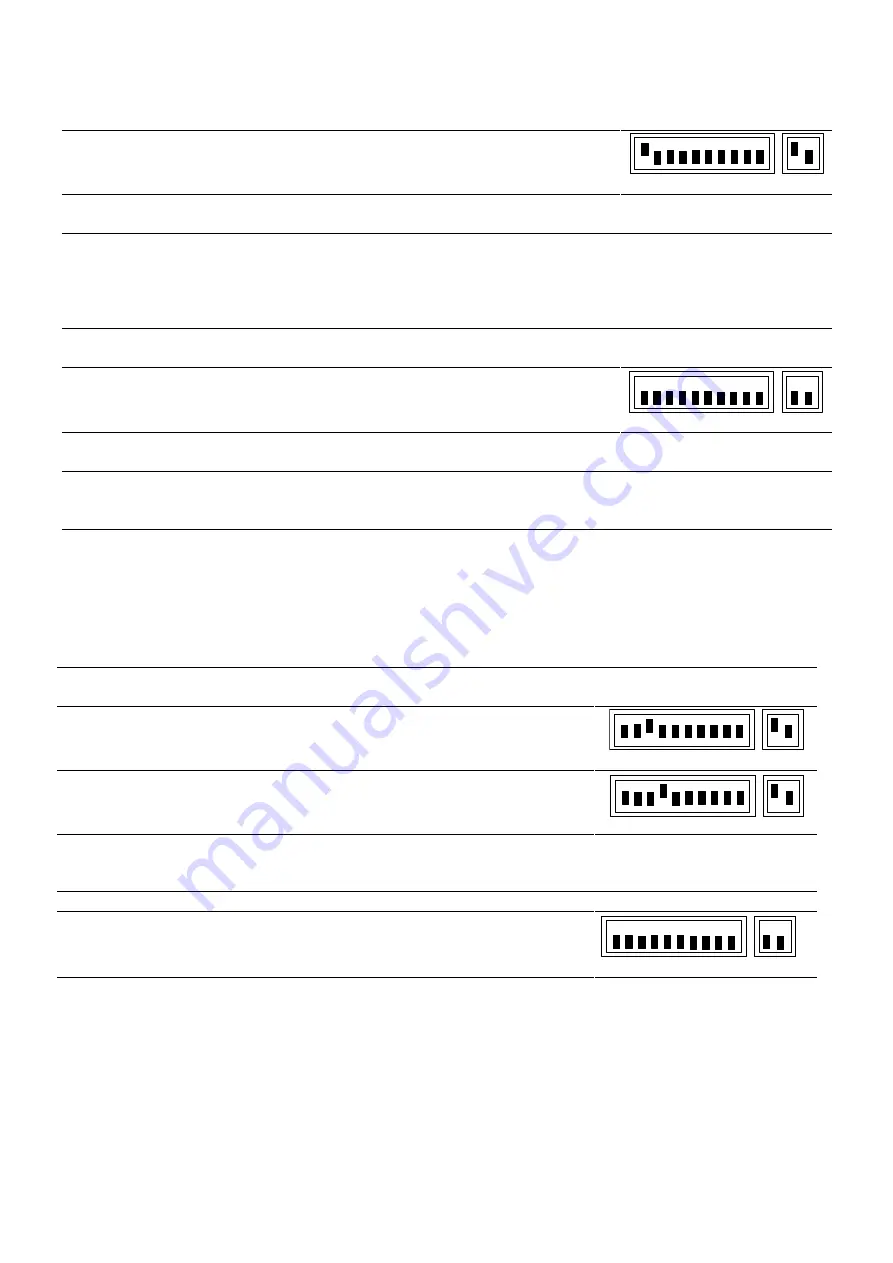
7. Set up the dip switches as shown:
1 2 3 4 5 6 7 8 9 10
11 12
8. release the barrier, move it clear of the mechanical stops so that it is free to move in the opening and
closing directions, and then lock the barrier
9. briefly press the Close button on the board and wait for the control unit to perform a low speed closing
manoeuvre to position 0, a low speed opening manoeuvre to position 1, and a high speed closing
manoeuvre to position 0.
1RWH
if after transmitting the command the first movement is an opening manoeuvre, transmit a second
command to stop the procedure and then invert the polarity of the motor feeding wires.
10. When the sequence described above is concluded, a mathematical operation is executed to calculate the
deceleration positions automatically.
11. Return the dip switches to the positions shown:
1 2 3 4 5 6 7 8 9 10
11 12
12. The mechanical stops "automatic search" procedure is now terminated and the gear motor is ready for use.
Set up the "functions" dip switches as required.
1RWH
If one of the safety devices should trip or another command pulse is received during the
"automatic search procedure", movement of the bar will be interrupted immediately; in this case the above
procedure must be repeated starting from step 1.
0DQXDOSURJUDPPLQJRIGHFHOHUDWLRQSRVLWLRQV
This procedure involves the manual input of the positions for the start of deceleration as an alternative to the
positions calculated automatically with the initial or automatic mechanical stops search procedure.
7RSURJUDPWKHGHFHOHUDWLRQSRVLWLRQVPDQXDOO\
Set up the dip switches in accordance with one of the following diagrams depending on the parameter to
be saved
326,7,215&
Deceleration start position during the closing manoeuvre
1 2 3 4 5 6 7 8 9 10
11 12
326,7,215$
Deceleration start position during the opening manoeuvre
1 2 3 4 5 6 7 8 9 10
11 12
6. Press the Open or Close button on the board and hold it down until the required position has been
reached.
1RWH
Press the Stop button if you wish to accelerate movement of the bar.
7. Once the position has been reached release the buttons and execute the "Save procedure"
heading 17.4)
8. Return the dip switches to the positions shown:
1 2 3 4 5 6 7 8 9 10
11 12
6DYHSURFHGXUH
This operation serves to upload the value of the parameter you wish to program to the control unit permanent
memory.
Summary of Contents for Signo
Page 1: ...1 ISTSG REV 00 01 ...
Page 2: ...2 1 2 A B SIGNO3 SIGNO4 SIGNO6 ...
Page 3: ...3 4 5 7 3 6 ...
Page 4: ...4 8 9 11 10 12 ...
Page 25: ...25 ISTSG REV 00 01 ...


