Roll Off Load Pin Installation
7
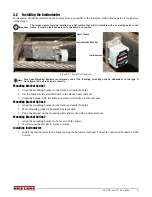
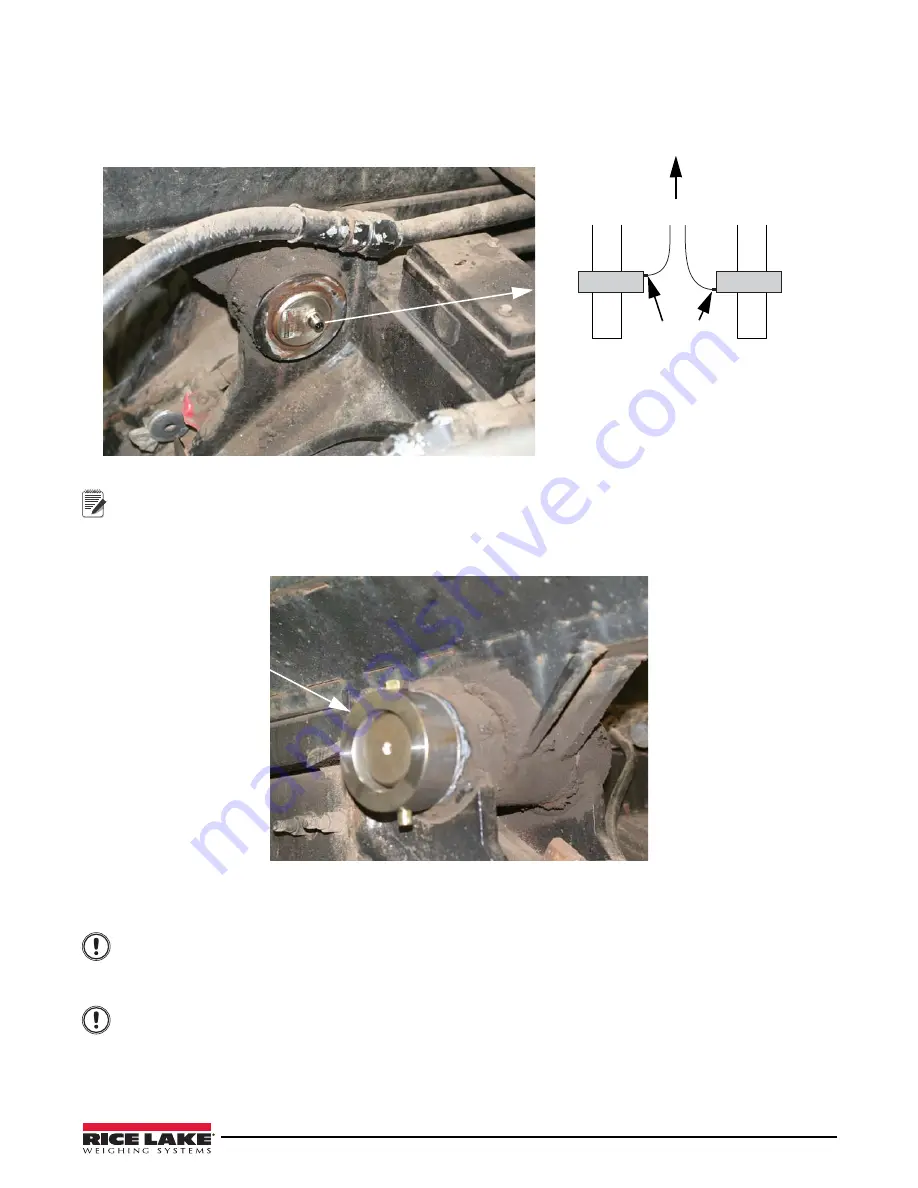
9. Using grease, lubricate the hole and insert the load pin into the frame ensuring the strain gauge seals are
facing toward the front of the truck. The load pins have arrows indicating the downward force, or direction
of load applied to register a positive weight value.
The load pin should extrude from the outside of the frame 4 inches.
Left Rear – Connector should face toward cab.
Right Rear – Connector should face away from
cab
Cab of Truck
Load Pins
Connectors
Figure 3-3. Install Load Pin
Note
See Figure 2-2 and 2-3 for load pin specifications and load direction.
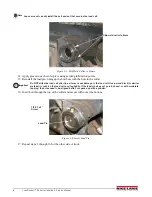
10. To install the collar kit, place collar on the load pin aligning the holes and secure with bolt. Pin should go in
from the top and be vertical. Use a small square to ensure the bolt is precisely vertical.
Collar and bolt
Figure 3-4. Install Collar and Bolt
11. Tack weld the collar to the frame to hold in place.
Important
Important
DO NOT overheat the load pin when tack welding. This may damage the load pin. Do not exceed 140° F.
12. Remove the load pin from the frame.
Load pin should be easily removed by hand. If not, use a wood block (or similar material) to cushion the
load pin, and tap lightly to remove.
Do NOT strike the load pin directly, it may cause damage to the load pin.
13. Skip-weld the collar to frame with four welds of 1 inch each, is adequate. However if the installer prefers,
the entire collar can be welded in place. Allow collar to cool before proceeding to next step. Ensure there
are no weld remnants inside the collar or pivots. Remove any such residuals.

