4
RoughDeck Low Profile Floor Scale Installation Manual
2.4
Assembly
The following paragraphs present instructions for installing and adjusting the scale feet and mounting plate
installation.
2.4.1
Installing and Adjusting Feet
For load cell protection during shipping, the scale feet are shipped detached from the load cells. The feet are
secured to the bottom of the shipping pallet along with the load cell cable, strain relief fitting and product literature.
Remove all parts from the envelope.
Screw one foot into each load cell and turn all the way in until the foot touches either the load cell or the underside
of the deck. Then unscrew each foot three complete turns.
Place a spirit level on the deck. Adjust any
high
corners not in contact with the floor by further unscrewing the feet
on those corners until they just contact the floor surface. When all feet are in contact with the floor, check the deck
with the spirit level to be sure the scale is within 1/4 inch of level.
2.4.2
Mounting Plate Installation
For permanent applications, the scale should be secured to the floor to prevent sideways movement. Two mounting
plates, with holes that slightly exceed the foot diameter, are available as an option for that purpose.
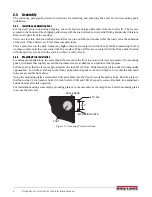
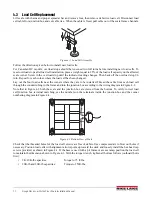
Lift the scale so that the feet are approximately one inch off the floor. Slide mounting plates under two diagonally
opposed feet. Lower the scale back to the floor, and position the plates as shown in Figure 2-2 so that the bolt down
holes are accessible from above.
Using the mounting plates as templates, drill pilot holes into the floor for suitable anchor bolts. Bolt the plates to
the floor using 1/2 inch anchor bolts (3/4 inch bolts for 20K and 30K-lb capacity scales). Recheck foot adjustment
and deck level after this operation.
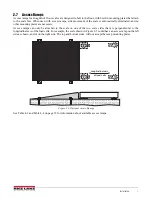
For installations using access ramps, mounting plates are not necessary as the ramps have built-in mounting plates
to secure the scale feet.
4.50"
.812" DIA
MOUNTING PLATE
SCALE DECK
FOOT
Figure 2-2. Mounting Plate Installation


