LLE14BRDA001A/E
7 - 19
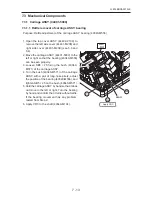
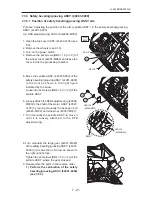
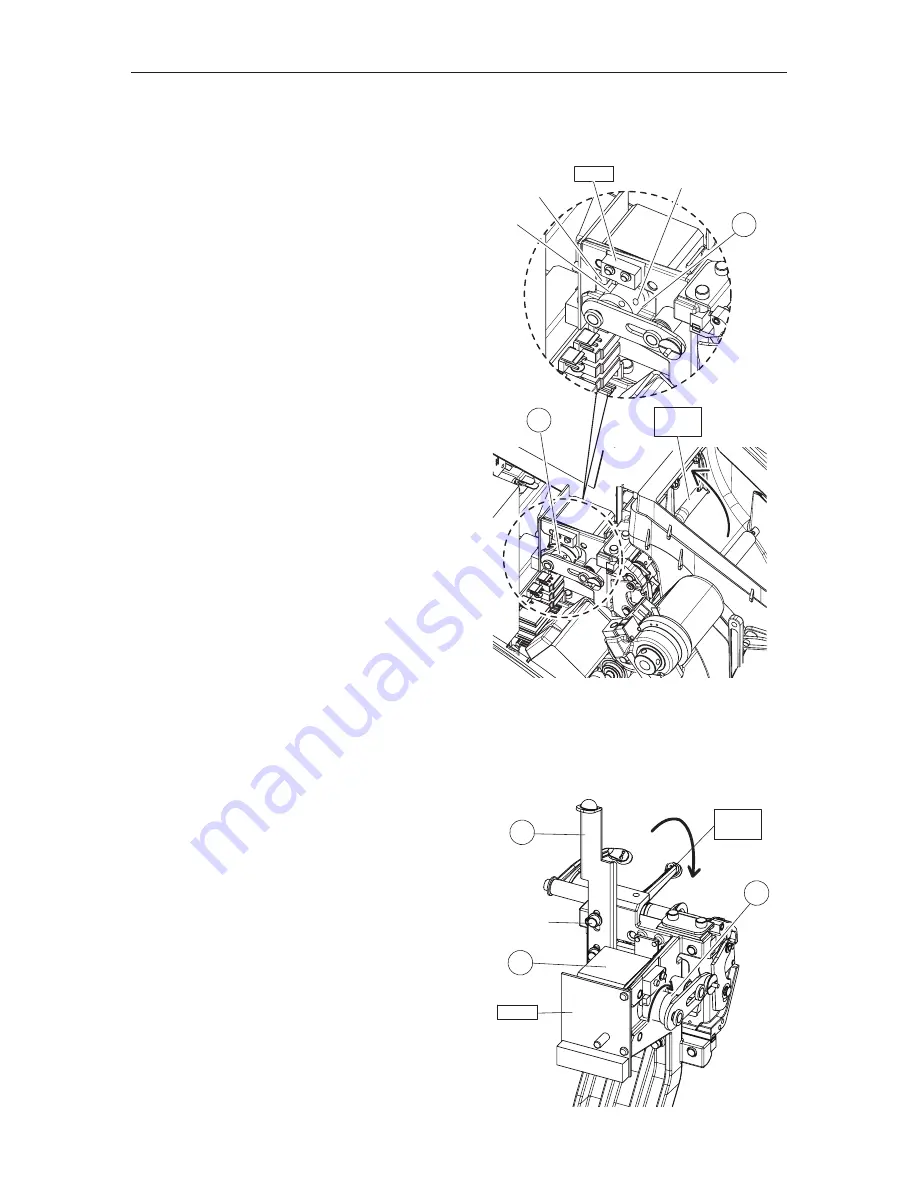
7.3.2.2 Initial position of feeler ASSY.
Purpose: Adjusting the initial position of the feeler ASSY.(40340-4100)
1. Open the top cover ASSY. (44402-2100) (see
5.3).
2. Turn the crank (40340-M272) until the feeler
ASSY. (40340-4100) flips up and the crank
cannot be turned.
3. Loosen HH4 × 6 of the dog (40340-M970).
4. Adjust the position of the dog (40340-M970)
so that the micro switch roller of cable CA31
(40340-CA31) is centered relative to the notch
of the dog, then screw HH4 × 6.
5. Reassemble the parts in the reverse order.
1) Perform the calibration of the lens
measurement unit ASSY. (see 7.5.5).
2) Adjust the feeler axis (see 7.6.1).
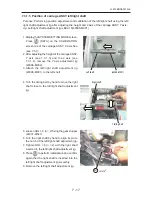
7.3.2.3 Voltage of lens measurement unit ASSY.
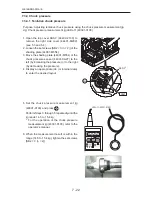
Purpose: Adjusting the initial position of the feeler ASSY. (40340-4100)
1. Open the top cover ASSY. (44402-2100) (see
5.3).
2. Turn on the main body.
3. After the initialization, disconnect cable
connector J2 (P602) of the pulse motor
(40340-E033) for flipping up the feeler.
4. Turn the crank in the direction of arrow as
shown to the right, release the lock of the
feeler ASSY. (40340-4100), and lower the
ASSY. to the measurement position.
5. Touch the positive probe of the multimeter to
the J5 2nd pin of the BA06 board and the
negative probe to GND of the main board
(44401-BA01).
-4100
40340
272
970
CA31
Notch
HH4×6
Roller
2
SB4×10
E33
BA06
290
272
-3000
40340
Summary of Contents for Le 1000
Page 1: ...PATTERNLESS EDGER Model SERVICE MANUAL June 2008 Pages in total 152 LLE14BRDA001A E...
Page 8: ...This page is intentionally left blank LLE14BRDA001A E 1 2...
Page 10: ...This page is intentionally left blank LLE14BRDA001A E 2 2...
Page 19: ...LLE14BRDA001A E 3 9 3 3 Model Configuration...
Page 22: ...LLE14BRDA001A E 3 12 5 4 01 000000 9CVGT RTGUUWTG CZ M2C EU area only...
Page 28: ...LLE14BRDA001A 3 18...
Page 34: ...LLE14BRDA001A E This page is intentionally left blank...
Page 91: ...LLE14BRDA001A E 7 27 7 4 2 Parameter list of BL motor 40340 E066 E067 inverter User parameter...
Page 92: ...LLE14BRDA001A E 7 28 User parameter...
Page 93: ...LLE14BRDA001A E 7 29 System parameter...
Page 126: ...LLE14BRDA001A E 8 2 8 2 Connector Cable...
Page 127: ...LLE14BRDA001A E 8 3...
Page 128: ...LLE14BRDA001A E 8 4...
Page 129: ...LLE14BRDA001A E 8 5...
Page 130: ...LLE14BRDA001A E 8 6...
Page 131: ...LLE14BRDA001A E 8 7 44401 BA01 2 2 2 2 2 2 2 2 2 2 2 44401 BA01 MAIN BOARD 2 2 2...
Page 134: ...LLE14BRDA001A E 8 10 8 5 Grease MSDS 8 5 1 NIPPECO LLP...
Page 135: ...LLE14BRDA001A E 8 11...
Page 140: ...LLE14BRDA001A E 8 16 8 5 4 NBU15...
Page 141: ...LLE14BRDA001A E 8 17...
Page 142: ...LLE14BRDA001A E 8 18...
Page 143: ...LLE14BRDA001A E 8 19...
Page 144: ...LLE14BRDA001A E 8 20...
Page 145: ...LLE14BRDA001A E 8 21 8 6 Troubles and Measures...
Page 146: ...LLE14BRDA001A E 8 22...
Page 147: ...LLE14BRDA001A E 8 23...
Page 148: ...LLE14BRDA001A E 8 24...
Page 149: ...LLE14BRDA001A E 8 25...
Page 152: ...LLE14BRDA001A E 8 28 This page is intentionally left blank...

