25
CHECK AND ADJUSTMENT PROCEDURES: Surface Measurement (LMU) Calibration
4
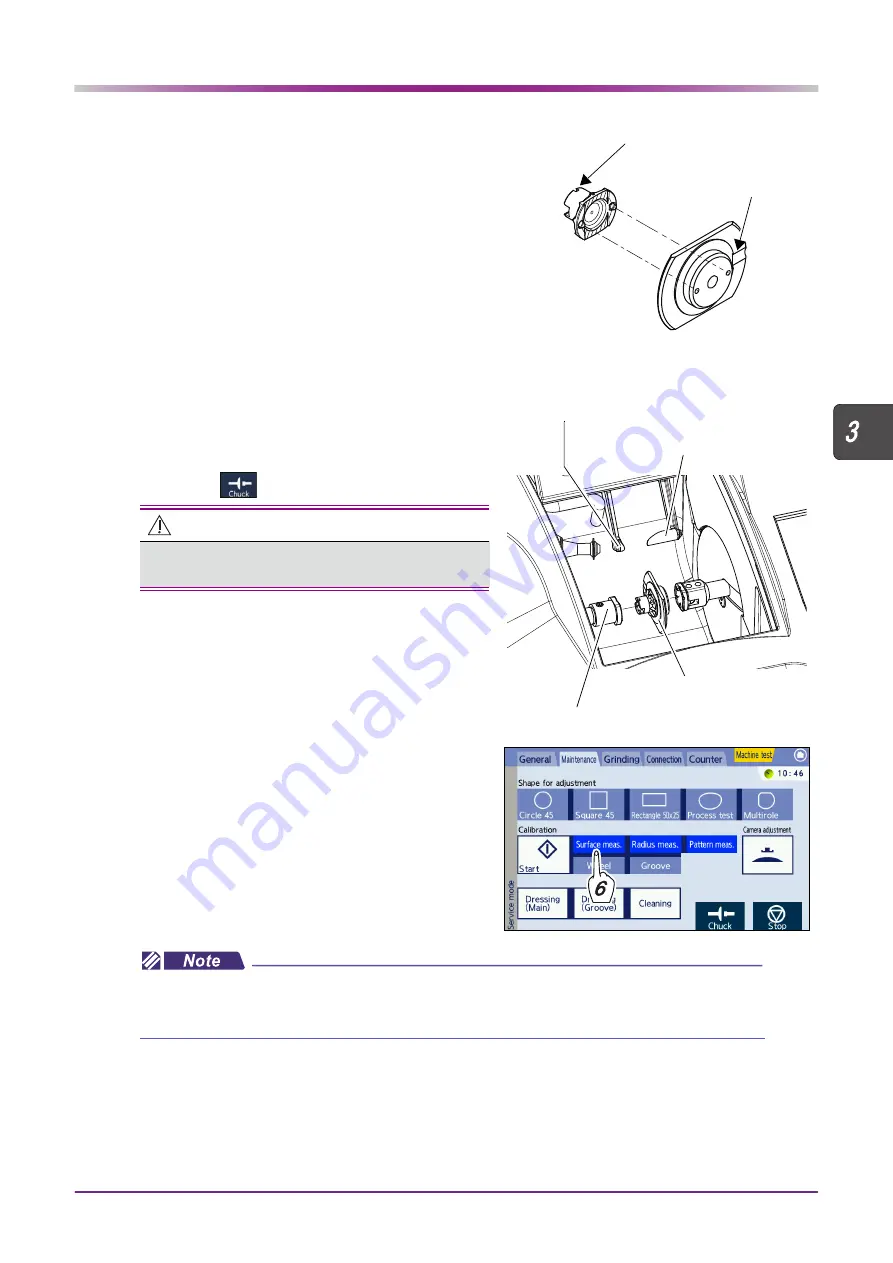
Attach the pattern holder to the calibration
jig in the orientation shown to the right.
Insert the two pins of the pattern holder into the holes
of the calibration jig.
Attach the pattern holder to the flat surface of the cal-
ibration jig.
The top mark on the pattern holder and the groove of
the calibration jig must be orientated as shown to the
right.
5
Set the calibration jig to the lens adapter.
1)
Fit the calibration jig to the lens adapter as
shown to the right and hold it by hand.
2)
Press
to secure the jig.
6
Press the “Surface meas.” button in the Cal-
ibration field.
The selected button is displayed in blue.
“Surface meas.”: Calibration of surface mea-
surement (LMU)
Top mark
Calibration jig
Groove
Pattern holder
CAUTION
• Be careful not to get fingers caught when chucking
(securing) a lens.
Calibration jig
LMU (feeler for surface measurement)
RMU (feeler for outer diameter measurement)
Lens adapter
• Depending on the selected item, other items may automatically be selected at the same time. This is
because additional calibration is required at the same time and it cannot be cancelled. Continue with
calibration.


