8 - 28
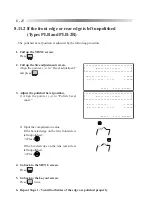
5. Input the compensation value of the groove
position.
To shift the groove toward the front side of the
lens, press
.
To shift toward the rear side, press
.
The arrow
←
shows that the groove is moved
toward the front side and
→
shows that it is
moved toward the rear side.
6. Go back to the MENU screen.
Press
.
7. Go back to the Layout screen.
Press
twice.
8. Repeat Steps 1 - 7 until the groove position comes to the right position.
8.12.3 Adjusting the groove depth (LE-9000EX Express only)
8.12.3.1 Groove depth is not made as designated (LE-9000EX Express only)
Groove depth should be made evenly. However, if the grooving is not made at the designated
depth, adjust it by changing the constant value of the chamfering wheel.
1. Call up the MENU screen.
Press
.
2. Call up the Groove & SFB adjustment
screen.
Align the pointer (
→
) to “Groove & SFB
adjustment” and press
.
㧖㧖㧖㧖㧖㧖㧖㧖㧖㧖㧖㧖㧖㧖㧖㧖㧖㧖㧖㧖㧖㧖㧖㧖㧖㧖㧖㧖㧖㧖㧖㧖
㧖
ޓ
㧹
㧱
㧺
㨁
ޓ
㧖
㧖ޓޓޓޓޓޓ㧸㨑㨚㨓㨠㨔ޓ㧾㧦㧝㧠㧟㧚㧣㧤ޓ㧸㧦㧝㧠㧟㧚㧣㧢㧖
㧖㧖㧖㧖㧖㧖㧖㧖㧖㧖㧖㧖㧖㧖㧖㧖㧖㧖㧖㧖㧖㧖㧖㧖㧖㧖㧖㧖㧖㧖㧖㧖㧖
ޓޓޓ
ޓψޓ㧼㨞㨛㨏㨑㨟㨟ޓ㨏㨛㨡㨚㨠㨑㨞ޓޓޓޓޓޓޓޓޓޓޓޓޓޓޓ
ޓޓޓ㨃㨔㨑㨑㨘ޓ㨐㨞㨑㨟㨟㨕㨚㨓ޓޓޓޓޓޓޓޓޓޓޓޓޓޓޓޓ
ޓ
ޓ
ޓ
ޓ
ޓ
ޓޓޓ㧿㨕㨦㨑ޓ㨍㨐㨖㨡㨟㨠㨙㨑㨚㨠ޓޓޓޓޓޓޓޓޓޓޓޓޓޓޓ
ޓ
ޓ
ޓ
ޓ
ޓޓޓ㧮㨑㨢㨑㨘ޓ㨍㨐㨖㨡㨟㨠㨙㨑㨚㨠ޓޓޓޓޓޓޓޓޓޓޓޓޓޓ
ޓ
ޓ
ޓޓޓ㧭㨄㧵㧿ޓ㨍㨐㨖㨡㨟㨠㨙㨑㨚㨠ޓޓޓޓޓޓޓޓޓޓޓޓޓޓޓ
ޓ
ޓ
ޓ
ޓ
ޓޓޓ㧼㧰ޓ㨍㨐㨖㨡㨟㨠㨙㨑㨚㨠ޓޓޓޓޓޓޓޓޓޓޓޓޓޓޓޓޓ
㧖㧱㨤㨑㨏㨡㨠㨑ޓ㧦ޓ㧼㨞㨑㨟㨟ޓ㧿㧱㧸㧱㧯㨀ޓ
ޓޓޓ㧼㨞㨛㨏㨑㨟㨟ޓ㨏㨛㨡㨚㨠㨑㨞ޓޓޓޓޓޓޓޓޓޓޓޓޓޓޓ
ޓޓޓ㨃㨔㨑㨑㨘ޓ㨐㨞㨑㨟㨟㨕㨚㨓ޓޓޓޓޓޓޓޓޓޓޓޓޓޓޓޓ
ޓ
ޓ
ޓ
ޓ
ޓ
ޓޓޓ㧿㨕㨦㨑ޓ㨍㨐㨖㨡㨟㨠㨙㨑㨚㨠ޓޓޓޓޓޓޓޓޓޓޓޓޓޓޓ
ޓ
ޓ
ޓ
ޓ
ޓޓޓ㧮㨑㨢㨑㨘ޓ㨍㨐㨖㨡㨟㨠㨙㨑㨚㨠ޓޓޓޓޓޓޓޓޓޓޓޓޓޓ
ޓ
ޓ
ޓޓޓ㧭㨄㧵㧿ޓ㨍㨐㨖㨡㨟㨠㨙㨑㨚㨠ޓޓޓޓޓޓޓޓޓޓޓޓޓ
ޓޓޓ㧼㧰ޓ㨍㨐㨖㨡㨟㨠㨙㨑㨚㨠ޓޓޓޓޓޓޓޓޓޓޓޓޓޓޓޓޓ
ޓ
ޓ
ޓ
ޓޓψ㧳㨞㨛㨛㨢㨑ޓ㧒ޓ㧿㧲㧮ޓ㨍㨐㨖㨡㨟㨠㨙㨑㨚㨠ޓޓޓޓޓޓޓ
ޓ
ޓ
ޓ
ޓ
ޓ
ޓ
ޓ
ޓ
ޓ
ޓ
ޓ
ޓ
Summary of Contents for LE-9000DX Express
Page 1: ...NIDEK PATTERNLESS EDGER LE 9000EX Express LE 9000DX Express OPERATOR SMANUAL...
Page 17: ...2 9 or or Top view...
Page 19: ...2 11...
Page 153: ......


