4 - 13
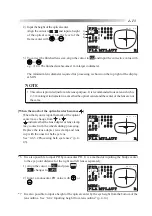
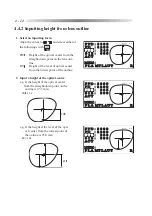
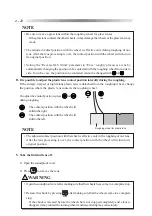
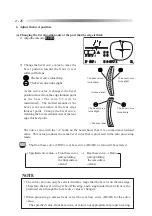
2) Input the height of the optical center.
Align the cursor to
and input a height
of the optical center from the level of the
frame center with
or
.
*7
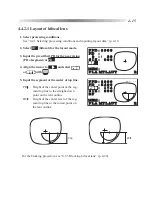
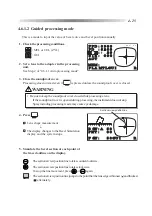
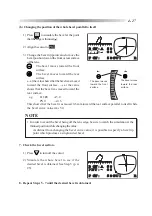
3) To correct the finished lens size, align the cursor to
SIZ
and input the corrective value with
or
.
e.g. +1.00: The finished size becomes 1 mm larger in diameter.
The minimum lens diameter required for processing is shown on the top right of the display
at MIN.
NOTE
• This value is provided just for a reference purpose. It is recommended to use a lens which is
2 - 3 mm longer in diameter in a case that the optical center and the center of the lens are not
the same.
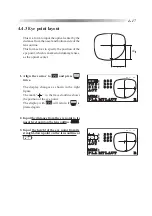
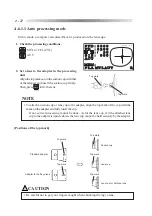
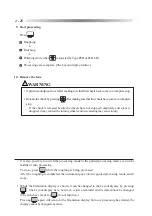
[When the mark of the optical center becomes
]
When the layout is input, the mark of the optical
center may change from
to
.
indicates that the lens adapter or lens clamp
may contact with the wheels during processing.
Replace the lens adapter, lens clamp and lens
cup with the ones for half-eye lens.
See “4.6.3.2 Processing half-eye lenses” (p. 4-
43).
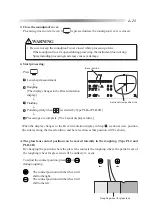
*6 It is also possible to input PD by monocular PD. It is a method of inputting the bridge center
to the eye point distance for the right and left lenses separately.
1) Align the cursor to
PD
C
and press
.
PD
C
changes to
1/2PD
.
2) Input a monocular PD value with
or
.
*7 It is also possible to input a height of the optical center by the eye height from the bottom of the
lens outline. See “4.4.2 Inputting height from lens outline” (p. 4-14).
1)
2)
3)
㧚ޓ
㧚ޓ
ޓ㧚
㧚ޓ
㧹㧵㧺ޓޓ㧢㧢
㧲㧼㧰㧦㧢㧥㧜㧜ޓޓޓޓޓޓޓޓ
㧼㧰
ޓ㧦㧢㧞㧜㧜ޓޓޓޓޓޓޓޓ
ޓޓޓ㧦ޓޓ㧞㧜ޓޓޓޓޓޓޓޓ
㧿㧵㨆㧦ޓ㧜㧜㧜ޓޓޓޓޓޓޓޓ
㧭㧯㨀ޓޓޓޓޓޓޓޓޓޓޓޓޓ
㧹㧱㧹㧦ޓޓޓޓޓޓޓޓޓ
㧼㧸㧭㧹㨀㧸㧭㨁㨀ޓޓޓޓޓ㧾
㧚ޓ
㧚ޓ
ޓ㧚
㧚ޓ
㧹㧵㧺ޓޓ㧢㧢
㧲㧼㧰㧦㧢㧥㧜㧜ޓޓޓޓޓޓޓޓ
㧛㧼㧰
㧦㧟㧝㧜㧜ޓޓޓޓޓޓޓޓ
ޓޓޓ㧦ޓޓ㧞㧜ޓޓޓޓޓޓޓޓ
㧿㧵㨆㧦ޓ㧜㧜㧜ޓޓޓޓޓޓޓޓ
㧭㧯㨀ޓޓޓޓޓޓޓޓޓޓޓޓޓ
㧹㧱㧹㧦ޓޓޓޓޓޓޓޓޓ
㧼㧸㧭㧹㨀㧸㧭㨁㨀ޓޓޓޓޓ㧾
㧚ޓ
㧚ޓ
ޓ㧚
㧚ޓ
㧹㧵㧺ޓޓ㧢㧢
㧲㧼㧰㧦㧢㧥㧜㧜ޓޓޓޓޓޓޓޓ
㧼㧰
ޓ㧦㧢㧞㧜㧜ޓޓޓޓޓޓޓޓ
ޓޓޓ㧦ޓޓ㧞㧜ޓޓޓޓޓޓޓޓ
㧿㧵㨆㧦ޓ㧜㧜㧜ޓޓޓޓޓޓޓޓ
㧭㧯㨀ޓޓޓޓޓޓޓޓޓޓޓޓޓ
㧹㧱㧹㧦ޓޓޓޓޓޓޓޓޓ
㧼㧸㧭㧹㨀㧸㧭㨁㨀ޓޓޓޓޓ㧾
Summary of Contents for LE-9000LX
Page 1: ...PATTERNLESS EDGER Model LE 9000LX OPERATOR SMANUAL ...
Page 17: ...2 9 Top view or or ...
Page 19: ...2 11 ...
Page 145: ......

