35
Chapter
6:
Getting Started
B.
24/7 Continuous
–channel records non-stop during selected times.
C.
Custom Schedule
–you define the recording modes, dates and times.
NOTE:
If you select Custom Schedule, but do not edit some channels, those
channels will be set to 24/7 Motion.
If no camera is connected to the channel, just click Next.
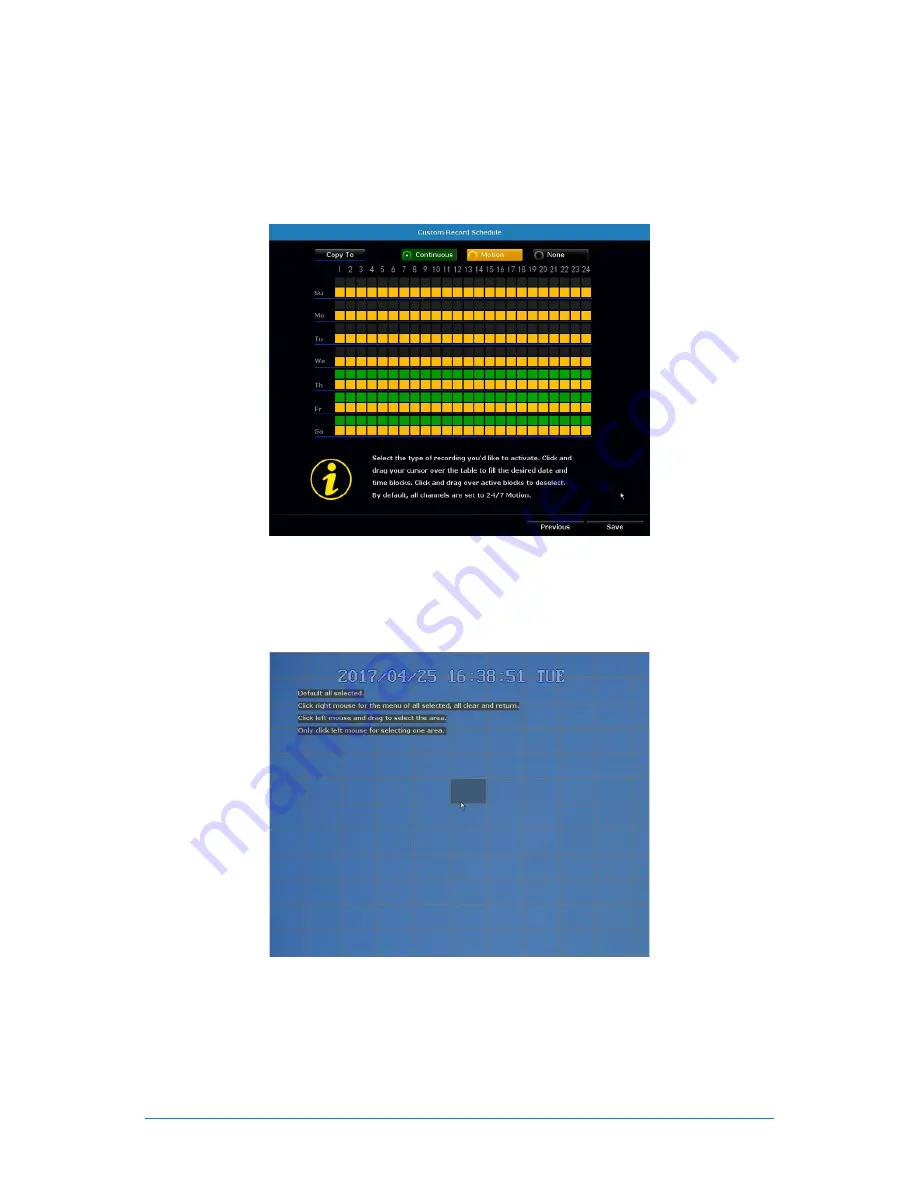
Select the type of recording you would like to activate. Click and drag your cursor
over the table to fill the desired date and time blocks. Click and drag over active
blocks to deselect. By default, all channels are set to 24/7 Motion.
To deselect an area, use your mouse to click on individual boxes. If you wish to
deselect the entire area, right click your mouse and choose Clear all. You may then
proceed to click and drag the area you want selected. To exit, right click your
mouse and choose Return.
Summary of Contents for WNVR-20B-81
Page 1: ...www NightOwlSP com USER S MANUAL WNVR SERIES...
Page 3: ...3 Table of Contents TABLE OF CONTENTS...
Page 7: ...7 Chapter 1 FCC Warnings CHAPTER 1 FCC WARNINGS...
Page 9: ...9 Chapter 2 Safety Instructions CHAPTER 2 SAFETY INSTRUCTIONS...
Page 11: ...11 Chapter 3 Specifications CHAPTER 3 SPECIFICATIONS...
Page 15: ...15 Chapter 4 Camera Installation CHAPTER 4 CAMERA INSTALLATION...
Page 19: ...19 Chapter 5 NVR Installation CHAPTER 5 NVR INSTALLATION...
Page 23: ...23 Chapter 6 Getting Started CHAPTER 6 GETTING STARTED...
Page 42: ...42 WNVR Series User s Manual CHAPTER 7 MENUS AND SETTINGS...
Page 67: ...67 Chapter 8 Glossary CHAPTER 8 GLOSSARY...
Page 69: ...69 Chapter 9 Warranty CHAPTER 9 WARRANTY...
Page 72: ...72 WNVR Series User s Manual CHAPTER 10 TROUBLESHOOTING...
Page 75: ...75 Chapter 11 User Information CHAPTER 11 USER INFORMATION...


