NIIGATA SEIKI CO., LTD
Thank you for purchasing BluetoothBOX, DTW-DG01.
Please read this document thoroughly for proper operation and in order to get the greatest benefit from the product.
■
OVERVIEW
Wireless adapter for GD series Calipers.
Bluetooth communication using an external USB Bluetooth adapter (Bluetooth 4.0 or higher) with support for USBHID class.
※
※
※
※
This adapter requires a standard USB Bluetooth Adapter (Bluetooth 4.0 or higher,) purchased separately.
■
FEATURES
●
Can communicate with wide range of Bluetooth capable devices.
●
Accepts a standard USB Bluetooth adapter, available worldwide.
●
Measurement data can be transferred to software such as Excel, etc.
■
ART IDENTIFICATION
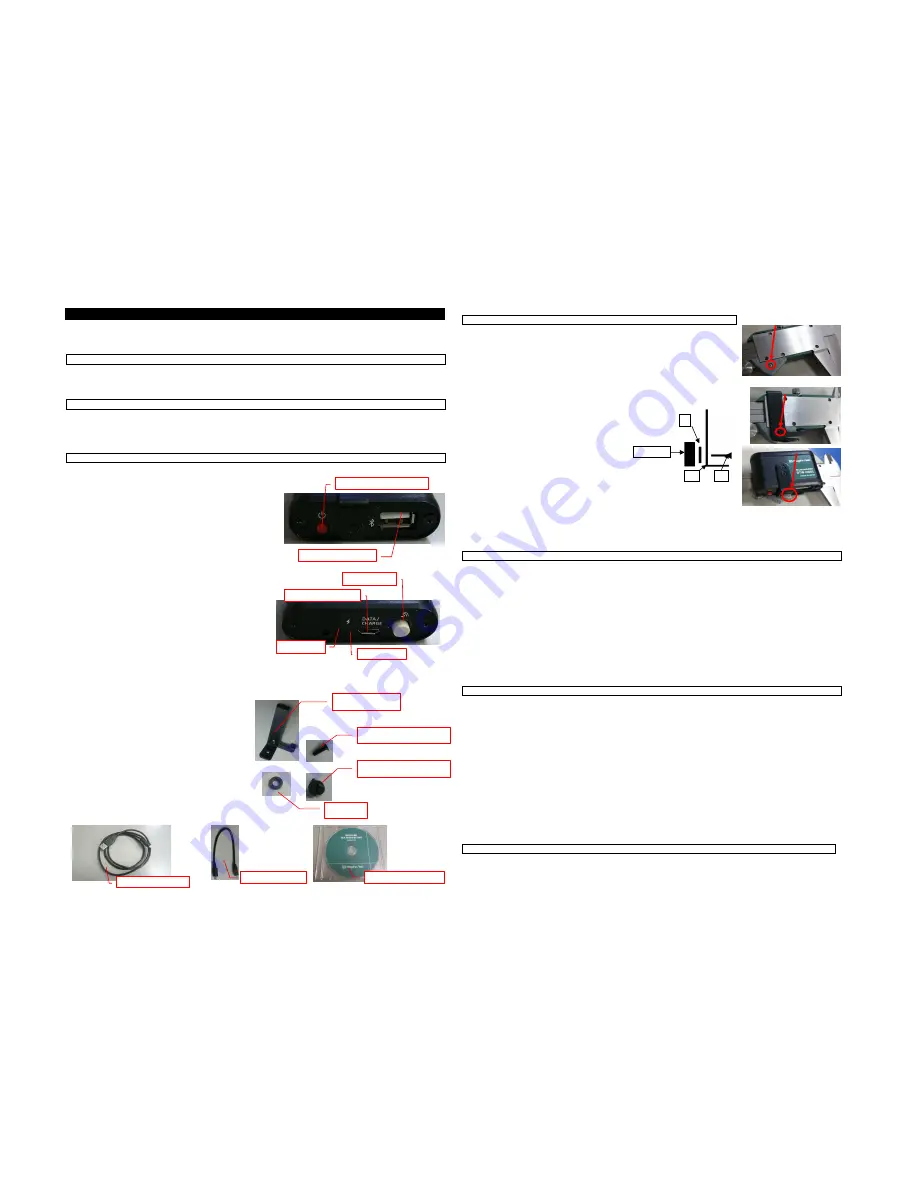
①
Power ON/OFF Button
・
Short press of button will turn device ON (Status LED = Red).
・
When ON, a short press will turn the device OFF
(Status LED = off).
・
Hold down the Send Button and press the Power Button at same
time to enter pairing (discovery) mode
(Status LED = Blinking Green).
②
USB-A Connector
Customer supplied USB Bluetooth adapter plugs in here.
Do not use to connect other USB devices.
③
Send Button
・
When device is communicating (Status LED = Blue), pressing
this button will transmit the measurement to the PC.
・
Hold down the Send Button and press the Power Button at same
time to enter pairing (discovery) mode
(Status LED = Blinking Green).
④
Micro-USB Connector
・
Connects to the Caliper using the included Communication
Cable (Micro-USB to Mini-USB) to send the measurement data to the wireless adapter.
・
Connect to the included AC-USB charger and Charging Cable, or connect to PC to charge the device.
※
Do not use to connect other USB devices.
⑤
Charging LED
LED on when charging; goes off when complete.
⑥
Status LED
Power ON
:LED=Red
Communicating
:LED=Blue
Pairing
:LED=Green
Transmitting data
:LED=Blinking Green
SLEEP
:LED=Purple
Voltage low
:LED=Blinking Red
⑦-⑩
Metal clamp for mounting adapter on to Calipers.
■
MOUNTING
1.Install a standard USB Bluetooth adapter by plugging it into the USB-A connector of the
adapter.
2.Remove the Caliper screw shown in the photo. Keep screw from being lost for future
use.
3.Gather the Caliper and the mounting components listed below for mounting.
①
Washer
②
Mounting Bracket
③
Caliper Mounting Screw
Attach to the Caliper as shown and secure using a
Phillips screwdriver.
4.Mount the Adapter to the Bracket and secure with the Plate Screw.
※
A standard screwdriver can be used to tighten the Plate Screw.
5.Connect the Adapter to the Calipers using the Mini-USB to Mico-USB connection cable.
※
When connecting with a caliper with a USB cable, the caliper setting value is initialized.
After connecting the cable, please set the calipers.
■
PAIRING
・
Turn on the PC you want to communicate with and enable the Bluetooth interface.
※
For Windows 7 computers without Bluetooth already installed, please install the drivers supplied with the USB Bluetooth
adapter.
For computers with Windows 8 or higher, device will work with standard Windows drivers. If other drivers are installed, there
is a possibility of a conflict so change setting to work with standard Windows drivers.
・
Hold down the Send Button and press the Power Button at same time to enter pairing mode (Status LED = Blinking Green).
・
Have the communicating PC or Tablet search for available Bluetooth devices. (This procedure varies depending on the
computer. Please refer to the instruction manual for the PC.)
・
Select "BLEBOX" from the detected devices and begin pairing.
・
When pairing is complete, the Status LED will be blue.
■
TRANSMITTING DATA
・
Turn on the Computer and enable the Bluetooth interface.
・
Confirm that the device is connected. The Status LED will be blue, and the PC will list the "BLEBOX" on the list of connected
devices.
・
Copy the file "BLOG.exe" to the PC (any location is OK) and double click the file to start the software.
・
When the B-LOG software "Start" Button is clicked, the software will being communicating with the BOX, and through the
connection cable, to the Caliper.
※
Please refer to the B-LOG Instruction Manual for information on setting up data output options, etc.
・
When you press the adapter's Send Button, data will be transmitted to the B-LOG software.
・
To end communication, click on the "End" button on the B-LOG software and press the Power Button on the Wireless
adapter to turn OFF.
※
After pairing is complete and the power is turned off, if you turn on the power again too quickly (about 5 seconds,) it may not
be able to connect. Please unplug the computer's USB Bluetooth adapter, reinsert and try pairing again.
■
AUTO OFF
If inactive for 20 minutes, the power will turn OFF. Please press the Power Button to turn back ON. If battery voltage drops
below a certain level, the Status LED will blink Red. As voltage continues to drop the adapter will automatically turn OFF.
BluetoothBOX DTW-DG01 Instruction Manual
①
Power ON/OFF Button
②
USB-A Connector
Communication Cable
B-LOG
software CD
④
Micro-USB Connector
⑤
Charging LED
⑥
Status LED
③
Send Button
⑨
Plate Screw
⑦
Mounting Bracket
⑧
Caliper Mounting Screw
⑩
Washer
②
③
Caliper
Charging Cable
①


