background image

-17- 

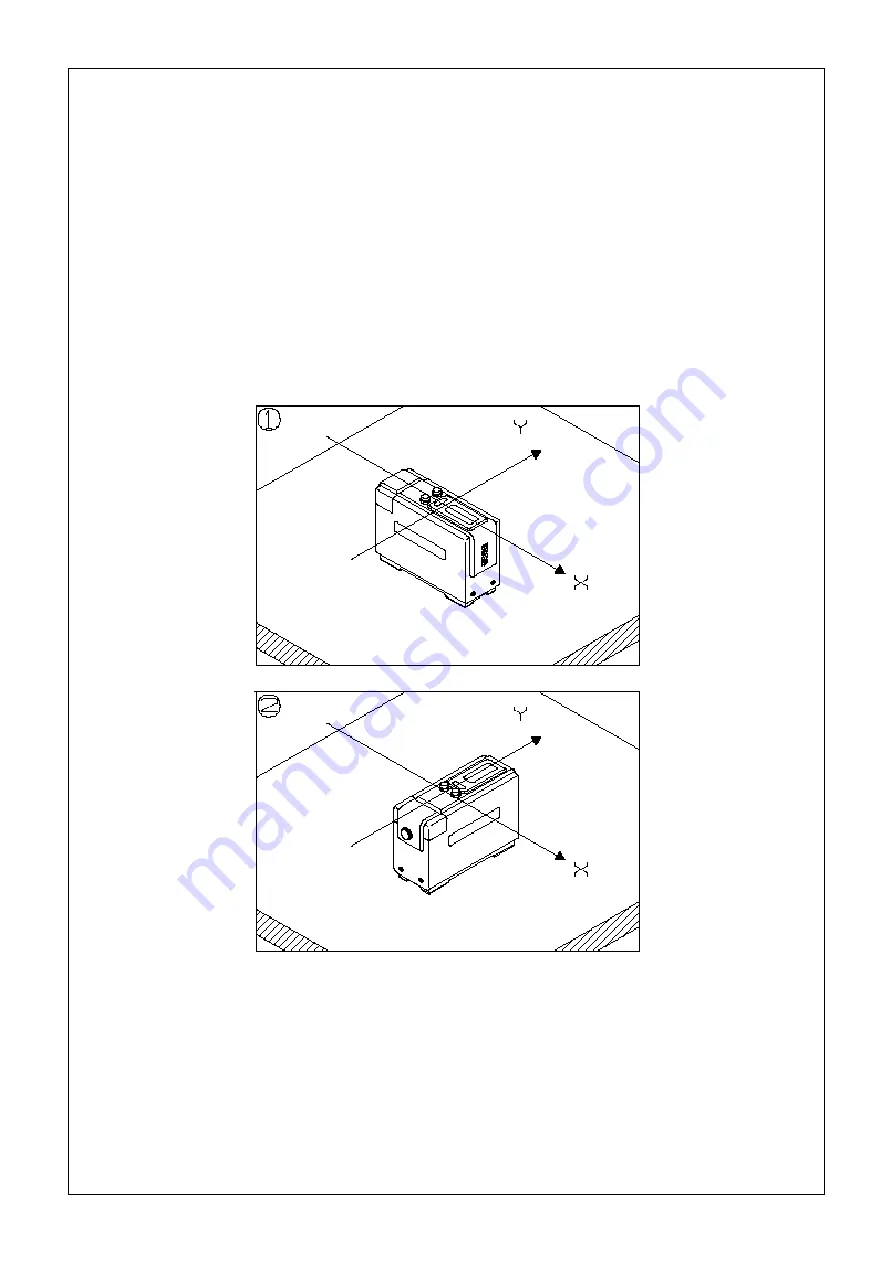
Leveling in two directions (x- and y-directions): 

(1)  Perform  leveling  in  one  direction  (x-direction,  for  example)  by  the  method  of  "Leveling  in 

one direction." 


(2)  Practice leveling in the other direction (y-direction) by the same procedure. 


(3)  When  the  object  under  measurement  is  moved  in  seeking  leveling  in  one  direction,  the 

level in the other direction may be disrupted. However, repeating Steps (1) and (2) several 
times will gradually bring the indication closer to zero in both directions.   


When you always have a zero indication, it means that leveling in two directions has been 
achieved. 


Summary of Contents for LEVELNIC DL-S3 DL-BW

Page 1: ...1 LEVELNIC DL S3 OPERATION MANUAL ...

Page 2: ...2 ...

Page 3: ...gh the end and acquire a sure grip on its correct use so that the device will serve you for many years to come This product contains certain elements that correspond to the strategic commodities or services defined under the Foreign Exchange and Foreign Trade Control Law of Japan Therefore an export permit is required to export the product in accordance with the said Law ...

Page 4: ...nent Parts 4 Functions of Component Parts 6 Variation of Measuring Range due to Movement of Reference Point 10 Operation Method 12 Zero Point Setting 14 Leveling 16 External Signal Output 18 Transportation Method 21 Precautions 22 Specifications 23 ...

Page 5: ... allows measurements over a broader range than bubble tube type levels 5 mm m 0 286º The device responds faster than bubble type levels Response time Approx 10 sec when a full scale displacement is given Since the device produces digital indications it does not require skill for taking readings The 0 Call and 1 2 Call switches enable such operations as deciding a reference halving an indication an...

Page 6: ... of Component Parts 1 0 Call switch 2 1 2 Call switch cum signal output switch 3 Auxiliary bubble tube 4 Display panel 5 Power switch 6 Unit selector switch 7 Mode switch 8 Function selector switch 9 Level base ...

Page 7: ... 5 10 Signal output jack 11 AC adapter jack 12 Battery case 13 Battery case knob ...

Page 8: ... value the moment it is released Operate the switch by pressing it rather leisurely for a second or so As signal output switch This switch is intended to instruct the output of signals on the side of this device Pressing the signal output switch causes the measured value to be output in RS 232C conformant signals through the signal output jack The signal output takes place the moment the switch is...

Page 9: ...mal operation will be restored Low battery voltage If the battery voltage falls below the working range the indication value will blink by the action of the automatic battery check function Should you find the indication value blinking replace the battery with a new one or use the AC adapter supplied with the device Communication glitches In the event that the cables are not properly connected or ...

Page 10: ...rounded off When the desired place is satisfied enough with 0 01 mm m or 0 001º the indications become easy to view free from heavy flickering By the way even when 0 001 was specified the minimum place of reading will automatically become 0 01 mm m or 0 001º if the measured value surpasses the above ranges 8 Function selector switch This switch designates the function with which the 1 2 Call switc...

Page 11: ...ned to feed power to the device from outside Use the AC adapter supplied with the device When the output plug of the AC adapter is inserted into the AC adapter jack the battery of this device is isolated from the internal circuit 12 Battery case The battery is accommodated in this case 13 Battery case knob When the battery needs to be installed or replaced turn the battery case knob counterclockwi...

Page 12: ...t the advantage that measurement is conducted each time with reference to the zero point properly adjusted and thus errors resulting from deviation of a zero point are prevented To set up a zero point of level operations of 0 Call and 1 2 Call are performed For details see Section Zero Point Setting To secure the measuring ranges of 5 mm m and 0 286º with their center at the zero point of level ex...

Page 13: ... 2 Call For example 0 Call was made on 0 1 mm m 1 2 Call was made on 0 2 mm m etc When the reference point of indication has been moved by 2 mm m due to 0 Call and 1 2 Call For example 0 Call was made on 2 mm m 1 2 Call was made on 4 mm m etc Internal value Reference point of indication Measuring range Internal value Reference point of indication Measuring range Internal value Reference point of i...

Page 14: ...switch The internal circuit stabilizes in about 20 minutes Then start measuring During the first 20 minutes following the power on zero point displacement will take place in an amount of 0 01 mm m or less If this amount of displacement does not affect your intended measurement you might want to initiate the measurement forthwith Try to eliminate any temperature difference between the device and th...

Page 15: ...ive sign For indications of this device selection can be made between the unit of mm m which expresses an inclination in a difference of elevation per meter and the unit of DEG º which produces an indication in an angle If the unit of mm m is chosen the actual difference of elevation in a measurement pitch is calculated from the reading by the following equation Difference of elevation in measurem...

Page 16: ...B When a flat surface with adjusted level is available 1 Place the device on the flat surface with adjusted level 2 After the indication has stabilized perform 0 Call to set the indication to zero The above operation has set up a zero point of level C When it is not clear whether a flat surface is level or not 1 Place the device on the flat surface 2 After the indication has stabilized perform 0 C...

Page 17: ...ned over 180º even if there is no absolute reference line extended orthogonally from the slope available Since θ can be known when 2 x θ is halved the horizontal plane is also found It is for this reason that when the board is turned over 180º the actual inclination is indicated twice as large assuming that one inclined side is at zero in the leveling When this double indication is halved the prod...

Page 18: ... If the position of the bubble in the auxiliary bubble tube is different adjust the object under measurement since it is likely that an error may be produced due to the inclination in the roll direction direction perpendicular to the measurement axis 3 Adjust the inclination of the object under measurement so that the indication will become zero 4 Turn the device around 180º once again and check t...

Page 19: ...irection y direction by the same procedure 3 When the object under measurement is moved in seeking leveling in one direction the level in the other direction may be disrupted However repeating Steps 1 and 2 several times will gradually bring the indication closer to zero in both directions When you always have a zero indication it means that leveling in two directions has been achieved ...

Page 20: ... Output Transmitting data 2 CTS Input Transmittable 3 GND Ground Communication method Start stop synchronization Asynchronous system Communication control Hardware Controlled with CTS Baud rate 1200 bps Data length 8 bits Stop bit 1 Parity bit None Output Signal Level 5 V to 10 V Input signal level 3 V to 15 V TD sends 16 character signals Japanese character set in one communication The signals ar...

Page 21: ...on selector switch is set in OUT When the signal output switch serving also as the 1 2 Call switch is pressed with the CTS terminal at High Level measurement data is output through the TD terminal The signal output switch is designed to deliver measurement data the moment it is released after being depressed so that two or more measurement data will not be sent out at a time in each operation Hold...

Page 22: ... seconds and then the normal operation will be restored Note 2 If the signal output switch is pressed when the CTS terminal is at Low Level E2 will appear on the display panel for about three seconds and then the normal operation will be restored Note 3 If the indication is blinking because the battery voltage is low no measurement data will be output Timing Chart T1 85 µsec to approx 400 msec T2 ...

Page 23: ...at as far as possible to protect the device from vibration Avoid transporting the case placed in a slant posture or upside down Transporting by truck etc For transportation of the device prepare a sturdy box that is larger than the carrying case by approximately 20 cm in the internal dimensions of height width and length First put the device in the carrying case and then pack the case in the cente...

Page 24: ...n the carrying case If the device is not going to be used for an extended period of time be sure to remove the battery For storage avoid a location under direct sunlight or susceptible to high temperature and select a place with little temperature variation and low humidity Presence of burrs and dirt on the object to be measured could leave nicks in the measuring surface of the device and the obje...

Page 25: ... cell JIS S 006P 1 100 240V AC adapter Continuous operation time Manganese dry cell Approx 10 hours 3 Alkaline dry cell Approx 20 hours External dimensions 172 L x 65 W x 120 H mm Size of base 150 L x 55 W mm Weight 2 2 kg Accessories 100VAC adapter 9V dry cell Carrying case Instruction manual 1 When indication in DEG º is selected 0 to the left of the decimal point is not displayed The indication...

Page 26: ...NIIGATA SEIKI CO LTD 1 22 17 HAYASHICHO SANJO CITY NIIGATA PREF JAPAN TEL 81 25 33 5500 FAX 81 256 33 5550 URL http www sokuteikougu com ...

Reviews: