14
First S
te
p
s
Setting Display Language, Date and Time
A language-selection dialog and date menu are displayed the first time the
camera is turned on.
1
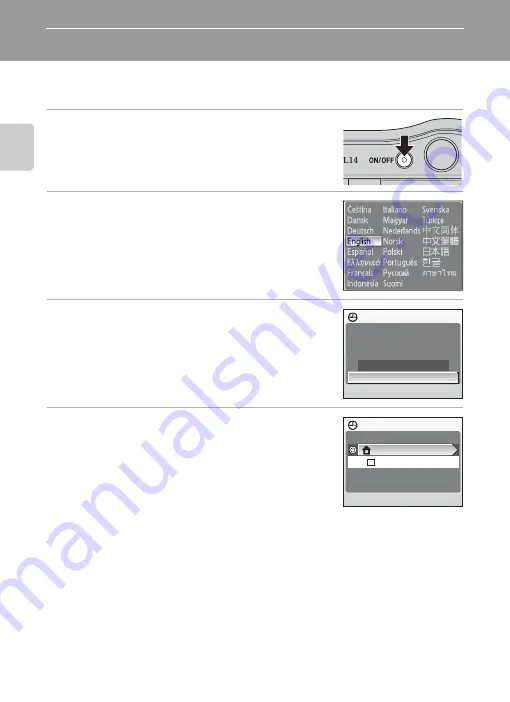
Press the power switch to turn on the camera.
The power-on lamp (green) will light for a moment and
the monitor will turn on.
2
Use the multi selector to choose the desired
language and press
k
.
For information on using the multi selector, see “The Multi
Selector” (
3
Choose [Yes] and press
k
.
If [No] is selected, the date and time will not be set.
Proceed to step 8.
4
Press
k
.
The home time zone menu is displayed.
D
Daylight Saving Time
If daylight saving time is in effect, turn on [Daylight saving] in the time zone menu and set the date.
1
Before pressing
K
, press the multi selector
I
to choose [Daylight saving].
2
Press
k
to enable daylight saving time (
w
). Pressing
k
toggles the daylight saving time option
on and off.
3
Press the multi selector
H
, and then press
K
to proceed to step 5.
When daylight saving time ends, turn [Daylight saving] off from the date menu (
80) in the setup
menu. The camera’s clock is automatically set back one hour.
Date
Set time and date?
No
Yes
Time zone
London,Casablanca
Daylight saving


