48
Image Adjustment
Curves
Although your Nikon digital camera will reproduce colors accurately if settings have been
ad just ed appropriately, it will usually be necessary to adjust contrast, tone (brightness) levels,
and color balance to make maximum use of the tone range and color gamut offered by a
particular output device, such as a printer or monitor. Nikon Capture offers two tools for
performing these tasks: the Color Balance palette (see “Color Balance” later in this chapter)
and the Curves palette. Of the two, the Curves palette offers the more precise control. The
Color Balance palette is useful when, for example, you want to adjust brightness or color
balance for all pixels in the image. The Curves palette, in contrast, allows adjustments to be
made to specifi c por tions of the tone range, making it possible to enhance the image while
preserving detail.
Curves—an Overview
To view the Curves palette, select the tool palette containing the Curves palette from the
View
menu (the default location for the Curves palette is Tool Palette 1) and click the triangle
at the top left corner of the palette. To enable the tools in the Curves palette, turn the Apply
button on (
).
Opening NEF Files Saved in Nikon Capture 3.5x or Earlier
In Nikon Capture 4, changes to color balance apply before changes to curves In earlier versions of Nikon
Capture, changes to curves applied before changes to color balance, with the result that settings may
change when the images saved in Nikon Capture 3.5x or earlier are opened in Nikon Capture 4.
Preferences > Advanced Color
Auto contrast, shadow, and highlight settings can be adjusted in the Advanced Color tab of the Prefer-
ences dialog.
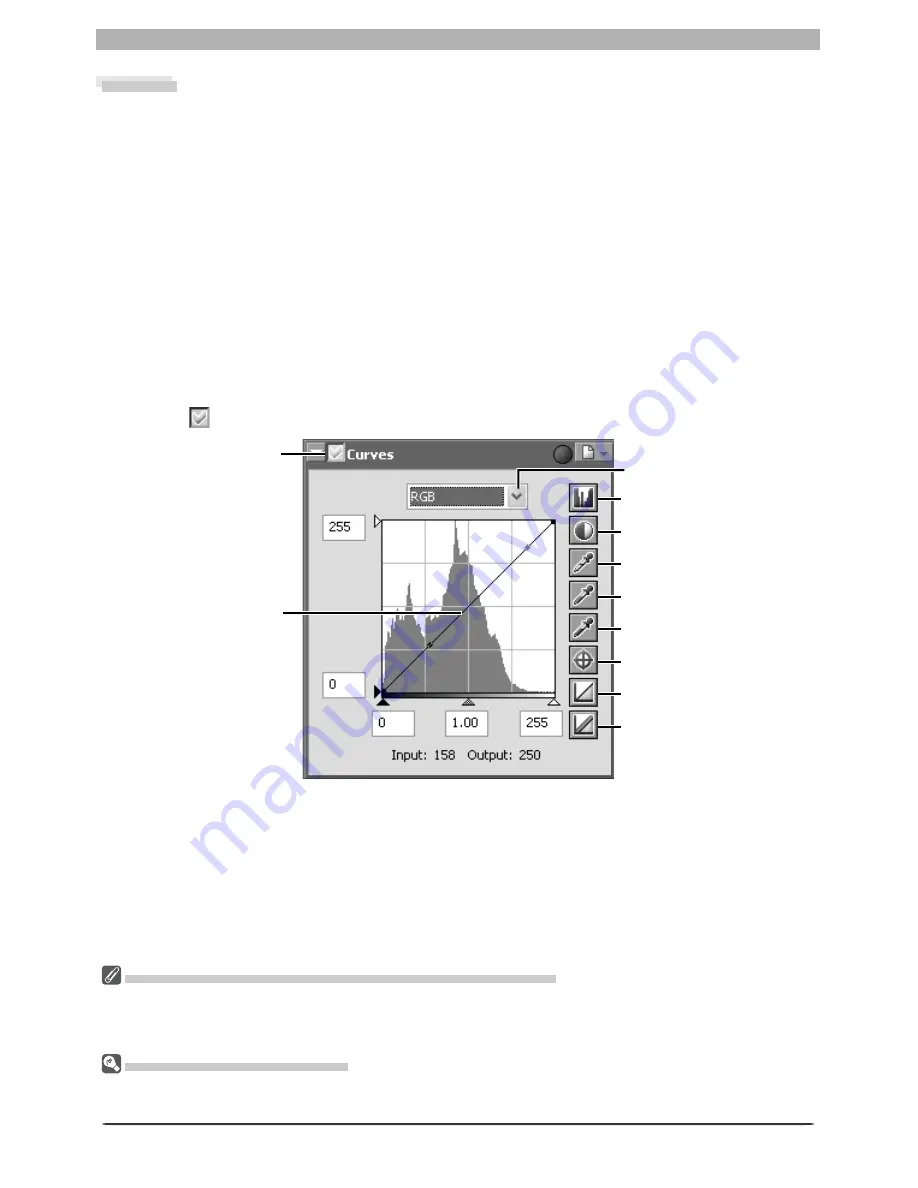
The main editing tool in the Curves palette is the curve edit display, which contains a curve
showing the relationship between input (the tones in the original image) and output (how
the tones in the input will be represented in the fi nal image). Separate curves control the
re la tion ship between input and output for the image as a whole (the “master curve”) and for
each of the red, green, and blue color com po nents, or “channels.” The default curve in each
case is linear, meaning that tones will be output exactly as they are input.
Apply
button
Current channel
Curve edit display
Histogram
button
Auto Contrast
button
White Point
button
Midpoint
button
Black Point
button
Reset Active Curve
Reset All Curves
Tone Curve Point
button
Summary of Contents for 4DIF
Page 1: ...En Ver 4 4 En Ver 4 4 ...
Page 10: ...6 ...


