background image

23

22

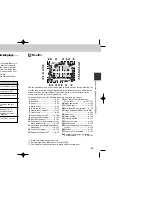
1

Scene .......................................p. 63

2

Self-timer ..................................p. 95

3

Zoom........................................p. 90

4

Digital zoom..............................p. 90

5

“Date not set” icon*

1

.................p. 52

6

Manual focus distance............p. 132

7

Flash mode...............................p. 98

8

Current Folder name*

2

............p. 108

9

Lens converter setting ............p. 145

10

Best Shot Selector .................p. 141

11

Exposure lock (Auto exposure lock/
White balance lock) ................p. 148

12

Exposure bracketing/White balance
bracketing ..............................p. 152

13

Continuous setting..................p. 139

14

Battery level indicator*

3

.............p. 50

15

Spot exposure metering area/
Focus area ......................p. 137/101

16

Image sharpening ...................p. 144

17

White balance.........................p. 135

18

Sensitivity (ISO equivalency)....p. 130

19

Image adjustment/Black-and-white

...............................................p. 142

20

Image size ..............................p. 106

21

Image quality ..........................p. 104

22

Metering method ....................p. 137

23

Exposure mode ......................p. 148

24

Shutter speed.........................p. 128

25

Exposure display (manual exposure
mode) .....................................p. 128

26

Aperture .................................p. 127

27

Exposure Compensation ........p. 100

28

Number of exposures remaining/
Movie duration...................p. 56/160

23

14

15

16

17

18

19

20

21

8

9

10

1

11

2

12

13

3

4

5

6

7

22 23

24

25

26

27

28

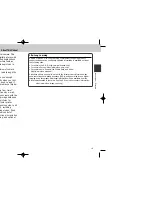
Introduction—Getting to Know the COOLPIX885

Pictures can be framed in the viewfinder or in
the monitor. Note that when your subject is
within 1.5 m (4.9 ft.) of the camera, the final
picture will differ slightly from the image seen
in the viewfinder. Use the monitor when your
subject is close to the camera.

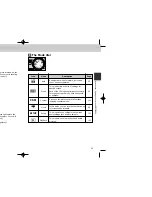
The two lights next to the viewfinder provide a guide to camera status while you
frame your picture.

Light

Meaning

On

Flash (Speedlight) will fire when picture
is taken.

Flashes

Flash (Speedlight) charging (p. 99).

Off

Flash (Speedlight) not required or flash
set to "off".

On

Subject in focus.

Flashes rapidly

Camera unable to focus on subject.
Use focus lock (p. 61).

Flashes normally

Camera recording image(s) to CF
memory card. Do not eject card or
remove or disconnect power source
while green light is blinking.

Flashes slowly

Digital zoom (p. 90) in effect. Use the
Monitor.

How to Use It—Camera Controls and Displays

A

The Viewfinder

B

Monitor

Like the viewfinder, the monitor can be used to frame pictures. During shooting, the
monitor shows the view through the camera lens together with icons indicating the
status of various camera settings. The monitor is also used to display pictures
during quick review (p. 70) and playback (p. 155).

In the shooting modes, the following indicators appear in the monitor.

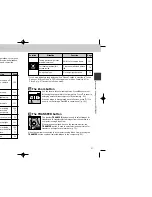
*1

Blinks if date/time has not been set.

*2

Not displayed when folder name is set to NIKON.

*3

Only displayed when battery power drops below a certain level.

Red Light 
(Flash-ready light)

Green Light 
(Autofocus light)

Green light

Red light

COOLPIX885 (E)  01.10.22 5:59 PM  Page 22

Summary of Contents for COOLPIX 885

Page 1: ...E otography ...

Page 2: ...d setting up your Nikon digital camera taking your first pictures and transferring them to your computer Guide to Digital Photography The Guide to Digital Photography this manual provides complete operating instructions for your camera Nikon View Reference Manual The Nikon View Reference Manual can be found in electronic format on the reference CD provided with your camera For information on viewi...

Page 3: ...s unplugged Use only the Nikon EN EL1 lithium ion battery or a 6V 2CR5 DL245 lithium battery When inserting the battery do not attempt to insert it upside down or backwards Do not short or disassemble the battery Do not expose the battery to flame or to excessive heat Do not immerse in or expose to water Do not transport or store with metal objects such as necklaces or hairpins Batteries are prone...

Page 4: ...ur fingers The proper procedure for cleaning the lens is described in Technical Notes Caring for Your Camera Handle the lens and all moving parts with care Do not apply force to the lens or to the battery card or connector These parts are especially susceptible to damage Turn the product off before removing the battery or unplugging the AC adapter Do not unplug the product or remove the battery wh...

Page 5: ...oving cards with the power on could render them unusable Insert memory cards as shown in the illustration at right Inserting cards upside down or backwards could damage the camera or the card Storage To prevent mold or mildew store the camera in a dry well ventilated area If you will not be using the product for a long period of time remove the battery to prevent leakage and store the camera in a ...

Page 6: ... the following measures Reorient or relocate the receiving antenna Increase the separation between the equipment and receiver Connect the equipment into an outlet on a circuit different from that to which the receiver is connected Consult the dealer or an experienced radio television technician for help CAUTIONS Modifications The FCC requires the user to be notified that any changes or modificatio...

Page 7: ...ape and Netscape Navigator are registered trademarks of Netscape Communications Corporation CompactFlash is a trademark of SanDisk Corporation Lexar Media is a trademark of Lexar Media Corporation Adobe and Acrobat are registered trademarks of Adobe Systems Inc Zip is a registered trademark of Iomega Corporation in the U S and other countries All other trade names mentioned in this manual or the o...

Page 8: ...89 Framing Pictures Optical and Digital Zoom 90 91 Focusing Near and Far Focus Mode Button 92 94 Delaying Shutter Release Self Timer Mode 95 96 Throwing Light on Your Subject The Flash Button 97 99 Bright Dark and High Contrast Subjects Exposure Compensation 100 Choosing a Focus Area Manual Focus Area Selection 101 Camera Setup The SETUP Menu 102 125 To View the SET UP Menu 102 Making Effective Us...

Page 9: ...f camera parts Menu Guide Refer to this section for instructions on using the menus that control some aspects of camera operation This section also contains an index of menu options 126 154 127 129 130 131 132 133 134 154 135 136 137 138 139 140 Menu 141 tment Menu 142 143 enu 144 145 146 u 147 148 149 150 151 152 153 154 155 177 156 162 163 175 o Device 176 177 178 186 179 180 181 184 185 186 our...

Page 10: ... part of Nikon s Life Long Learning commitment to ongoing product support and education continually updated information is available on line at the following sites For users in the U S A http www nikonusa com For users in Europe http www nikon euro com For users in Asia Oceania the Middle East and Africa http www nikon asia com Visit these sites to keep up to date with the latest product informati...

Page 11: ... connector USB connector cover p 46 176 13 Memory card slot cover p 47 A Viewfinder p 22 B Monitor p 23 C Power switch p 24 D Shutter release button p 24 E Mode dial p 25 F Multi selector p 26 G Zoom button p 27 H TRANSFER button p 27 I QUICK p button p 28 J 1 5 button p 28 K 2 6 button p 29 L 3 7 button p 29 M MENU button p 29 Introduction Getting to Know the COOLPIX885 mera controls and ection a...

Page 12: ... Number of exposures remaining Movie duration p 56 160 23 14 15 16 17 18 19 20 21 8 9 10 1 11 2 12 13 3 4 5 6 7 22 23 24 25 26 27 28 Introduction Getting to Know the COOLPIX885 in the viewfinder or in when your subject is the camera the final from the image seen he monitor when your camera era status while you will fire when picture charging p 99 not required or flash focus on subject 61 image s t...

Page 13: ...oint and shoot snapshot pictures This mode offers a choice of settings for specific scenes Each of the 12 modes optimizes the camera for scenes of specific type such as sunsets or portraits Gives you complete control of all settings including exposure mode In this mode you can record silent movies up to forty seconds in length This mode lets you configure the camera s basic settings such as date t...

Page 14: ...amera to a computer running Nikon View When images are played back on the camera monitor the TRANSFER button is used to select movies and pictures for transfer to a computer at a later date p 73 When the camera is connected to a computer running Nikon View pressing the TRANSFER button copies all selected images to the computer p 80 Use the zoom button to frame pictures Press W to zoom out increasi...

Page 15: ...nce Photo information display Mode AUTO SCENE CSM CSM p Playback When taking pictures the flash mode 3 button controls the built in Speedlight p 97 In full frame playback or full screen review pressing this button displays the images stored on the CF memory card as small thumbnail preview allowing you to choose images for playback or deletion from a menu of nine or four p 72 162 L 3 7 button Press...

Page 16: ...he menu for the current operating mode except AUTO and m movie can be displayed by pressing the MENU button WHITE BALANCE PAGE2 SELECT SET Menu for current operating mode displayed Press MENU WHITE BALANCE PAGE2 SELECT SET If PAGE2 appears at the lower left corner of the menu pressing the MENU button again will display the menu s second page When OFF is displayed pressing the MENU button returns y...

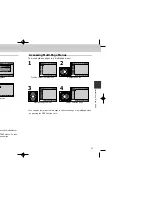
Page 17: ...lso jump from the first page to the second page of a multi page menu by pressing the MENU button once WHITE BALANCE PAGE2 SELECT SET Position cursor in main menu Accessing Multi Page Menus To move between pages in a multi page menu 1 SHOOTING MENU1 PAGE2 SELECT SET Highlight page tab 2 SHOOTING MENU2 OFF SELECT SET Highlight page number 3 IMAGE SIZE QUALITY OFF SELECT SET Display selected page 4 ...

Page 18: ...to default values No Yes SELECT SET Controls Set camera to remember settings in effect when cam era is turned off Turn digital zoom on or off p 118 Shot Confirm Lamp Control visual shutter release confirmation p 119 Pic Data Transfer Save photo information in text format turn transfer marking on or off p 120 Date Set date and time p 122 Video Mode Select the video standard to use for playback on T...

Page 19: ...en sation p 148 Focus Options Select AF Area change Autofocus mode confirm focus distance unit displayed p 150 Auto Bracketing Set Auto Bracketing on or off or White Balance Bracketing p 152 Noise Reduction Turn Noise Reduction on or off p 154 CF Card Format Format CF memory card p 117 Off On WB Bracketing On Off 3 0 3 3 0 7 3 1 0 5 0 3 5 0 7 5 1 0 Exposure mode AE Lock EXP AF Area Mode Auto Focus...

Page 20: ... suitable for e mail and Web distribution p 175 640 x 480 320 x 240 160 x 120 96 x 72 Playback Menu 2 Transfer Mark all pictures for transfer or remove marks from all pic tures p 174 All ON All OFF Auto Off Set time delay for Auto Off function p 115 30 S 1 M 5 M 30 M ge and set Protect ge and set Hide Image ge and set number of prints tvl 7 2S 3S 5S 10S rs e ed Images ages Set New Rename Delete In...

Page 21: ...ur camera for the first time Taking Pictures Read this section for a step by step guide to the basics of taking pictures with the COOLPIX885 Reviewing and Deleting Learn how to review and delete pictures while setting up your next shot First Steps pp 42 53 Taking Pictures pp 54 67 Reviewing and Deleting pp 68 73 Getting Started ...

Page 22: ...r Camera Page 43 44 46 47 49 50 51 52 53 Step 1 Attach the Camera Strap and Lens Cap Camera Strap Lens cap Attach the strap as shown Press the tabs on the lens cap to attach detach it We recommend attaching the lens cap to the strap loop with the supplied cord to prevent it from being misplaced ...

Page 23: ...the 2CR5 DL245 lithium battery is not rechargeable Caution Regarding Battery Use In some cases the WARNING BATTERY EXHAUSTED message may not appear in the monitor if an exhausted battery is re inserted into the camera The rechargeable Nikon EN EL1 lithium ion battery should be removed and recharged as soon as the message WARNING BATTERY EXHAUSTED appears in the monitor Turning the camera on and of...

Page 24: ...To power your s you can use the s a battery charger 1 hen connected for an function erted into the er battery charger Step 3 Insert the CF Memory Card In place of film your Nikon digital camera uses CompactFlash CF memory cards to store pictures This step provides instructions on inserting CF memory card See p 189 for more information on approved CF memory cards Slide the card slot cover out and f...

Page 25: ...le formatting is in progress Before Formatting Formatting permanently deletes all data on the CF memory card Be sure to transfer any images you would like to keep to a computer before formatting 5Press to start formatting s can also be oting menu 2 CSM out formatting card o and press Formatting begins immediately While formatting is in progress the message shown will be displayed ...

Page 26: ...p Pic data Transfer Date Video Mode Language Reset All PAGE1 SELECT SET Press MENU button to display SET UP 2 menu 2 SET UP2 Controls Shot Confirm Lamp Pic data Confirm Date Video Mode Language Reset All PAGE1 SELECT SET Highlight Language 3 LANGUAGE Controls Shot Confirm Lamp Pic data Confirm Date Video Mode Language Reset All D E F J S SELECT SET Choose a language from D Deutsch German E English...

Page 27: ...00 00 00 00 00 If the time and date have not been set a flashing clock icon will be displayed in the top right corner of the monitor when the camera is in shooting mode DATE Y M D 2001 09 15 15 3 0 SELECT SET Highlight YMD 7 SET UP2 Controls Shot Confirm Lamp Pic data Transfer Date Video Mode Language Reset All PAGE1 SELECT SET Press to save changes to settings and return to SET UP menu 9 DATE M D...

Page 28: ...ens cap in place and the mode dial set to AUTO SCENE CSM or m an error message will appear in the monitor To clear this message from the display turn the camera off and remove the lens cap 2Turn the mode dial to a 3Turn the camera on The lens zooms out when the camera is turned on and the green light next to the viewfinder will turn on for a few seconds After a short pause the view through the len...

Page 29: ... and the description in this section assumes that the defaults are used For information on making changes to the settings listed below refer to the page numbers in the rightmost column Setting Focus mode self timer Flash mode Image quality Image size Description Camera focuses automatically at distances over 30 cm 1 ft widest angle or 60 cm 2 ft telephoto self timer off Flash fires automatically w...

Page 30: ...rm camera settings at a glance while at the same time viewing an image that shows how the final picture will appear This is particularly important when the image in the viewfinder does not accurately reflect what will appear in the final picture for example when macro close up is used p 93 your subject is within 1 5 m 4 9 ft of the camera you are using digital zoom p 90 you are using an optional l...

Page 31: ...l focus on the background and the main subject may not be in focus Focus lock is used to focus first on your subject then adjust the composition before taking the picture 1Focus Position the subject in the center of the frame and press the shutter release button halfway 2Check the green light With the shutter release button pressed halfway check that the green autofocus light next to the viewfinde...

Page 32: ...ures 1 Turn the mode dial to SCENE 2 SCENE 1 OFF SELECT DONE Party Indoor Party Indoor Night Portrait Night Portrait Beach Snow Beach Snow Lnadscape Lnadscape Sunset Sunset Portrait Party Indoor Night Portrait Beach Snow Landscape Sunset Press the MENU button to display the SCENE mode menu 3 SCENE 1 OFF SELECT DONE Portrait Portrait Party Indoor Party Indoor Night Night Landscape Landscape Sunset ...

Page 33: ...Reduction Slow Sync Focus mode Autofocus and autofocus self timer can be selected In some situations slow shutter speed is selected To avoid camera shake make sure to hold the camera steady or use a tripod f Night Portrait Use for pictures that provide a natural balance between the main subject and the background when taking portraits against a backdrop of night time scenery Flash mode Auto with R...

Page 34: ...lf timer can be selected Focus area The AF area mode is set to Manual so you can select the focus area with the Multi selector p 101 In some situations a slow shutter speed is selected To avoid camera shake be sure to hold the camera steady or use a tripod x Copy Use to obtain clear pictures of text or drawings on a white board business card or in printed matter To shoot a close subject set the ca...

Page 35: ...K p button once to display existing pictures at the top left corner of the monitor twice to display pictures full screen Pressing the button a third time returns you to shooting mode Shooting Mode Quick Review Photos on the CF memory card are displayed in the top left corner of the monitor allowing you to view the results of previous images while setting up your next shot Full Screen Review Photos...

Page 36: ...rapidly to desired picture If there are small picture files the small pictures will be displayed with a grey frame Hide and display camera settings turn the monitor on and off Press to create a small picture of the current picture A confirmation dialog will be displayed Press on the Multi selector to highlight the option and to select Select Yes to delete picture Select No to keep picture Press th...

Page 37: ... be transferred to the computer can be selected and deselected using the TRANSFER button Tutorial Reviewing and Deleting Images marked for transfer to the computer are shown by the D icon If you select an unmarked image and press the TRANSFER button the D icon will appear and the image will be marked for transfer If you select and image that is already marked for transfer and press the TRANSFER bu...

Page 38: ... to My Friends and Family Read this section for advice on distributing your pictures via e mail and the Web How Do I Make Prints Learn about Digital Print Order Format DPOF and how to take photos for printing How Do I Keep Track of My Photos This section provides an overview of how image database software can be used to view and organize your photos How Do I Send Pictures to My Friends and Family ...

Page 39: ...the Web Where Do I Go from Here How Do I Send Pictures to My Friends and Family Display a picture in single image playback or full screen review to create a small picture file 1 Press to select a picture 2 Press SMALL PIC button 3 Small Pic Creating small picture file Yes No SELECT SET Press to highlight Yes 4 Press to create a copy of the photograph at the designated Small Picture size A Small Pi...

Page 40: ...wer When small pictures created with the COOLPIX885 are used with a digital camera other than the COOLPIX885 small pictures may not be displayed or transferred to the computer properly COOLPIX885 s small picture function is not guaranteed for pictures taken with other digital cameras Notes on deleting Small Pictures When a Small Picture is deleted the original photo is left untouched The Small Pic...

Page 41: ...titled volume corresponding to the camera into the Trash Macintosh Then turn the camera off and unplug the USB cable p 178 The images especially Small Pictures that have been copied to your computer can be appended to e mail messages see the documentation provided with your e mail application for details or uploaded to your personal home page PREPARING TO TRANSFER TRANSFERRING IMAGE TO COMPUTER TR...

Page 42: ...r the card can be removed from the camera and inserted in a DPOF compatible device be it a personal photo printer or a photofinisher s print system and pictures printed directly from the card To create a digital print order 1 PLAY BACK MENU Delete Folders Slide Show Protect Hide Image Print Set PAGE2 SELECT SET Press MENU button to display playback menu 2 PLAY BACK MENU Delete Folders Slide Show P...

Page 43: ...an also be used to preview the pictures stored in your computer and to open them in your favorite imaging application For details see the documentation provided with the image database software How Do I Keep Track of My Photos Using Image Database Software Image Database Software Depending on where you purchased your camera the COOLPIX885 comes with Canto Cumulus iView Media Pro or Fotostation Eas...

Page 44: ...on for a detailed description of playback mode Connections How to connect your camera to a computer and transfer images using Nikon View Technical Notes This section describes how to care for camera and what to do when it does not function as expected It also lists camera specifications and optional accessories available for the COOLPIX885 Index An alphabetical index to the topics covered in this ...

Page 45: ...hoot photography Use for snapshots Auto mode is also recommended for pictures that will later be retouched on a computer In this mode most camera settings are automatically adjusted to suit the chosen scene Twelve choices of scene are available See p 65 for the details and restrictions on each scene In CSM shooting mode various setting can be adjusted one by one to suit the composition Record sile...

Page 46: ...ing the center portion of the image to fill the frame Unlike optical zoom digital zoom does not increase the amount of detail visible in the picture Instead details visible at maximum zoom are enlarged producing a slightly grainy image Digital zoom also differs from optical zoom in that its effects are visible only in the monitor not the viewfinder meaning that the monitor must be on before digita...

Page 47: ...cro close up with shutter release delay of 10 or 3 sec When to Use It Use with subjects 30 cm 1 ft at widest angle 60 cm 2 ft at telephoto or more from lens Use for self portrait or prevent pictures from blurring when shutter release button is pressed Use when photographing distant scenes through foreground objects such as a window Use for close ups Use for close ups to prevent pictures from blurr...

Page 48: ... which you wish to appear yourself when it gives you time to position yourself in front of the camera after pressing the shutter release button The three second timer prevents pictures from being blurred by camera movement that occurs when the shutter release button is pressed This feature is most useful when taking low light or close up shots with the flash turned off To use the self timer 1Posit...

Page 49: ...mmended in these circumstances At shutter speeds of below 1 4 sec the shutter speed indicator in the monitor will turn yellow Pictures taken when this indicator appears may be blurred or slightly mottled To prevent this try zooming the camera out At shutter speeds of below 1 4 sec noise may also appear in the dark part of the frame This noise in the form randomly spaced bright colored pixels can b...

Page 50: ...adows ects both subject and night or under dim ipod is recommended ng The Flash Ready Light A short pause is required between exposures for the flash system to charge If the shutter release button is pressed halfway while the flash is charging the red light next to the viewfinder will blink Remove your finger briefly from the shutter release button and try again Keep the Flash Window Clear Keep yo...

Page 51: ...s makes it possible to focus on an off center subject without using focus lock The focus area can be selected using the Multi selector Center focus area selected Use Multi selector to select new focus area Any of five focus areas can be selected Focus area selection can be used in combination with focus lock if the subject would not fall in any of the focus area in the final composition In CSM mod...

Page 52: ...ize and quality affect the number of images that can be stored on a CF memory card view the following table which shows the approximate number of pictures that can be stored on 8 MB 16 MB 32 MB and 64 MB cards at different combinations of image size and quality Note that the number of pictures that can be stored at each combination also varies according to their composition detail number or colors...

Page 53: ...al pictures that will be web pages File size nal While setting of NORMAL represents the best trade off between file size and image quality in most cases a setting of BASIC can be used to save memory or create smaller files suitable for electronic distribution Setting of HI or FINE are suitable for pictures that will be enlarged or printed at high resolution JPEG JPEG pronounced jay peg stands for ...

Page 54: ...llowing table shows how images of different sizes will print at a resolution of 200 dpi supported by most household inkjet printers Print Size Dimensions When Printed at 200 dpi FULL Approx 26 x 20 cm 10 2 x 7 9 in XGA Approx 13 x 10 cm 5 1 x 3 9 in VGA Approx 8 x 6 cm 3 1 x 2 4 in See p 175 for more information on choosing an image size for electronic distribution See p 107 for more information o...

Page 55: ...ders Monitor Options Auto Off Seq Numbers CF Card Format PAGE2 SELECT SET Highlight last letter and press to create new folder 5 NEW N M P Q T O K Y O SELECT SET Press to edit selected letter Folder name can include uppercase letters A Z numbers and spaces Repeat steps 3 and 4 to create new five letter folder name 4 Creating Renaming and Deleting Folders The Folder Options Menu The folder options ...

Page 56: ... folders 2 ERASE FOLDER TOKYO OSAKA KOBE SELECT SET Highlight folder name Folder NIKON is not available for deletion 3 SELECT OK FOLDER OSAKA deleting folder No Yes Press Select Yes to delete selected folder Select No to return to SET UP menu without deleting folder 4 Deleting Folders If the selected folder contains hidden p 171 or protected p 170 images the folder will not be deleted Any images i...

Page 57: ... specify whether or not pictures are displayed in the monitor after shooting Option Description Monitor On Monitor turns on at start up pictures are displayed in monitor after shooting Review Only Monitor turns on only to display pictures immediately after shooting Choose this option to save batteries Preview Only Monitor turns on at start up but pictures are not displayed in monitor after shootin...

Page 58: ...tended period We recommend that you set Auto Off to five minutes or less when using a 2CR5 DL245 lithium battery Using an AC Adapter When the camera is powered by the EH 21 AC adapter battery charger available separately the camera will remain on for thirty minutes if no operations are performed regardless of the setting in the Auto Off menu If the camera is connected to a video device video outpu...

Page 59: ... On Off Reset SELECT SET rm DSCNnnnn JPG by the camera e g ension MOV e g tead of DSCN is stored in folders with nd 999 followed by er of files in a folder umber is created and stored in it CF Card Format The CF memory card supplied with your camera is already formatted for use in the COOLPIX885 Other CF memory cards will however need to be formatted prior to use For more information on formatting...

Page 60: ... reduction lamp next to the viewfinder window can be used to let your subjects know that the shutter has been released This can be useful when taking portraits without the flash Shot confirmation can be turned on or off in the Shot Confirm Lamp sub menu SHOT CONFIRM LAMP Controls Shot Confirm Lam Pic data Confirm Date Video Mode Language Reset All Off On SELECT SET Option Description Off Red eye r...

Page 61: ...s and movies are not marked for transfer On Default setting Pictures and movies are marked for transfer as they are taken Changing Transfer Status Images already recorded to the CF memory card can be selected for transfer by pressing the TRANSFER button when the image is displayed in Full Screen review p 71 or in playback mode p 156 or when the image is highlighted in thumbnail review or thumbnail...

Page 62: ...c data Confirm Date Video Mode Language Reset All NTSC PAL SELECT SET a to a TV or VCR The Language Menu This option is used to choose the language in which camera menus and messages are displayed For more information see Tutorial First Steps 5 Choose a Language p 51 LANGUAGE Controls Shot Confirm Lamp Pic data Confirm Date Video Mode Language Reset All D E F J S SELECT SET ...

Page 63: ...o Auto Focus Mode Continuous AF Focus Confirmation MF Auto Bracketing Off Noise Reduction On Folders NIKON Display Mode On Brightness 3 Hue 6 Auto Off 30 S Seq Numbers On Controls All options on Shot Confirm Lamp Off info txt Off Auto Transfer On Frame Interval Slide Show 3 S Transfer On Small Picture 640 x 480 All other settings are unaffected ...

Page 64: ...erture is chosen by pressing on the Multi selector while holding down the 1 button 1Press for maximum aperture small f number for minimum aperture large f number 2Confirm aperture setting in monitor Note on minimum aperture Filter is applied to adjust the light entering the camera when the aperture is set to its minimum with the COOLPIX885 Because of this the minimum aperture setting may not yield...

Page 65: ... slower than 1 sec in the long time exposure Shutter speed limitations At a CONTINUOUS setting of Ultra HS p 139 the lowest available shutter speed is 1 30 sec At setting of m movie p 89 shutter speed cannot be set to a value slower than 1 15 sec BULB is only available at a setting of Single p 139 Note that if the shutter is open for more than 1 4 sec at any setting mottling noise may appear in th...

Page 66: ...valent to setting of 100 under normal conditions when AUTO lighting is poor however camera automatically raises sensitivity default to compensate ISO icon appears in monitor only when sensitivity raised above 100 100 Approximately equivalent to ISO rating of 100 200 Approximately equivalent to ISO rating of 200 400 Approximately equivalent to ISO rating of 400 A slight amount of mottling noise may...

Page 67: ...ual focus To use the self timer in combination with manual focus select a focus mode of 0 autofocus self timer or 0 macro close up self timer before choosing the focus distance The flash can be used while manual focus is in effect This makes it possible to combine the flash with a focus setting of infinity The units used for manual focus ban be selected from meters or feet using the Distance Units...

Page 68: ...hen viewed in the final picture This adjustment is called white balance Choosing a White Balance Setting In CSM shooting mode white balance can be chosen from the white balance menu in other modes white balance is adjusted automatically according to the type of scene The following options are available Option Description A Auto White balance automatically adjusted to suit lighting conditions Best ...

Page 69: ...rea How It Works Exposure calculated by comparing measurements from 256 areas of frame with library of typical compositions producing best possible setting for entire frame Camera measures light in area in center of frame occupying roughly 1 32 of total shown by square in center of monitor Camera measures light in entire frame but assigns weight of 80 to area in center of frame occupying roughly 1...

Page 70: ...ving unpredictably Not available at image quality setting of HI Camera takes sixteen consecutive thumbnail images and combines them into a collage This option is only available when image size is set to FULL Camera takes series of pictures 640 x 480 pixels in size Image quality p 104 is set to NORMAL allowing pictures to be taken at approximately two frames per second while shutter release button ...

Page 71: ...ighting is poor for example the subject is outside the range of the flash or you want to capture natural lighting under low light conditions BSS may not produce the desired results with a moving subject or if you change the composition while the shutter release button is pressed all the way down The BSS menu contains the following options BEST SHOT SELECTOR Off On OFF SELECT SET Option Description...

Page 72: ...ows This setting can put on computer produce images that in image without ows This setting can put on computer produce images that e Black and white mory as color images n this option is in monitor is in black and 35 and digital zoom ption is in effect An image adjustment icon appears in the monitor at settings other than Normal and Auto Only one image adjustment setting can be used at a time Sele...

Page 73: ...eye converter Slide Copy Adptr for ES E28 slide copying adapter Description No modifications are made to settings Use this option when no lens converter is attached Camera zooms out to widest angle p 90 Flash disabled p 98 Zooms in to maximum optical zoom position adjustable after setting p 90 Camera zooms in to maximum optical zoom position p 90 Optical zoom p 90 adjustable between maximum to mid...

Page 74: ... set with the 1 button in combination with the zoom button p 130 As with the 1 button sensitivity can be set to AUTO 100 200 or 400 Choosing a new sensitivity value from the Sensitivity sub menu changes the value selected with the 1 and zoom button while changing the sensitivity value with the 1 button changes the value selected in the Sensitivity sub menu SENSITIVITY AUTO 100 200 400 OFF SELECT S...

Page 75: ...i selector p 100 As with the 1 button exposure compensation can be set to values between 2 0 EV and 2 0 EV in increments of 1 3 EV Choosing a new exposure compensation value from the Exp sub menu changes the value selected with the 1 button while changing exposure compensation with the 1 button changes the value selected in the Exp sub menu SELECT SET EXP Exposure Mode AE Lock EXP 0 3 0 0 3 OFF EX...

Page 76: ...mains locked as long as it is held in this position p 61 Single AF Camera focuses when shutter release button is pressed halfway focus is locked as long as shutter release button is held in this position Choose this option to save battery power Focus Confirmation Use focus confirmation when you want to know exactly what areas of the frame will be in focus before you take the final picture Focus co...

Page 77: ... set in Multi shot 16 Ultra HS p 139 Best Shot Selector p 141 AE Lock p 148 or Noise Reduction mode p 154 White balance bracketing cannot be set in Continuous mode other than Single p 139 Best Shot Selector AE Lock or Noise Reduction mode ce bracketing make sure to turn The exposure compensation indication along with the compensated EV value for the next shot are displayed in the monitor when the ...

Page 78: ...ng in on images for enlarged views that show fine details marking individual images for transfer to a computer playback of Small Pictures The Playback Menu pp 163 175 Read this section for a description of the operations that can be performed in the playback menu deleting multiple pictures selecting a folder for playback slide shows or automatic sequential playback of the pictures stored on the CF...

Page 79: ...t be used with movies While photo is zoomed in use the Multi selector to view other parts of the image To cancel zoom press W button Press the MENU button to display or hide the playback menu Press the 6 button to display picture information Playback Tips In single image playback pictures are displayed briefly at low resolution while being read from the CF memory card This makes it possible to scr...

Page 80: ... pixel brightness with dark tones to left and bright tones to right while vertical axis shows number of pixels of each brightness in image 3 File number and type 4 Metering method 5 Shutter speed 6 Aperture 7 Exposure compensation 8 Sensitivity ISO equivalent Page 4 histogram 1 File number and type 2 Focal length 3 Shutter speed 4 Aperture 5 Focus mode or manual focus distance 6 Noise reduction 7 ...

Page 81: ...es and small picture files Operation T t Press y Press Function Zoom picture in Zoom increases each time button is pressed to maximum of 4 0X While image is zoomed in T indicator and zoom factor are displayed in monitor Cancel zoom Scroll to another area of image To use the Multi selector to view other pictures in memory first cancel zoom by pressing the W Reference Playing Images Back ...

Page 82: ...can also create a digital print order for printing photographs on any device compatible with the Digital Print Order Format DPOF and select all images on the CF memory card for transfer to a computer To view the playback menu Playback menu 1 Playback menu 2 1 Press MENU button to display playback menu Select p 2 Delete P 164 Folders P 167 Slide Show P 168 Protect P 170 Hide Image P 171 Print Set P...

Page 83: ...to highlight option press to put choice into effect Select Yes to delete all selected images Select No to return to playback menu without deleting images 5 Deleting All Pictures and Movies To delete all pictures on the CF memory card OFF DELETE Selected Images All images Print Set SELECT SET Highlight All Images Confirmation dialog is displayed 1 OFF ERASE ALL IMAGES No Yes SELECT SET Erasing all ...

Page 84: ... To view images in all folders select All Folders OFF FOLDERS Options All Folders N I KON TOKYO OSAKA SELECT SET OFF FOLDERS Options All Folders N I KON TOKYO OSAKA SELECT SET 2Press The most recent picture in the selected folder is displayed Each series of seventy pictures taken at a setting of Ultra HS is stored in a separate folder with a name consisting of N_ followed by a three digit number a...

Page 85: ...first w is in progress tion se the slide show The displayed To restart start and press on end the slide show and ack Changing the Display Interval The slide show menu shown opposite and the pause dialog shown above both contain a Frame Intvl option for changing the length of time each image in the slide show is displayed To change display interval highlight Frame Intvl and press on the Multi selec...

Page 86: ...images are only visible in the Hide Image menu They cannot be deleted in single image playback or from the Delete sub menu 1Press to highlight desired thumbnail 2Press to select image to be hidden Selected images are marked by H icon Repeat steps 1 and 2 to select more images To deselect highlight and press on the Multi selector 3Press QUICK p button to complete operation To exit Hide Image menu w...

Page 87: ... in box next to item To deselect a checked item highlight and press To complete print order and return to playback highlight Done and press To exit without altering print order press MENU button 4 Deleting the Print Order To delete the current print order when it is no longer needed select Print Set from the Delete menu p 166 Print Settings Created Using Other Cameras If a CF memory card containin...

Page 88: ... 240 160 x 120 or 96 x 72 pixels Choosing a new Small Picture size from the Small Pic sub menu changes the size of the small picture created by pressing the SMALL PIC button of the Multi selector and the size of small pictures created there after will be recorded in the newly selected size SET SELECT SMALL PIC OFF Auto Transfer Small Pic Auto Off 640 30S 640X480 320X240 160X120 96X72 See p 76 for ...

Page 89: ...ver that camera settings and picture info will not be displayed on the television screen when the camera monitor is off Choosing a Video Mode p 122 The Video Mode item in the SETUP menu offers a choice of NTSC and PAL standards for video output Be sure that the standard selected matches that of any video device to which you connect the camera PAL Video Mode p 122 At a setting of PAL the monitor wi...

Page 90: ...se software before installing Nikon View If you will be using Fotostation Easy install Nikon View 4 first and then install Fotostation Easy Before You Begin Installing Nikon View The first step to using Nikon View is to read the directions for installation These are included on the reference CD provided with your camera INDEX pdf icon in the reference CD 1Insert the reference CD in a CD ROM drive ...

Page 91: ...n the computer on Turn the computer on and wait for the operating system to start up 2Select the images to be transferred After removing lens cap and turning the mode dial to p turn the camera on and press the 7 button to display a page of thumbnail images p 162 Check that the images you want to transfer are marked with a D icon To select unmarked pictures for transfer or to deselect pictures alre...

Page 92: ...R will be displayed 6Disconnect the camera When all marked images have been transferred the monitor will show TRANSFER COMPLETED Before disconnecting the cable or turning the camera off you must remove the camera from the system as described below PREPARING TO TRANSFER TRANSFERRING IMAGE TO COMPUTER TRANSFER COMPLETED Interrupting Transfer To end transfer before all marked pictures have been copie...

Page 93: ... View has already been installed and the CF memory card is from a Nikon Digital Camera Nikon View will automatically detect the card See the Nikon View Reference Manual for information on transferring images to your computer CompactFlash Card Reader A CompactFlash CF card reader is a device that allows your computer to read memory cards of the type used in your camera CF card readers come in many ...

Page 94: ...s information on Caring for Your Camera p 188 Read this section for tips on cleaning and storing your camera Optional Accessories p 189 Learn what optional accessories are available for the COOLPIX885 Web Resources p 190 Where to get help on line Troubleshooting p 191 196 Read this section for help when your camera does not function as expected Specifications p 197 201 Technical data for the COOLP...

Page 95: ...on battery supplied in some areas CS E885 Soft Case EC CF 64 MB CompactFlash memory card EC CF 96 MB CompactFlash memory card EC AD1 PC card adapter UR E4 step down ring lens adapter WC E24 WC E63 Wideangle converter TC E2 2x TC E3ED 3x Telephoto converter FC E8 fisheye lens converter ES E28 slide copying adapter Not available in some areas MC EU1 remote cord Note on using remote release cable The...

Page 96: ... available separately is not properly connected Camera is in sleep mode Press shutter release button halfway Monitor is off Press on Multi selector to turn monitor on PAL is selected in Video Mode menu and video cable is connected Indicators are hidden In shooting mode press on Multi selector until indicators are displayed Slide show is in progress Monitor brightness requires adjustment Monitor is...

Page 97: ... inserted in card reader or card slot Possible Cause Picture has been overwritten or renamed by a computer or another make of camera Video cable not correctly connected Television not tuned to video channel Video Mode setting does not match video device Camera is off EH 21 AC adapter battery charger available separately is not properly connected or battery is dead Interface cable not correctly con...

Page 98: ...ror appears when you try to transfer images to computer Not enough space on CF memory card to record information needed for transfer Error encountered while saving picture Camera has run out of folder or file numbers Small picture cannot be created with the image CF memory card contains no pictures Solution Use approved CF memory card Press on Multi selector to highlight Format and press to format...

Page 99: ...vice CCD 3 37 million 3 21 million User can select from Full 2048 x 1536 pixels XGA 1024 x 768 pixels VGA 640 x 480 pixels Four Small Picture sizes selectable 640 x 480 320 x 240 160 x 120 or 96 x 72 pixels 3x Zoom Nikkor F 8 24 mm 35 mm camera format equivalent to 38 114 mm f 2 8 f 4 9 9 elements in 8 groups 4X digital zoom in 20 steps of 0 2X Contrast detect through the lens TTL AF Continuous AF...

Page 100: ...nsation 2 0 EV in steps of 1 3 EV Auto Exposure Bracketing EV 3 to 15 W EV 1 4 to 16 6 T Mechanical and charge coupled electronic shutter 8 1 1000 sec Bulb up to 60 sec in M mode Electronically controlled preset aperture Two steps f 2 8 and f 7 6 W ISO equivalent 100 200 400 Auto can be set in CSM mode Auto with TTL control 5 mode manual with fine tuning pre set white balance white balance bracket...

Page 101: ... camera memory card required when Nikon View is running Display 640 x 480 with 16 bit color 800 x 600 or greater full color recommended Others CD ROM drive USB interface only built in USB ports supported Mac OS8 6 needs USB driver ver 1 3 5 on Apple s website Windows OS Models Windows 98 98SE Windows 2000 Windows ME pre installed model CPU MMX Pentium or later RAM 32Mbyte 64Mbyte or more recommend...

Page 102: ... 156 161 FULL mode image size P 103 106 107 Full Screen Review mode P 71 Green light P 22 60 Hide Image P 171 HI mode image quality P 103 104 Histogram display P 159 Hue P 114 Image Adjustment P 142 143 Image file name P 116 Image Quality P 103 105 Image Sharpening P 144 Image Size P 103 106 107 Incandescent White Balance P 135 Infinity mode P 93 info txt P 120 Interval setting Slide Show P 169 E ...

Page 103: ...k P 176 177 Thumbnail mode P 72 162 TIFF P 76 104 Transfer P 73 174 Ultra HS shooting P 139 USB P 181 184 VGA Sequence shooting P 139 VGA image size P 103 106 107 Video Mode P 122 White Balance P 135 White Balance Bracketing P 153 Wide angle converter P 145 XGA image size P 103 106 107 Zoom P 58 90 91 Zooming in P 161 S T U V X Z W P 66 P 51 123 P 145 146 P 129 P 93 127 129 148 P 132 133 P 137 P 1...

Page 104: ......

Page 105: ...apan K1I5000401 11 6MAA0211 04 ...

Reviews: