169
Changing the Projecting Settings
U
sin
g th
e pro
je
cto
r
b
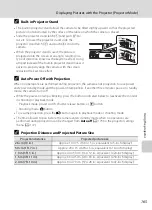
Projector Slide Show
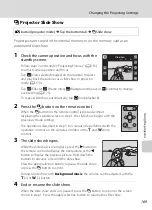
Project pictures stored in the internal memory or on the memory card as an
automated slide show.
1
Check the camera position and focus with the
standby screen.
Follow steps 3 and 4 under “Projecting Pictures” (
to adjust camera position and focus.
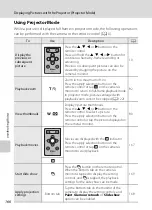
Tap
w
(View selected images) on the monitor to select
and play back the pictures as a slide show in projector
mode (
Tap
x
(Effects),
y
(Frame intvl),
z
(Background music), or
X
(volume) to change
each setting (
To repeat slide show automatically, tap
m
(loop playback).
2
Press the
b
button on the remote control.
When the
b
button on the remote control is pressed without
displaying the standby screen in step 1, the slide show begins with the
previously made settings.
The operations described in step 3 to 4 can also be performed with the
operation controls on the camera’s monitor or the
g
and
f
zoom
controls.
3
The slide show begins.
While the slide show is in progress, press the
K
button on
the remote control to display the next picture or the
J
button to display the previous picture. Hold down the
buttons to advance or rewind the slide show.
Press the apply selection button to pause the slide show,
or press the
b
button to end it.
During a slide show with
Background music
, the volume can be adjusted with the
g
(+) or
f
(–) button.
4
End or resume the slide show.
When the slide show ends or is paused, press the
b
button to return to the screen
shown in step 1. Press the apply selection button to resume the slide show.
P
button (projector mode)
M
Tap the bottom tab
M
b
Slide show
S
l
ide
show
4
4


