3
Get to Know Your Scanner
Your Scanner
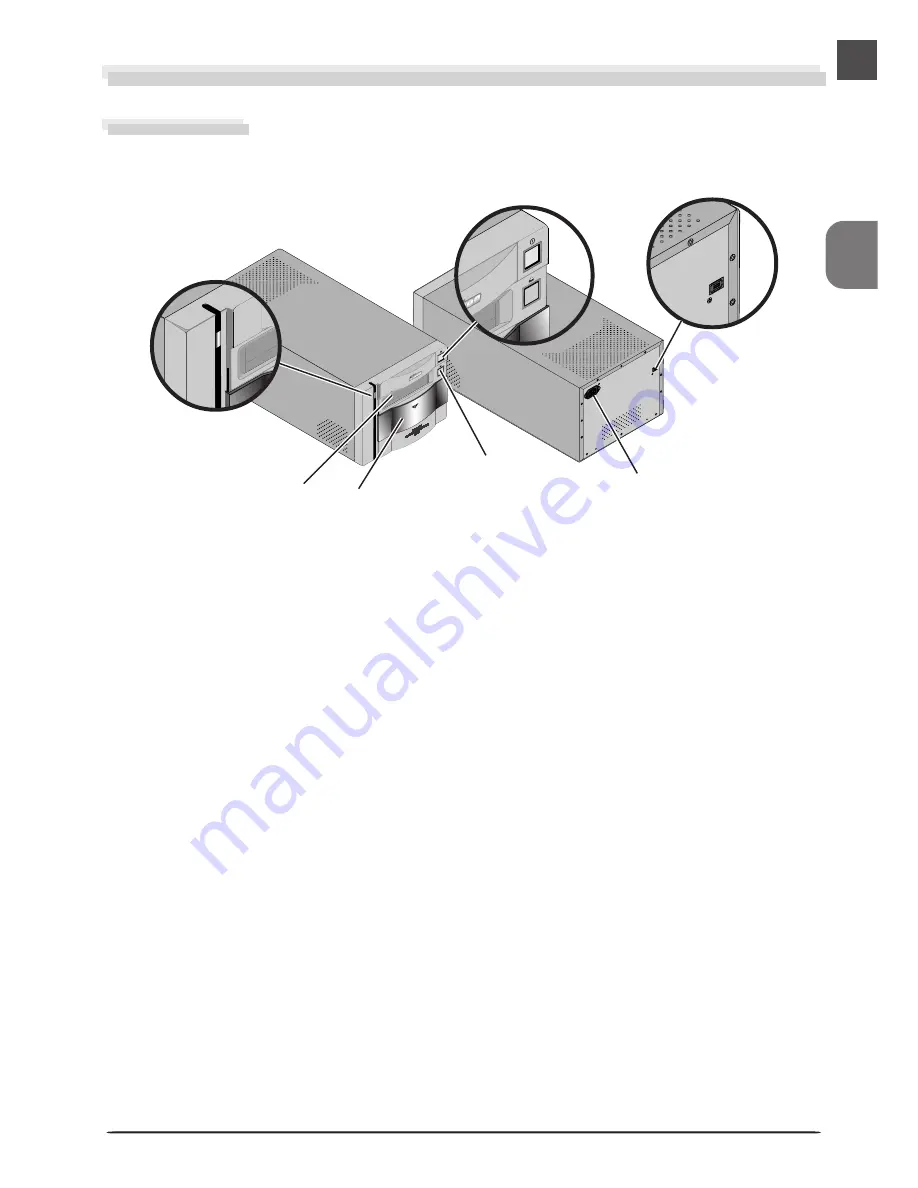
Front View
Rear View
쐇
Power switch
Press this switch to turn the scanner on and
off.
쐋
Eject button
Use this button to eject holders from the scanner.
쐇
쐆
쐂
쐋
쐄
쐏
���
Status LED
This LED blinks slowly (roughly twice every three
seconds) when the scanner is in operation. Do
not turn the scanner off, remove or insert adapt-
ers, or eject or insert film until the LED has
stopped blinking and is glowing steadily. If the
LED flashes rapidly (about five times a second),
a communications error has occurred or there is
a problem with the scanner. Turn the scanner
off, wait for at least five seconds, and then turn
the scanner on again.
The first time you run Nikon Scan, the status
LED will emit five series of rapid blinks (each of
about three seconds duration) when you first
insert a holder with the scanner on or if you
start Nikon Scan for the first time with the scan-
ner on and a holder in place. This does not
indicate an error. Do not eject the holder.
쐄
Sliding cover
Slide the cover down before inserting a holder.
To protect your scanner from dust and other
foreign objects, be sure ALWAYS to close the
cover when no holder is in place.
쐂
AC connector
Connect the female end of the power cable
here.
쐆
IEEE 1394/Firewire interface connector
Connect the IEEE 1394/Firewire interface cable
here.
���
Holder Slot
This is where you put holders for different
types of film. Don’t put anything in this slot
except an approved Nikon holder.
쐃


