background image


The riflescope 3-9x40, 3-9x50 has a variable magnification from 3 to 9X, 
2-7x32 from 2 to 7X. 

To change powers, just rotate the power selector ring until the desired 
magnification appears adjacent to the power index dot. 
 

(3) Adjustment of the riflescope 

Sighting through the riflescope, align the rifle with your aiming point on the 
target and shoot a trial round. If the bullet does not hit the aiming point, adjust 
the elevation and windage, as follows: 


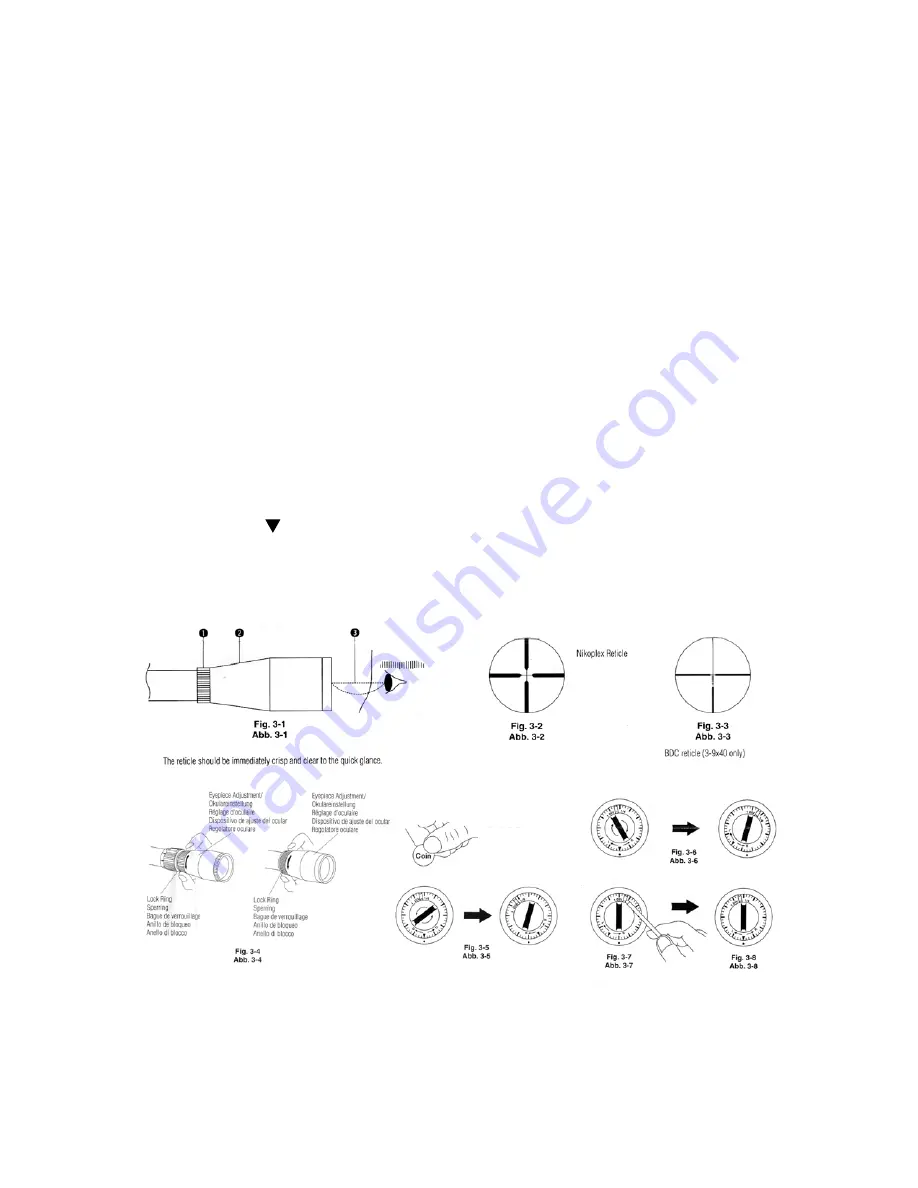
If the bullet hits under the aiming point, turn the elevation adjustment 
(counter-clockwise) in the direction of the arrow marked “U” for up as in 
Fig. 3-5. If the bullet hits high, turn adjustment (clockwise) in the direction 
of the arrow marked “D” for down. 


If the bullet hits to the right of the aiming point, turn the windage 
adjustment (clockwise) in the direction of the arrow marked “L” for left as 
in Fig. 3-6. If the bullet hits to the left of the aiming point, turn adjustment 
(counter-clockwise) in the direction of the arrow marked “R” for right. 


After the reticle has been adjusted to the point of impact, insert the tip of 
a screwdriver into the slot of the scale ring and rotate the scale ring so 
that the “


” is lined up with the index dot. (Fig. 3-7, Fig. 3-8) 

 
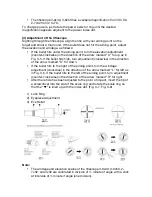
1)


Lock Ring 

2)


Eyepiece Adjustment 

3)


Eye Relief 


Note: 


The windage and elevation scales of the riflescope 3-9x40, 3-9x50, 2-
7x32, and 4x32 are calibrated in division of 

 minute of angle with a click 

at intervals of 

 minute if angle (one division). 

Summary of Contents for ProStaff Team Realtree 2-7x32

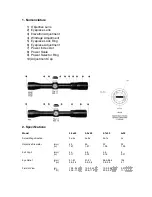
Page 1: ...damage your eye This precaution applies to all optical devices such as cameras and binoculars 2 The riflescope is effectively sealed against moisture and dust You may use your scope safely either in the rain or in dusty climates To preserve the appearance of the scope we suggest that it be dried and cleaned prior to storage Use a soft cloth for cleaning metal surfaces and use photographic lens tis...

Page 2: ...or Ring 10 Adjustment Cap 2 Specifications Model 3 9x40 3 9x50 2 7x32 4x32 Actual Magnification 3x 9x 3x 9x 2x 7x 4x Objective Diameter mm 40 50 32 32 in 1 57 1 97 1 26 1 26 Exit Pupil mm 4 4 5 6 4 6 8 in 0 17 0 22 0 18 0 31 Eye Relief mm 91 91 91 91 96 5 96 5 104 in 3 6 3 6 3 6 3 6 3 8 3 8 4 1 Field of View m 10 3 3 44 10 3 3 44 10 2 2 89 3 37 ft 33 8 11 3 33 8 11 3 33 4 9 5 11 1 ...

Page 3: ... Focusing Look through the eyepiece with your eye positioned about 10cm 4 in away from the eyepiece lens Fig 3 1 and you will see the Nikoplex reticle Fig 3 2 or the BDC reticle Fig 3 3 Be sure your eye is positioned within proper alignment and proper eye relief otherwise the view will black out Point the objective end of the scope at the sky Do not point at the sun or at a plain unpatterned wall ...

Page 4: ...ts high turn adjustment clockwise in the direction of the arrow marked D for down If the bullet hits to the right of the aiming point turn the windage adjustment clockwise in the direction of the arrow marked L for left as in Fig 3 6 If the bullet hits to the left of the aiming point turn adjustment counter clockwise in the direction of the arrow marked R for right After the reticle has been adjus...

Page 5: ...s surface or corrode the lens Brush dust off using a soft oil free brush 2 Scope Exterior Use a soft dry cloth to wipe off any dirt or fingerprints that might accumulate It is not necessary to oil the scope s surface 3 Windage Elevation Adjustments These adjustments are permanently lubricated Do not attempt to lubricate them Cover with caps supplied except when adjusting to keep out dust and dirt ...

Reviews: