background image

Scanning a Preview Image

The purpose of the preview scan is to rapidly display the image on the slide on

your computer screen.  Once the image is scanned and on the screen, you can then per-
form more detailed operations which will affect how the image will be captured in the
final high resolution scan.  A sampling of such operations might include cropping a par-
ticular portion of the image, or adjusting the contrast, brightness and color balance.
The results of  these operations will be displayed on the screen.  For now, though, we
will scan the sample slide using the scanner's default settings.

For Coolscan users: Before proceeding, make sure that the center line of the focus
wheel on the front panel of the scanner is in the centered position.  If not, set this
position by rotating the wheel with your thumb.

So, go ahead and click the 

P

REVIEW

button.

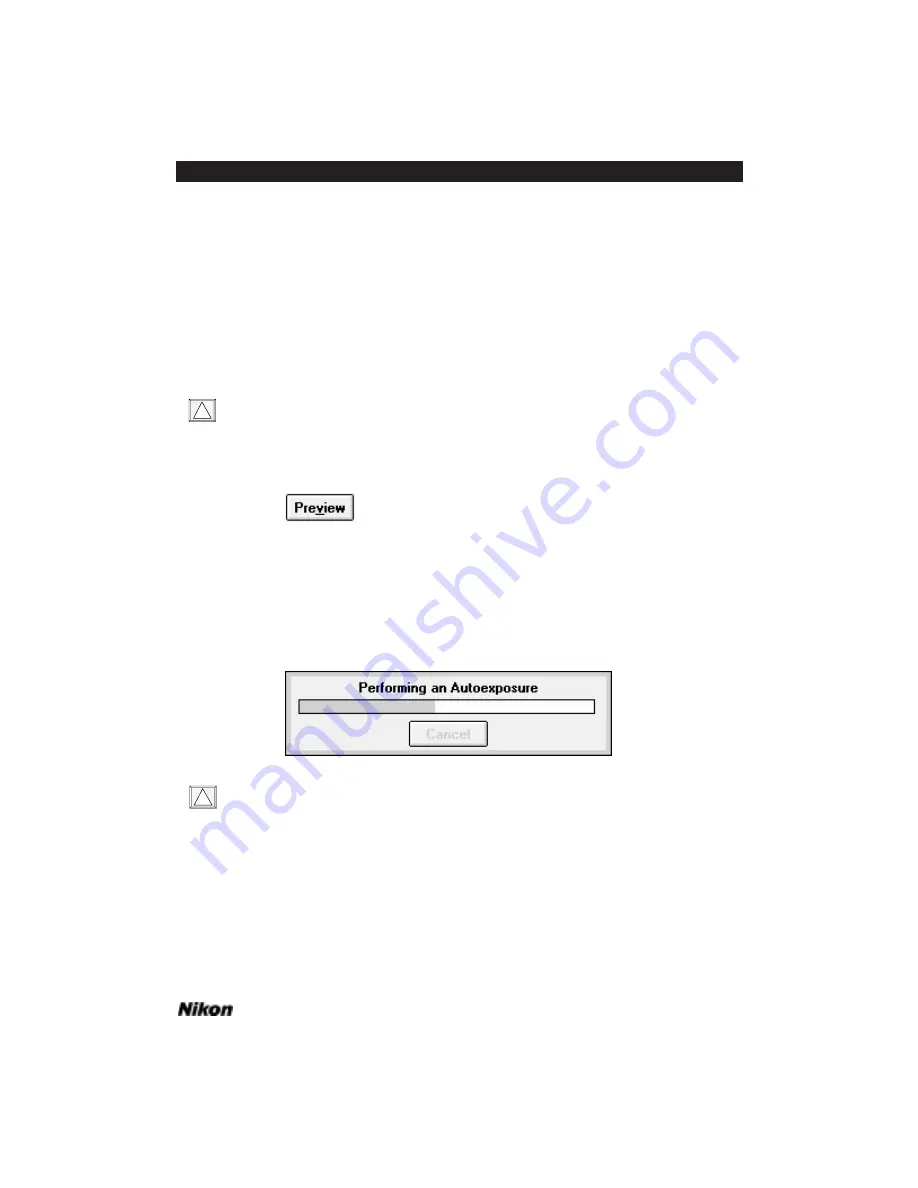
In order to obtain the best scan, Coolscan and the LS-3510AF first perform an

autoexposure sequence to determine certain image characteristics.  This will be indicated
on screen by the dialog shown below, and followed by additional messages as required.
The LS-3510AF will also perform an autofocus sequence, accompanied by the message

P

ERFORMING

A

UTOFOCUS

.  Coolscan users should then see the green LED on the scan-

ner’s front panel blink on and off slowly as the scanner is acquiring the image, while LS-
3510AF users should see the green BUSY LED illuminated.

Should you discover that you have inserted the slide in the wrong orientation, you
can abort the scan by pressing the Escape key.  Coolscan users can then eject the
slide by clicking on the 

E

JECT

S

LIDE

button in the bottom-right corner of the Scan

dialog box.  Do not click the 

E

JECT

S

LIDE

button during a scan.  Always abort the

scan first.

!

!

Software Reference for Scanners 

Page 37

Chapter 5

Getting Started on the IBM PC or Compatible

Summary of Contents for Scanners

Page 1: ...Software Reference for Scanners ...

Page 2: ... and Nikon and takes the place of any prior agreement oral or written between us relating to the Nikon Device Driver Software 1 License This license allows you to A Use the Nikon Device Driver Software only on a single Apple or IBM computer You must obtain a supplementary license from Nikon before using the Nikon Device Driver Software in connection with systems multiple central processing units c...

Page 3: ...receipt During this period if there is any defect in material or workmanship to the disk return it to the Nikon authorized dealer from whom you obtained it together with your origi nal fee receipt and it will be repaired or replaced free of charge If you ship the Nikon Device Driver Software to your Nikon authorized dealer you must pay all postage shipping trans portation insurance and delivery co...

Page 4: ...SOFTWARE FURNISHED UNDER THIS AGREEMENT SHALL IN NO CASE EXCEED THE FEE YOU PAID FOR THE NIKON DEVICE DRIVER SOFTWARE SOME STATES DO NOT ALLOW A LIMITATIONS ON HOW LONG AN IMPLIED WARRANTY LASTS OR B THE EXCLUSION OR LIMITATIONS OF INCIDENTAL OR CONSEQUENTIAL DAMAGES SO THE ABOVE LIMITATIONS OR EXCLUSIONS MAY NOT APPLY TO YOU NIKON S WARRANTY GIVES YOU SPECIFIC LEGAL RIGHTS AND YOU MAY ALSO HAVE O...

Page 5: ...rketing Development Group at Nikon Electronic Imaging This manual may not in whole or in part be copied photocopied reproduced translated or converted to any electronic or machine readable form without prior written consent of Nikon Inc The accompanying 35mm slide is for instructional purposes only and may not be copied reproduced translated or converted to any electronic or machine readable form ...

Page 6: ...f 3M Corp Chromalin is a trademark of DuPont Corp Pantone is a trademark of Pantone Inc HP IB is a trademark of Hewlett Packard America Online is a trademark of America Online Inc PressLink is a trademark of Knight Ridder Targa is a trademark of Truevision Inc All trademarks have been used in an editorial fashion with no intention of infringement Nikon Inc Electronic Imaging Department 1300 Walt W...

Page 7: ...he Distribution Diskette 6 Before You Begin 7 Running the Nikon Installer 7 Chapter 3 Software Installation IBM PC or Compatible 11 Nikon Software 11 Nikon Scanner Plug in Software 11 Nikon Control Software 11 Utility Software 11 Nikon Installer Software 11 System Requirements 12 The Distribution Diskette 12 Running the Nikon Installer 12 The Software Installer Dialog 13 The Product Selection Dial...

Page 8: ...ing a Scan 41 Step 1 Insert the slide into the scanner 41 Step 2 Launch the application program 41 Step 3 Select the film type and orientation 42 Step 4 Perform a preview scan 44 Step 5 Select the size of the scan 44 Step 6 Select the final resolution of the scan 45 Lock the file size 46 Step 7 Select the area to scan 47 Step 8 Perform a final scan 48 Step 9 Name the file 48 Step 10 Eject Remove t...

Page 9: ...Chapter 8 Setting and Restoring the Nikon Plug in State Macintosh 73 The Settings Controls 74 Reset 74 Set Defaults 74 Load Settings 74 Save Settings 75 The Automatic Method 75 Summary 75 The Set Default Method 75 Summary 76 The User Named Method 76 Summary 77 Chapter 9 Setting and Restoring the Nikon Plug in State Windows 79 The Settings Controls 80 Use Defaults 80 Set Defaults 80 Load Settings 8...

Page 10: ...1 Cropping and Sizing Images 93 The Sizing Controls 93 The Preview Window 94 Width 94 Height 95 Width and Height Units 95 Final Resolution 95 Final Resolution Units 96 Scan Pitch 96 Scan Resolution Status 97 Locking the Aspect 97 Locking the File Size 97 File Size Status 98 The Preview Window 98 Crop Rectangle 99 Coordinate Display 101 The Sizing Controls 101 Dimensional Units 103 Resolution and S...

Page 11: ... Exposure Controls 119 Automatic Exposure 119 Autoexposure Button 120 Autoexposure Check Box 120 Autoexposure Check Mark 120 Brightness 121 Adjusting Brightness 121 Contrast 122 Adjusting Contrast 123 Color Balance 124 Red Exposure 124 Green Exposure 125 Blue Exposure 126 Chapter 14 Focusing with Coolscan 127 Focus Controls 127 Selecting the Focus Method Macintosh only 127 Metered Focus Method 128...

Page 12: ...Gamma Curves 145 Monochrome Gamma Curve 145 Master Gamma Curve 146 Red Green and Blue RGB Gamma Curves 146 Viewing the Histogram 147 Adjusting the Preview Image 148 Setting Control Points on the Gamma Curves 148 Setting the Black Point 149 Setting the White Point 150 Automatic Contrast Adjustment 152 Modifying the Gamma Curves 152 Graphically Altering a Gamma Curve 152 Forcing a Gamma Curve to Lin...

Page 13: ...dows 165 The Main Menu 166 The File Menu 166 New Scan 167 Open 167 Close 168 Save 168 Save As 168 About 169 Exit 169 The Edit Menu 169 The Window Menu 170 Cascade 170 Tile 170 Arrange Icons 170 Zoom In 170 Zoom Out 171 Fit In Window 171 Autosize Window 171 Information 172 Selecting the Active Scan Window 172 Troubleshooting Macintosh 173 Troubleshooting Windows 177 Glossary of Computer Imaging Ter...

Page 14: ...Page XIV Software Reference for Scanners Table of Contents ...

Page 15: ...ic references to model LS 3510AF may apply to model LS 3500 as well Commands that are taken from the user interface are shown using HELVETICA type Cautions and Notes are printed in boldfaced type with a triangular warning marker located in the margin The Package Contents Listed below are the components of the Nikon Software Reference for Scanners package Nikon Software Reference for Scanners Nikon...

Page 16: ...dapter with LS 3510AF SCSI models Suggested Macintosh System Configurations Following these suggestions will yield the best scanning results Set your disk cache found in the Memory Control Panel in System 7 and in the General Control Panel in System 6 to the minimum setting as scan times increase if the RAM cache is set above the minimum Virtual Memory also in the Memory Control Panel in System 7 ...

Page 17: ... of disk space Make sure your hard disk has sufficient free space to store the images you plan to scan You should have at least 60 megabytes of free space available if you plan on maximum resolution scans Before You Begin Before proceeding make a backup copy of your master diskettes Store the master diskettes in a safe place Always work with the backup copies to install the software In Getting Sta...

Page 18: ...led in your computer or have one ready to install For detailed information on the scanning hardware and a full discussion of pro gramming your own scanner interface refer to the Technical and Programmer s References available from Nikon Now let s begin by following the instructions in the Software Installation chap ter for your particular computer Page 4 Software Reference for Scanners Read This F...

Page 19: ...d Commands that are taken from the user interface in this section are shown using HELVETICA type Nikon Scanner Plug in Software The Nikon Scanner plug in software must be used in conjunction with another software application It is called a plug in because it plugs in to any software applica tion which is compatible with the Adobe Photoshop plug in standard The Nikon Scanner plug in software user i...

Page 20: ...ikon Installer software The destination disk drive the drive on which you will be loading the scanning software must have enough disk space to accommodate the Nikon Scanner plug in and Nikon Control If you are planning on using the plug in with specific third party applications make sure that the application is already installed on the destination drive before installing the plug in About the Niko...

Page 21: ...obe Photoshop If you already have one of these applications loaded onto your computer all that is required is to run the Nikon Installer then copy the Nikon Scanner plug in from the NIKON CONTROL folder to the desired folder The Nikon Scanner plug in can then be automatically accessed by your existing imaging software The LS 3510AF LS 3500 GPIB software must be installed to a system disk The Nikon...

Page 22: ...on scanner Click the CONTINUE button Step 4 The Nikon Installer dialog box seen in Figure 2 3 will appear and your Startup disk will be selected for the installation Figure 2 3 The Nikon Installer dialog for selecting Easy Install of LS 3510AF GPIB model Click CUSTOMIZE for installation for other Nikon devices Page 8 Software Reference for Scanners Software Installation Macintosh Chapter 2 ...

Page 23: ...o be confused with the EASY INSTALL button which returns you to the first dialog or If you want to install the LS 3500 LS 3510AF GPIB model click the EASY INSTALL button Step 7 The dialog box shown in Figure 2 5 will appear indicating the progress of the installation You will see the names of the files being installed adjacent to EXTRACTING as they are first copied then extracted to your hard disk...

Page 24: ...Installer progress indicator Step 8 In most cases a message will be displayed informing you that the installa tion was completed successfully Be sure to make note of any error messages that appear before contacting Nikon Technical Support Some virus detection software may be triggered by the Nikon Installer You should disable them before using the Nikon Installer If you are installing a Nikon LS 3...

Page 25: ...r from the PC to the Macintosh without having to learn a new scanner software interface Use of the Nikon Scanner plug in is explained in detail later in this manual Nikon Control Software Nikon Control is a stand alone scanning software application that directly sup ports the Nikon Scanner plug in for use with Nikon scanners only If you would rather not scan from within another application program...

Page 26: ...SI controller card and the main installation program called SETUP EXE The SETUP EXE program will install Nikon Control and or a num ber of third party applications you may already own Make sure to make a backup copy of the Nikon distribution diskette before continuing Running the Nikon Installer First insert the backup copy of the distribution diskette into an available 3 1 2 inch floppy disk driv...

Page 27: ...elp at any stage of the installation by clicking on the HELP but ton Similarly you can exit the Nikon Installer at any time by clicking on the EXIT button To complete the software installation simply select from the options available in each dialog which are explained fully in the following sections The Software Installer Dialog The first dialog that appears after you launch the SETUP EXE program ...

Page 28: ...lick the EXIT button Clicking the HELP button will provide you with basic information about the current step in the installation procedure Figure 3 5 The NIKON SCANNER SOFTWARE INSTALLER dialog The Product Selection Dialog The PRODUCT SELECTION dialog seen in Figure 3 6 is used to indicate which Nikon product is being installed Select the appropriate button then click on the CONTINUE button to pro...

Page 29: ...e application software which you want to host or control the Nikon Scanner plug in software Use of the Nikon Scanner plug in requires a host application Select the host application through the INSTALLATION OPTIONS dialog shown in Figure 3 7 The function of this dialog is to tell the Nikon Installer which application you will be using to access the scanner Figure 3 7 The INSTALLATION OPTIONS dialog...

Page 30: ...d This is accomplished by entering the logical disk and path into the PATH SELECTION FOR FILES dialog as shown in Figure 3 8 then clicking CONTINUE The default path for Nikon Control is C NIKON Figure 3 8 The PATH SELECTION FOR FILES dialog If you want to install the Nikon Control software as the host application click CONTINUE This will invoke the SCSI DEVICE DRIVER OPTIONS dialog as seen in Figu...

Page 31: ...of the other options Improperly editing the CONFIG SYS file may cause your system to operate improperly or fail to boot Always make a backup copy of the CONFIG SYS file before editing it After you click on CONTINUE each file is copied to your hard disk The NIKON SETUP Progress Indicator seen in Figure 3 10 will report the percentage of the installa tion completed Software Reference for Scanners Pa...

Page 32: ...clicking on an icon instead of typing a path in the RUN dialog in the Program Manager or having to locate the program in the Windows File Manager Figure 3 11 The NIKON SETUP dialog After you create the Program Manager group you will see the REBOOT SYSTEM dialog You must reboot your system in order to load the driver software and use your Nikon scanner Figure 3 12 The REBOOT SYSTEM dialog Page 18 S...

Page 33: ...where you want the files to go based on your host application selection This path information will automatically appear in the PATH text box If this path is correct click on CONTINUE If it is incorrect correct the path entry then click on CONTINUE If necessary you can revert to the PATH SELECTION FOR INSTALLER dialog by clicking on BACK Figure 3 13 The PATH SELECTION FOR INSTALLER dialog The Insta...

Page 34: ...ntered through the PATH SELECTION FOR INSTALLER dialog shown in Figure 3 13 Upon completion of the third party application software installation you will be required to enter the destination path for the Nikon Scanner plug in This is accom plished by entering the path into the PATH SELECTION FOR FILES dialog as seen in Figure 3 8 then clicking CONTINUE If you are only updating previously installed...

Page 35: ...file yourself In this case select the COPY FILE BUT DON T UPDATE CONFIG SYS radio button then click CONTINUE If you select this option you must manually enter the following line into your CONFIG SYS file DEVICE C PATH MA13B SYS The last option in this dialog DON T COPY FILE OR UPDATE CONFIG SYS should only be selected when you do not want to complete this operation If you are attempting to use the...

Page 36: ...Page 22 Software Reference for Scanners Software Installation IBM PC or Compatible Chapter 3 ...

Page 37: ...p of the screen It will look similar to the one shown in Figure 4 2 Figure 4 2 The Photoshop Main menu Click on the FILE portion of the Main menu Notice the file pull down menu looks similar to the following illustration Without releasing the mouse button pull down until the ACQUIRE item is highlighted as shown in Figure 4 3 File Edit Mode Image Filter Select Apple Menu Main Menu Bar Click and pul...

Page 38: ...e right of the ACQUIRE item This will bring up the NIKON SCANNER item as shown in Figure 4 4 Highlight this box and release the mouse button This will initialize the plug in s Main Scan dialog box Figure 4 4 Selecting the NIKON SCANNER menu item Page 24 Software Reference for Scanners Getting Started on the Macintosh Chapter 4 ...

Page 39: ...lled the Main Scan dialog There are three sizes of this scan dialog designed to best accommodate the wide variety of available monitor sizes Macintosh PowerBooks are supported with appropri ate artwork depending on the available display These three different sized dialog boxes offer similar functionality with the dialog box for large screens offering a substantially larger preview making such oper...

Page 40: ...is can be changed in the Tools dialog explained later in this chapter Figure 4 6 The Nikon Scanner plug in s Main Scan dialog for monitors that display less than 832 x 624 pixels Coolscan connected Most scanning operations can be performed from this dialog box including selecting the film type previewing the image fine focusing cropping the image and performing basic brightness contrast and color ...

Page 41: ...orm your first preview scan and final scan The two sides of the film in the slide mount are not the same One side is known as the emulsion side and contains the image dye layers The other side is known as the base and consists of the celluloid film support We will explain the significance of the emulsion side of the film and how to identify it in a later chapter For the purpose of this introductio...

Page 42: ...r backwards although sharpest results will be achieved when the emulsion faces the front of the scanner This is because the imaging lens will not be reading the film through the film base which may reduce definition depending on the film type Insert the Slide Holder into the scanner so that the slide mount is closest to the lamp Close the dustproof cover so that the outside light does not affect t...

Page 43: ... of the image or adjusting the contrast brightness and color balance The results of these operations will be displayed on the screen For now though we will scan the sample slide using the plug in s default settings For Coolscan users Before proceeding make sure that the center line of the focus wheel on the front panel of the scanner is in the centered position If not set this position by rotating...

Page 44: ...T button during a scan Always abort the scan first The preview scan should take a little less than one minute to complete with slight variations in speed depending on the model of your Macintosh and the size of your dis play Upon completion the preview image will stay in the Scan dialog box while you prepare for the final scan Final Scan The next step is to perform the final scan at a higher resol...

Page 45: ...tely by the scanning progress indicator which shows the approximate duration of the scan and the portion remaining to be completed Coolscan users should also see the green LED on the scanner s front panel blink on and off as the scan proceeds while LS 3510AF users should see the green BUSY LED illu minated The final scan should take approximately two minutes to complete with slight variation in sp...

Page 46: ... will not be able to see the high quality color produced by the scanner unless your computer is configured with a 24 bit display card Using an 8 bit card will display a dithered or softened image comprised of many small dots Select Thousands or Millions of colors from your Monitors control panel for the best display Conclusion Congratulations You have completed Getting Started Feel free to continu...

Page 47: ...l soft ware the dialog will appear automatically If you are using a third party imaging application pull down the FILE menu to access the appropriate menu item used by that application for scanning input Then select NIKON SCANNER from the submenu Once launched you should see the fol lowing messages appear on your screen After a moment the following message will appear The Nikon Scanner plug in is ...

Page 48: ...scan Please note that engineering changes may mean that your ROM version which was the shipping version at the time of this printing will not be the same If no scanner type is indicated the message NO SCANNER CONNECTED will appear In this case the scanner may not have been in a ready state indicated by a steady green LED on the front panel when you started the Nikon Scanner plug in software You ca...

Page 49: ...slide when it is inserted into the scanner does affect the scanning process This will be addressed in depth in a later chapter Coolscan The slide is inserted into Coolscan in much the same way as a floppy diskette is inserted into a disk drive as shown in Figure 5 2 For optimum scanning the emulsion side should face the top of the scanner as shown in Figure 5 2 Insert the slide into the slot in th...

Page 50: ...ack of the scanner This is because the imaging lens will not be reading the film through the film base which may reduce defin ition depending on the film type Insert the Slide Holder into the scanner so that the slide mount is closest to the lamp Close the dustproof cover so that the outside light does not affect the scan The sample slide is a landscape or a horizontal image Therefore we can leave...

Page 51: ...ad and click the PREVIEW button In order to obtain the best scan Coolscan and the LS 3510AF first perform an autoexposure sequence to determine certain image characteristics This will be indicated on screen by the dialog shown below and followed by additional messages as required The LS 3510AF will also perform an autofocus sequence accompanied by the message PERFORMING AUTOFOCUS Coolscan users sh...

Page 52: ...acing the cursor on any of the small boxes or hot spots on the crop rectangle The cursor will change to an arrow when it is placed over any of these boxes Now move the rectangle inward by clicking and dragging until the border line of the rectangle encloses the area of interest as in Figure 5 4a for Coolscan and Figure 5 4b for LS 3510AF Repeat this step using the other small boxes as necessary un...

Page 53: ... 3510AF users should see the green BUSY LED illuminated The final scan should take approximately two minutes to complete with slight variation in speed depending on the model of your PC and the size of your display Figure 5 5 Start your final scan by clicking the SCAN button Unlike the preview scan the image will not display on the screen as the scan pro gresses Instead you will see the scanning p...

Page 54: ...usion Congratulations You have completed Getting Started Feel free to continue by exploring on your own However to take advantage of the full functionality of the scanner we strongly recommend reading the following chapters In them you will learn the fundamentals of scanning managing different film formats adjusting color con trast and brightness and utilizing the software controls Page 40 Softwar...

Page 55: ... Select the final resolution of the scan Step 7 Select the area to scan Step 8 Perform a final scan Step 9 Name the file Step 10 Eject Remove the slide These ten steps are described here in greater detail Step 1 Insert the slide into the scanner The first step required is of course to insert the slide into the scanner Selecting and orienting the scanned image is described in detail in Chapter Twel...

Page 56: ...mmand Step 3 Select the film type and orientation Step 3 requires that you make sure that the film type is correctly indicated There are four possible film types 1 Positive color slide 2 Negative color print film 3 Positive black and white 4 Negative black and white The scanner will perform image processing based on the film type selected so it is critical to indicate the correct film type The fil...

Page 57: ...d as either portrait or landscape In order for the software to correctly display the preview image it must first know the ori entation of the image The final scan will be properly oriented based on this selection The image orientation button is located adjacent to the preview image window The symbol on the face of this button changes to reflect which orientation the film is assumed to be in in the...

Page 58: ... screen thus enabling you to preview the effect they would have on the final scan Perform a preview scan by clicking on the PREVIEW button Figure 6 4 The PREVIEW button Macintosh and Windows Once the PREVIEW button is clicked the scanner will set its exposure then make a preview scan The image will display on a line by line basis as the preview progresses The preview image will remain in the Scan ...

Page 59: ...value edit box Windows Note that the size of the crop rectangle seen in the preview image area has changed to reflect the new dimensions Do not be concerned about the selected bound aries yet You will adjust the crop rectangle in Step 7 Step 6 Select the final resolution of the scan The final resolution determines the amount of detail captured in the scan The final resolution setting is especially...

Page 60: ...ing the final resolution automatically changes the pitch of the scanner stage mechanism scanner resolution The pitch is automatically set by chang ing the output resolution Therefore all you really need to know is what output resolu tion or FINAL RES you want See page 96 for an explanation of scanner pitch The new values for these fields follow We won t modify the pitch at this time Figure 6 8 The...

Page 61: ...s necessary to position the crop rectangle such that only the desired portion of the film is scanned This is accomplished graphically using the mouse Position the cursor inside the crop rectangle such that the four way arrow is visi ble Now hold down the mouse button and move the cursor Note that the entire crop rectangle moves with the cursor Position the crop rectangle over the area of the film ...

Page 62: ...ner control will keep you informed of the progress of the scan operation by displaying status messages during the scan Step 9 Name the file Now that the final scan is done it is necessary to name the scan file in order for it to be saved To do so select the SAVE AS command from the FILE pull down menu Select the location and file type enter a file name for the resulting file then click on SAVE 229...

Page 63: ...e Macintosh For Coolscan scanners the slide can be ejected by either clicking on the EJECT button or by selecting the EJECT menu item in the FILE pull down menu After a few moments the slide can be easily removed from Coolscan s film slot You may also run the Eject Coolscan Film application If you are using System 7 place the Eject Coolscan Film application in the Apple Menu Items folder located w...

Page 64: ...on the EJECT SLIDE button After a few moments the slide can be easily removed from Coolscan s film slot You may also run the Eject Coolscan Film application to accomplish this Figure 6 14b The EJECT SLIDE button Windows For LS 3510AF scanners simply open the dustcover and remove the slide holder from the scanner Page 50 Software Reference for Scanners Producing a Scan Chapter 6 ...

Page 65: ...g on pg 67 of this reference Note that the disk space feature will not provide accurate readings when using the Version 1 plug in You have seen a simple imaging software application is provided for use with Nikon scanners called Nikon Control This application was developed specifically to use the Nikon Scanner plug in For IBM PC or compatible computers running Windows the plug in can be used with ...

Page 66: ...asing the mouse button pull down until the ACQUIRE item is highlighted as shown in Figure 7 3 and drag the cur sor to the right following the arrow to the right of the ACQUIRE item and highlighting NIKON SCANNER Release the mouse button This will initialize the plug in s Main Scan dialog box Figure 7 3 Selecting NIKON SCANNER from the Photoshop FILE pull down menu Macintosh File Edit Mode Image Fi...

Page 67: ...ACQUIRE item is highlighted as shown in Figure 7 5 and drag the cur sor to the right following the arrow to the right of the ACQUIRE item and highlighting NIKON SCANNER Release the mouse button This will initialize the plug in s Main Scan dialog box Figure 7 5 Selecting NIKON SCANNER from the Photoshop FILE pull down menu Windows Plug in Initialization Macintosh The plug in will first set up the s...

Page 68: ...type of scanner to ensure that your scanner is installed and functional Once the plug in opens the functional SCSI or GPIB scanner you will be able to commence scanning In the unlikely event that an error message appears consult the Troubleshooting Windows chapter in this manual The Scan Dialogs Macintosh The Nikon Scanner plug in s main scanning dialog box is called the Main Scan dialog There are...

Page 69: ...in Figure 7 7 is the default dialog size for monitors with resolutions that are less than 832 x 624 pixels that include 9 through 14 screens Note that using the larger dialog results in longer preview times The dialog size can be changed in the Tools dialog explained later in this chapter Figure 7 7 The Nikon Scanner plug in s Scan dialog for monitors that display less than 832 x 624 pixels Macint...

Page 70: ...ion and cropping easier and more precise There are only some minor differences involving the position of the con trols within the Scan dialog The scan dialog shown in Figure 7 8 is the dialog used for monitors that have res olutions of 800 x 600 pixels or larger with small fonts and 1024 x 768 pixels or larger with large fonts Figure 7 8 The Nikon Scanner plug in s Main Scan dialog for monitors th...

Page 71: ...fine focusing cropping the image and performing basic brightness contrast and color balance tasks Using the Nikon Scanner Plug in You should already be familiar with most of the controls in the Nikon Scanner plug in from the previous chapters of this manual Following is a brief summary of the dialogs and controls used in the plug in with a description of how to interact with them Message Boxes A m...

Page 72: ...ated by clicking them once with the mouse These three dimensional buttons are in their active state when they are dis played with contrast as seen in Figure 7 11 Figure 7 11 Button in active state In their inactive state these buttons appear dimmed as seen in Figure 7 12 Figure 7 12 Button in inactive state Value Edit Boxes There are various small boxes within the scanning dialog box called value ...

Page 73: ...r at any point within a text or number string The fourth method is to Tab from one box to the next Shift Tab will move in reverse order The Tab key will highlight the entire value edit box Values are not set until you leave the value edit box using the Tab key or the mouse cursor Figure 7 13 Value edit box Macintosh and Windows Pop up Menus Macintosh Combo Boxes Windows Pop up menus as seen in Fig...

Page 74: ... selection box will display the new choice Figure 7 15a Pop up menu options Macintosh Figure 7 15b Combo box options Windows Graphics Windows A graphics window is an area of the Scan dialog box that displays all or part of an active image The preview image area in the Scan dialog box and the Gamma Curve Editor are graphics windows Special rules apply to the use of these windows and each is describ...

Page 75: ...located over the image area in the Scan dialog box but not within the crop rectangle it assumes the shape of a crosshair as shown in Figure 7 18 The color of the crosshair changes to provide contrast with the image For exam ple if the cursor is located over a black or dark area the cursor will change to a light color and vice versa in white or light areas The appearance of the crosshair cursor ind...

Page 76: ...ted through use of the Gamma Curve Editor dialog box Like the Scan dialog the controls in the Gamma Curve Editor dialog are positioned differently depending on the size of your display The Gamma Curve Editor dialogs shown in Figure 7 20a and Figure 7 20b are the large dialogs for Macintosh and Windows respectively Figure 7 20a The large Gamma Curve Editor dialog box Macintosh Page 62 Software Refe...

Page 77: ...he Gamma Curve Editor dialogs shown in Figure 7 21a and Figure 7 21b are the small dialogs for Macintosh and Windows respectively Refer to Table 11 1 in Chapter Eleven for specific information on monitor size resolution and preview size Figure 7 21a The small Gamma Curve Editor dialog box Macintosh Software Reference for Scanners Page 63 Chapter 7 Introduction to the Nikon Scanner Plug in ...

Page 78: ...f by the complexity of this dialog There are three items that you will need to be concerned with These are the USE LARGE SCREEN check box the SCANNING FOCUS check box the CALIBRATE LAMP button LS 3510AF only and the SCSI and GPIB selection buttons The rest of the Tools dialog box can be ignored for now since its primary function is service related INTERACTIVE HELP will provide an explanation of al...

Page 79: ...igure 7 23a The Tools dialog box for Coolscan Macintosh Figure 7 23b The Tools dialog box for Coolscan Windows Software Reference for Scanners Page 65 Chapter 7 Introduction to the Nikon Scanner Plug in ...

Page 80: ...ntosh Figure 7 24b The Tools dialog box for LS 3510AF Windows The Tools dialog box is invoked by clicking on the Tools button in the Scan dia log shown in Figure 7 25 Page 66 Software Reference for Scanners Introduction to the Nikon Scanner Plug in Chapter 7 ...

Page 81: ...by removing the check mark from this box If you change the state of the check box you must exit the Tools dialog exit the plug in then relaunch the plug in in order for the new screen size to take effect It is not necessary to restart the application software Faster previews can be obtained by unchecking the USE LARGE SCREEN check box and using the smaller screen size Figure 7 26 USE LARGE SCREEN ...

Page 82: ... the FOCUS button shown in Figure 7 27 Figure 7 27 The SCANNING FOCUS keystroke Interface Buttons This toggling pair of buttons which specifies SCSI or GPIB interface is available in the Main Scan dialog and in the Tools dialog While opening the plug in the soft ware will search the GPIB and then the SCSI bus for any scanners When found the device will have its ID displayed in the upper right hand...

Page 83: ...election dialog Macintosh Figure 7 29b The SCSI addressing selection dialog Windows Figure 7 30a The GPIB addressing selection dialog Macintosh Software Reference for Scanners Page 69 Chapter 7 Introduction to the Nikon Scanner Plug in ...

Page 84: ...should be used with caution Before calibrating the unit you must remove any film and film holders from inside Otherwise it will misinterpret the light balance and attempt to calibrate to a set ting that is outside normal limits This may leave the scanner in a confused state and possibly require a call to Nikon Technical Support to remedy To execute a calibration close the dust cover click the butt...

Page 85: ... replaced by a message box as shown in Figure 7 32 b When the mouse cursor is placed over a control the appropri ate help message for that control appears in this message box For example in the Scan dialog box suppose that the cursor was placed over the FILM TYPE selection box after selecting INTERACTIVE HELP The message box would relay the information shown in Figure 7 32 b This function operates...

Page 86: ...HELP button reappears Windows When the mouse cursor is placed over a control the appropriate help message for that control automatically appears in the top left hand corner of the Scan dialog Page 72 Software Reference for Scanners Introduction to the Nikon Scanner Plug in Chapter 7 ...

Page 87: ...od allows you to save and restore the state through named files The automatic method of setting and saving the plug in state involves saving the state each time the application exits and then restoring this state the next time the application is run In Figure 8 1a it is seen that clicking on either the CANCEL or SCAN buttons causes the last state of the plug in to be stored in the plug in preferen...

Page 88: ...tton shown in Figure 8 2 provides a means to set the plug in state to the default values in the plug in preferences file These default values can be changed by clicking the SET DEFAULTS button Figure 8 2 The RESET button Set Defaults The SET DEFAULTS button seen in Figure 8 3 provides a means to store the cur rent plug in settings as the default state in the preferences file After these new defaul...

Page 89: ...wing conditions would there be the need for a new preview scan to be performed The film was moved inside the scanner since the last preview scan The film was removed from the scanner manually or electronically ejected The scanner s power was turned off Summary To automatically save the state Exit the Nikon Scanner plug in through the CANCEL or SCAN buttons To automatically restore the state Run th...

Page 90: ... state Remove the preferences file from the system folder and restart the application The User Named Method You may desire to have several different scanner settings readily available To accomplish this you can load and save these settings into user named settings files These files are named by following the standard Macintosh file system conventions Clicking on the SAVE SETTINGS button brings up ...

Page 91: ...le can be saved through the SAVE SETTINGS but ton Make sure however to give this state a different name if you also wish to retain the original settings file Figure 8 7 The SELECT THE SETTINGS FILE dialog Summary To save the current state to a named file Click on the SAVE SETTINGS button To change the current state to the state in a named file Click on the LOAD SETTINGS button Software Reference f...

Page 92: ...Page 78 Software Reference for Scanners Setting and Restoring the Nikon Plug in State Macintosh Chapter 8 ...

Page 93: ...le c The user named method allows you to save and restore the state through named files The automatic method of saving the plug in state involves saving the state when you click the SCAN button as seen in Figure 9 1a When the plug in is run these saved settings are used as the new startup conditions The default settings are used after the application is terminated This includes the image present i...

Page 94: ... 2 provides a means to set the plug in state to the default values in the plug in s NKNCTRL INI file These default values can be changed by clicking the SET DEFAULTS button Figure 9 2 The USE DEFAULTS button Set Defaults The SET DEFAULTS button seen in Figure 9 3 provides a means to store the cur rent plug in settings as the default state in the NKNCTRL INI file After these new default settings ar...

Page 95: ...you exited the plug in are automatically in place The pre view image of the film is still present as well This saves you a great deal of time as the only operation required is to change the crop All other settings are identical Only under any of the following conditions would there be the need for a new preview scan to be performed The film was moved inside the scanner since the last preview scan ...

Page 96: ...ally use the factory default settings Summary To save the current state as the default state Click on the SET DEFAULTS button To invoke the default state as the current state Click on the USE DEFAULTS button To restore the factory defaults as the default state Remove the NKNCTRL INI file from the Nikon Control directory and restart the application The User Named Method You may desire to have sever...

Page 97: ... the LOAD SETTINGS dialog as shown in Figure 9 7 Once the settings file is selected and opened the state stored in the named file will be loaded in as the current state of the plug in Any changes made to this file can be saved through the SAVE SETTINGS button Make sure however to give this state a different name if you also wish to retain the original settings file Figure 9 7 The LOAD SETTINGS dia...

Page 98: ... named file Click on the SAVE SETTINGS button To change the current state to the state in a named file Click on the LOAD SETTINGS button Page 84 Software Reference for Scanners Setting and Restoring the Nikon Plug in State Windows Chapter 9 ...

Page 99: ... used to halt a scan that is in progress The Preview Button Clicking the mouse on the PREVIEW button shown in Figure 10 1 causes the scanner to perform a preview scan The preview scan enables you to see the film image on the screen and carry out any adjustments before the final scan is performed The preview scan contains the entire film area Figure 10 1 The PREVIEW scan button Macintosh and Window...

Page 100: ... shown in Figure 10 4 no autoexposure cycle will be performed Figure 10 4 Autoexposure cycle check box in inactive state Macintosh and Windows 2 Want autoexposure cycle for this image If the AUTO check box is active contains an X and there is no check mark next to it an autoexposure cycle will be initiated upon the next scan This state shown in Figure 10 5 indicates that you desire an autoexposure...

Page 101: ...uch as exposure can vary widely even within the same film type To accomplish this it is necessary to remove the check mark next to the AUTO cycle check box This can be achieved by double clicking on the AUTO cycle check box shown in Figure 10 7 Figure 10 7 Forcing an autoexposure cycle Macintosh and Windows The first click removes the check mark and the X in the autoexposure cycle check box The se...

Page 102: ...plug in will automatically perform an autofocus the first time a preview is performed or before the final scan If the AUTO checkbox is unchecked and checked again this is reset and another autofocus will be performed before the next preview or final scan Figure 10 9 The Autofocus button Macintosh and Windows Manual Focus LS 3510AF only In some cases such as with blurry images or warped film you ma...

Page 103: ...affect the out come of the preview scan Each of these is controlled through the Scan dialog and the Gamma Curve Editor dialog boxes as indicated in Table 10 1 Parameter Dialog Box Described In Film Type Scan Chapter 12 Image Orientation Scan Chapter 12 Auto Exposure Scan Chapter 13 Brightness Scan Chapter 13 Contrast Scan Chapter 13 Color Balance Scan Chapter 13 Gamma Curves Gamma Editor Chapter 1...

Page 104: ... used for the scan This scan file can be saved in two 24 bit true color file formats either PICT or TIFF 5 0 file Figure 10 12 The scanned image is saved to a disk file through the SAVE AS file dialog box Macintosh Windows You can then save the resulting scan to disk by pulling down the FILE menu to activate the SAVE AS dialog as seen in Figure 10 13 A dialog box will appear prompting you to enter...

Page 105: ...pplication in the Apple Menu Items folder in your System Folder Never use tweezers or other tools to remove a slide Eject Coolscan Film Figure 10 14 The Eject Coolscan Film application icon Macintosh Windows The film can be ejected from the scanner by re running the plug in and clicking on the EJECT button or it will automatically eject upon the next scanner power up It can also be ejected using t...

Page 106: ...on is terminated through the QUIT command in the FILE pull down menu or by simply pressing ð and Q Windows The application is terminated through the EXIT command in the FILE pull down menu or by simultaneously striking the ALT key and the F4 key Page 92 Software Reference for Scanners Performing a Preview or Final Scan Chapter 10 ...

Page 107: ... higher the resolution the greater the scan quality and the larger the resulting scan file size You will want to select an appropriate scanning resolution for each image The objective is to scan an image at the appropriate resolution for your intended use thus minimizing unnecessarily large file sizes yet guaranteeing sufficient data for demanding output requirements Figure 11 1a Sizing controls i...

Page 108: ... you have seen the preview scan is displayed in the image portion of the pre view window The cursor provides graphical control of the crop rectangle when it is moved within this window Graphical control of the crop rectangle is explained in this chapter in the section Crop Rectangle The orientation of the preview window portrait or landscape depends on the sta tus of the orientation button as show...

Page 109: ...e selectable They can be defined as pixels inches cm mm picas or points This is shown in Figure 11 5 Figure 11 5 Selecting the units of measure for WIDTH or HEIGHT Macintosh and Windows Final Resolution The FINAL RESOLUTION determines the number of pixels per unit area in the final scan or the output resolution The value of this setting will determine the scan PITCH For example if you decide that ...

Page 110: ...ally the inch cm or mm units of measure selected will correspond to the WIDTH and HEIGHT units Selection of the units of mea sure for this setting is shown in Figure 11 6b Figure 11 6b Selecting the units of measure for FINAL RESOLUTION Windows Scan Pitch The scan PITCH is a number that determines the input resolution of a scan The lower the PITCH number the higher the quality of the resulting sca...

Page 111: ...noted in the beginning of this chapter it is possible to lock the aspect ratio or proportions of a crop rectangle If the LOCK ASPECT check box is checked as shown in Figure 11 9b the WIDTH and HEIGHT values can change but the ratio cannot Figure 11 9b The LOCK ASPECT box in active state Windows Locking the File Size Macintosh We also noted earlier that you may wish to constrain the file size of sc...

Page 112: ...se components in the landscape mode are shown in Figure 11 12 Figure 11 12 The components of the preview window in landscape mode The preview window is also present in the Gamma Curve Editor dialog box However no crop rectangle is present although the rectangle of the preview window is used to contain data for the autocontrast button When manipulating the exposure controls in the Gamma Curve Edito...

Page 113: ...r performing a new preview Windows Resolution Font Size Preview Size Dialog Size 640 x 480 Small 300 x 200 Small 800 x 600 Small 486 x 324 Large 800 x 600 Large 389 x 260 Small 1024 x 768 Large 556 x 371 Large Table 11 1b Monitor resolution and preview sizes Windows If no preview image is available when the Scan dialog is invoked a black preview area is displayed Crop Rectangle As seen in Figure 1...

Page 114: ... rectangle it is displayed as a four arrow cursor as shown in Figures 11 13 and 11 14 The coordinates of the cursor are shown just above the center of the preview window Notice that as you move the cursor within the crop rectangle the value of the coordinates changes accord ingly You can reposition the crop rectangle without resizing it by clicking and dragging the mouse when the four arrow cursor...

Page 115: ...the four corners of the crop rectangle as seen in Figure 11 13 The scanner s coordinate array system reflects the corner values in pixels of the image area The Sizing Controls The sizing controls used in conjunction with the crop rectangle in the preview image specify the spatial parameters height width and image area of the scan This relationship is illustrated for example in Figure 11 17a for Ma...

Page 116: ... 624 792 624 216 483 792 1438 a Sizing text entry dialog b Preview image Height 6 Inches 0 0 Width 4 Inches Pixel coordinate system Width 4 Inches Height 6 Inches Pitch 4 Scan Res 675 DPI Lock Aspect File Size 364 5 KB Final Res 72 Pixels Inch Page 102 Software Reference for Scanners Cropping and Sizing Images Chapter 11 ...

Page 117: ... that dots and pixels are functionally the same Typically the width and height are specified in the same units of measure The final resolution uses either inches cm or mm based on the selection of units of measure for the width and height Resolution and Scan Pitch Resolution is a measure of the amount of data per unit area The units are pixels The unit measure is either inches cm s or mm s This is...

Page 118: ...he resolution of the scan is selected to best suit its intended use in par ticular the device it will be output on To match any output device that has 300 dots per inch the final resolution might be selected to be 300 pixels per inch This simple rule does not necessarily apply for all applications For example when your intended output is for offset or printed reproduction the scan resolution shoul...

Page 119: ...72 144 and 288 dpi FINAL RESOLUTION settings are shown in Figure 11 18b The WIDTH and HEIGHT remain constant Note however that the scan PITCH the SCAN RESOLUTION and the FILE SIZE vary accordingly a 72 ppi final resolution c 288 ppi final resolution b 144 ppi final resolution Width 4 Inches Height 6 Inches Pitch 4 Scan Res 675 DPI Lock Aspect File Size 364 5 KB Final Res 72 Pixels Inch Width 4 Inc...

Page 120: ...ans that require interpolation to reach an exact size Interpolation is the process by which the Nikon Scanner plug in reduces the number of pixels to fit the precise resolution requested Whenever possible it is recommended to use Integer Pitch settings For example suppose that a desired WIDTH HEIGHT and FINAL RESOLUTION produces a PITCH of 2 05 In this case forcing the PITCH to 2 0 while accepting...

Page 121: ...is dialog affects the crop and vice versa You can lock the ASPECT keeping the ratio between the crop rec tangle s width and height constant regardless of changes to the output parameters and crop rectangle size You can also lock the FILE SIZE keeping the pixel count in the scan as well as the aspect ratio constant This makes it easy to set final dimensions and resolution while freeing you up to ad...

Page 122: ...re determined Although not necessary it is easiest to first lock the FILE SIZE which automatically locks the ASPECT Move the cursor over the preview window and inside the current crop rectangle a Lock Aspect Ratio Lock mark locks Width and Height b Lock File Size Lock mark locks Width Height and Final Resolution Automatically locks Aspect ratio a Lock Aspect Ratio Lock mark locks Width and Height ...

Page 123: ...le Figure 11 21a Moving the crop rectangle Macintosh a Crop rectangle b Moving the crop rectangle Width 5 Inches Height 3 Inches Pitch 1 Scan Res 2702 DPI Lock Aspect File Size 3 6 MB Final Res 288 Pixels Inch Width 5 Inches Height 3 Inches Pitch 1 Scan Res 2702 DPI Lock Aspect File Size 3 6 MB Final Res 288 Pixels Inch 1248 432 2688 432 1248 1236 2688 1236 592 1088 2032 1088 592 1952 2032 1952 So...

Page 124: ...rner of your screen upon system startup in order for the Nikon Scanner plug in to save the preview image The larger main dialogs create larger pre view images and a larger Nikon Scanner preferences file Figure 11 22a Available DISK SPACE status message Macintosh Windows A status message indicating the amount of disk space available on the selected disk drive is provided as shown in Figure 11 22b T...

Page 125: ...s free on your hard disk in order for the Nikon Scanner plug in to save the preview image The larger main dialogs create larger preview images and a larger NKNCTRL INI file Figure 11 22b Available DISK SPACE status message Windows Software Reference for Scanners Page 111 Chapter 11 Cropping and Sizing Images ...

Page 126: ...Page 112 Software Reference for Scanners Cropping and Sizing Images Chapter 11 ...

Page 127: ...scape button in portrait mode Portrait Landscape Button in Landscape Mode Clicking the mouse on this button when it is in the portrait mode causes the image orientation to rotate 90 degrees into the landscape mode as shown in Figure 12 2 Clicking the mouse on this button when it is in the landscape mode causes the image orientation to rotate 90 degrees into the portrait mode and the button s face ...

Page 128: ...s during this operation and it is typi cally very fast Figure 12 4 Flip Horizontal button Portrait or Landscape In order for the plug in to properly display an image you must insert it into the scanner slot narrow side first Coolscan and select the correct orientation Incorrectly setting the orientation causes the image to be viewed sideways i e rotated by 90 degrees This rotation would also be pr...

Page 129: ...other words blues in the image appear blue on the film Blacks in the image appear opaque on the film Color Negative Film Color negative film sometimes called print film is typically unmounted in strips of five or six frames Shining a light through color negative film produces a negative image In other words blues in the image appear orange on the film Blacks in the image appear transparent on the ...

Page 130: ...ure 12 5b Figure 12 5b FILM TYPE pop up menu selected Macintosh The adjacent check mark indicates the currently selected film type By moving the mouse up and down the menu without releasing the mouse button you can select one of the four film types Indicate the selected type by placing the reverse box over it then releasing the mouse button The FILM TYPE button will return to the single line displ...

Page 131: ... currently selected film type By moving the mouse up and down the menu without releasing the mouse button you can select one of the four film types Indicate the selected type by placing the reverse box over it then releasing the mouse button The FILM TYPE button will return to the single line display Software Reference for Scanners Page 117 Chapter 12 Film Type and Orientation ...

Page 132: ...Page 118 Software Reference for Scanners Film Type and Orientation Chapter 12 ...

Page 133: ...overall green cast is to increase the Blue and Red exposures by equal amounts Equal amounts of Blue and Red are equivalent to the same amount of Magenta which is the complimentary or opposite color to Green and will neutralize it Adding to any value when scanning positives will shift the color in that direction When scanning negatives adding to the value removes that color Automatic Exposure The a...

Page 134: ... the next scan If the Autoexposure button is not selected no autoexposure operation will occur before the next scan Figure 13 2 AUTO check box in inactive state Macintosh and Windows If the Autoexposure button is selected an autoexposure operation will occur dur ing the next scan depending on the status of the Autoexposure check mark Autoexposure Check Mark The presence of the Autoexposure check m...

Page 135: ...erexposed image Essentially it allows more light through the film However care must be exercised when increasing the brightness especially if there are large bright areas highlights in the film If strong highlights are present and the bright ness control is boosted these areas might saturate overexpose or wash out reducing or eliminating detail in these areas Similarly problems can occur if the br...

Page 136: ...ights while darkening the shadows Using the correct contrast setting when scanning is critical to achieving good results This is because the dynamic range of film is greater than the dynamic range of the scanner That is the film contains a wider range of densities than is reproducable by the imaging system This is the case for any digital imaging system It should be noted that the contrast control...

Page 137: ...The Contrast slider control in the Scan dialog Macintosh The Brightness control and Red Green and Blue exposure controls function in the same manner as the Contrast control You can enter a number directly into the value edit box associated with each control or you can use the associated slider controls Again to access the slider controls click and hold the selected button down and move the mouse l...

Page 138: ...r LS 3510AF or LS 3500 Like the brightness control the color controls affect the entire range of the color For example changing the red intensity lightens the red shadows midtones and high lights by the same amount More accurate local control can be achieved by modifying the gamma curves discussed in Chapters Fifteen and Sixteen Care must be exercised when modifying colors as undesirable results c...

Page 139: ...d value edit box in the Scan dialog Windows Green Exposure Macintosh The Green Exposure button the button labeled G in the Scan dialog lets you select the amount of green exposure in the image either through the associated Green value edit box or through the Green Magenta slider The Green value edit box can be changed by clicking in the box and entering the next value The greenness val ues can ran...

Page 140: ...5 for LS 3510AF Clicking on the Blue button without releasing it invokes the Blue slider as shown in Figure 13 9a which allows you to drag a white slider control to select the blue yellow value Figure 13 9a The Blue slider control in the Scan dialog Macintosh Windows The Blue Exposure value edit box adjacent to the B in the Scan dia log lets you specify the amount of blue exposure in the image The...

Page 141: ...e is displayed during this focus operation The second focusing technique called Visual Focus involves positioning the cur sor over the preview window at which point a magnifying glass cursor appears By posi tioning this cursor over the region of interest and clicking the mouse button Coolscan will perform a constant high resolution scan in the area you have selected As you change the focus control...

Page 142: ... movements indicate the results of a focus measure The meter value indicated by the black bar indicates the sharpness of focus The optimal focus is achieved by positioning the meter indicator as far to the right as possible Remember the best focus that Coolscan can achieve is dependent on the sharp ness of the image Some images may not contain sharp details to focus on In such cases focus on the g...

Page 143: ...s until the maximum level is indicated Figure 14 3b Windows The Scan dialog in the Metered Focus mode The user clicks on the FOCUS button The cursor is then placed in the preview window and clicked on the area to be focused on A meter bar is displayed allowing the user to adjust the focus until the maximum level is indicated Clicking the DONE button exits the focus operation Software Reference for...

Page 144: ...an dialog box is shown in Figure 14 4a during a Visual Focus operation Figure 14 4a The Scan dialog in Visual Focus mode Macintosh The user clicks on the FOCUS button then positions the magnifying cursor over the region of interest and clicks The film is repetitively scanned with a highly magnified scan and displayed in the preview window allowing the user to fine focus Windows First invoke the pr...

Page 145: ...ws While holding down the Control key the user clicks on the FOCUS button then positions the magni fying cursor over the region of interest and clicks The film is repetitively scanned with a highly magnified scan and displayed in the preview window allowing the user to fine focus A blurry or soft original image cannot be made sharper using the focus control In fact out of focus images are much har...

Page 146: ...Page 132 Software Reference for Scanners Focusing with Coolscan Chapter 14 ...

Page 147: ...or button Custom Check Box For the modified gamma curves to be used they must first be downloaded to the scanner The gamma curves will be sent to the scanner before the next scan occurs if the CUSTOM check box in the Scan dialog is checked When checked clicking on this box will disable this function and remove the check mark Figure 15 2 The CUSTOM check box in active state Macintosh and Windows Sc...

Page 148: ...hat you can return to the factory default gamma settings at any time by deleting the plug in preferences file which is located in the preferences folder Windows Note that you can return to the factory default gamma settings at any time by deleting the plug in s NKNCTRL INI file which is located in the Nikon directory Changing Your Mind If you decide that you don t want to send new gamma curves to ...

Page 149: ... and 16 2b provide precise controls for manipulating the gamma curves associated with the scanner Figure 16 1a The large Gamma Curve Editor dialog Macintosh Figure 16 1b The large Gamma Curve Editor dialog Windows Software Reference for Scanners Page 135 Chapter 16 The Gamma Curve Editor Dialog ...

Page 150: ...Windows The Interactive Help Button Macintosh only If at any time you require help in the Gamma Curve Editor dialog you can click on the INTERACTIVE HELP button seen in the top portion of Figure 16 3 to view short help messages relevant to each control The messages will appear in a help message box in the space normally occupied by the INTERACTIVE HELP button For example if the Page 136 Software R...

Page 151: ... the Monochrome gamma curve and the Master gamma curve When a color film type is selected the Red Green and Blue RGB gamma curves are used in conjunction with the Master gamma curve When a black and white film type is selected the Monochrome curve is used in conjunction with the Master gamma curve Gamma curves are loaded by the scanner and applied to the scan data before the final data is sent to ...

Page 152: ...a Tables to the Scanner The factory default gamma curves reside in the scanner so it is not necessary to send them to the scanner Conversely default custom gamma curves or gamma tables must be sent to the scanner if they are to be utilized The important point to understand is that the gamma curves sent to the scanner are the ones currently active in the Scan dialog These might be the factory defau...

Page 153: ...de in the Nikon Scanner plug in s preferences file If the plug in does not find a preferences file upon start up which contains the default settings it creates a preferences file and loads it with the factory default settings So in this scenario the default settings would be identical to the factory default settings At any time you can save the custom gamma curves currently in the Scan dialog as t...

Page 154: ...y to save and recall additional sets of default settings at any time through the SAVE SETTINGS and LOAD SETTINGS buttons in the Scan dialog In both cases a standard file dialog will appear requesting the name and location pertaining to the file These dialogs are shown in Figures 16 5a 16 5b 16 6a and 16 6b for Macintosh and Windows Figure 16 5a The LOAD SETTINGS dialog Macintosh Figure 16 5b The L...

Page 155: ...CUSTOM check box in the Scan dialog Therefore even though a set of default custom gamma curves are read into the plug in these will not be sent to the scanner unless the CUSTOM check box is checked Loading Curves from Gamma Files Like settings files gamma curves can be created and saved as gamma curve files in your imaging application e g Photoshop and loaded back into the Nikon Scanner plug in th...

Page 156: ... Windows all three R G B curves will be read from the scanner Similarly if the Master curve is active when the SCANNER GAMMA button is clicked all of the curves will be read from the scanner Figure 16 7a Reading gamma curves from the scanner key command Macintosh Figure 16 7b Reading gamma curves from the scanner key command Windows Loading Custom Gamma Curves Macintosh only Custom gamma curves cr...

Page 157: ...mma curve s button keystroke Macintosh Custom gamma curves can also be loaded from a settings file by clicking on the LOAD SETTINGS button in the Scan dialog Resetting the Gamma Curves When working in the Gamma Curve Editor dialog it is possible to reset the gamma curves to their original values by clicking on the RESET button shown in Figure 16 10 The original values are those in effect at the ti...

Page 158: ... and master curves Each of the Red Green and Blue gamma curves is unique The Master curve pro vides a simple means of adjusting all of the primary curves equally Thus you do not have to adjust each primary curve individually as illustrated in Figure 16 11 Figure 16 11 The resulting gamma curves sent to the scanner are a combination of the primary red cyan green magenta blue yellow gamma curves and...

Page 159: ...highlight values in an image The input and output values on 8 bit scanner models range from 0 to 255 The input values on 12 bit scanner models range from 0 to 4095 while the output values are still limited to the range of 0 to 255 A diagonal line connecting the lower left and upper right corners would represent a linear transfer function For example an input value of 100 would produce an output va...

Page 160: ...content in the image The Master curve is initialized as a diagonal linear function representing a 1 1 input output relationship Figure 16 14 The Master gamma curve button Red Green and Blue RGB Gamma Curves At times it is desirable to view all of the gamma curves simultaneously These include the Master curve and the R G and B primary gamma curves This is accom plished by clicking and holding the R...

Page 161: ...the Gamma Curve Editor dialog shown in Figure 16 17 As long as the button is held down the histogram will be displayed A typical histogram is displayed in Figure 16 18 This control is active when either a monochrome or color film type is selected in the Scan dialog The histogram is viewable only while the mouse button is held down Figure 16 17 The Histogram button Master Curve Red Curve Green Curv...

Page 162: ... window This involves setting control points on the gamma curves selecting the white point and black point and performing automatic contrast adjustment Setting Control Points on the Gamma Curves In Figure 16 20 a control point is seen superimposed on the Master gamma curve This control point provides a means to relate densities in the preview window to a point on the Master gamma curve All pixels ...

Page 163: ...t a black area in the image is represented by a 10 in the scanned data Values 0 9 would be wasted since no pixel in the image would have any value lower than 10 unless there are no blacks in the original image By setting the Black Point to 10 a re mapping of the data would occur such that a value of 10 from the scanner would consequently produce a 0 When the Black Point is selected the active gamm...

Page 164: ...oint button Macintosh and Windows When you decide on the pixel you want to use as the image s Black Point clicking the mouse forces the gamma curves to use this value as the minimum value in the pre view window Any pixels darker than the black point will be set to the minimum value The result of this new curve is approximated in the preview window Setting the White Point The White Point represents...

Page 165: ...y adjust ed to reflect the Black Point After the White Point button is clicked shown in Figure 16 24 position the mouse cursor over the image in the preview window and select a pixel value to be used as the lightest point in the image This will be the White Point or reference point for darkness In addition the pixel s location and RGB component values will be displayed as described in the Marker b...

Page 166: ...enta and Blue Yellow gamma curves are far more complex and the result more difficult to predict The gamma curves can be modified manually or automatically The manual mode involves selecting and moving points on the gamma curves with the mouse there by graphically reshaping the curve A semi automated technique involves the White Point and Black Point selection which was discussed in a previous sect...

Page 167: ...y active when a color film type is selected in the Scan dialog You will notice that changes to the shape of the gamma curves will cause corre sponding changes to the tonal quality of the image as seen in the adjacent image pre view window As the curved is altered a curve fitting software algorithm redraws the new curve As mentioned earlier the bottom portion of the gamma curve corresponds to the i...

Page 168: ...n Figure 16 27 forces whichever gamma curve is active to a lin ear or 1 1 state Figure 16 27 The Force Linear button Exiting the Gamma Curve Editor Dialog There are two ways to exit the Gamma Curve Editor dialog thereby returning control to the Scan dialog These are CANCEL and DONE In short the difference between the two is that CANCEL does not save the results from the current gamma curve editing...

Page 169: ... Results of the Editing Session You can exit the Gamma Curve Editor dialog while also sending the various gamma curves to the scanner before the next scan This is accomplished by clicking on the DONE button shown in Figure 16 29 No data is sent to the scanner from the Gamma Curve Editor dialog after DONE is clicked Instead the CUSTOM check box found in the Scan dialog box is checked see Chapter Fi...

Page 170: ...Page 156 Software Reference for Scanners The Gamma Curve Editor Dialog Chapter 16 ...

Page 171: ...est within scanned images Complete scanning control is provided via the Nikon Scanner plug in described in detail in this manual Launching Nikon Control The Nikon Control application is launched by double clicking on its icon shown in Figure 17 1 Figure 17 1 Launching Nikon Control Scan Windows Nikon Control is based on three elements a simple menu system the Nikon Scanner plug in and scan windows...

Page 172: ...in Menu The Nikon Control Main menu shown in Figure 17 3 consists of the Apple menu the FILE menu and the EDIT menu Figure 17 3 The Nikon Control Main menu The Apple Menu The Apple menu contains the ABOUT NIKON CONTROL menu item and items in your Apple Menu Items folder RAM or Desk Accessories System 6 as seen in Figure 17 4 Page 158 Software Reference for Scanners Nikon Control Application Softwa...

Page 173: ...ner plug in as shown in Figure 17 5 Figure 17 5 The ABOUT NIKON CONTROL dialog The File Menu The FILE menu seen in Figure 17 6 contains commands to perform scans close scan windows save new scans to a disk file eject the film from the scanner and quit the application Software Reference for Scanners Page 159 Chapter 17 Nikon Control Application Software Macintosh ...

Page 174: ...shown in Figure 17 7 Figure 17 7 The Nikon Scanner plug in s Scan dialog Close A scan window can be closed by selecting the FILE menu s CLOSE command or by clicking the standard close box in the upper left corner of the window If the image in the window resulted from a new scan and has not been saved to disk a query dialog Page 160 Software Reference for Scanners Nikon Control Application Software...

Page 175: ...d TIFF 5 0 formats are supported which will allow you to import images created with your scanner to a wide variety of imaging and page layout software packages The Save As dialog is shown in Figure 17 9 Figure 17 9 The Save As dialog Eject You can eject the film from the scanner s film slot at any time that scanning is not in progress by selecting the EJECT command from the FILE menu The Command ð...

Page 176: ...OM 1 1 and ORIGINAL SCAN ZOOM Figure 17 10 The EDIT menu Undo Redo Last Command Used The UNDO REDO LAST COMMAND USED command enables you to revert to the last window state regardless of which menu selection was made in the edit menu All Edit menu items are supported Command ð Z will invoke this function Zoom In The ZOOM IN command enables you to magnify the view of the image in the active scan win...

Page 177: ... the magnification of the view of the image in the active scan window by 50 The HALVE ZOOM command can be invoked in two ways 1 Select the HALVE ZOOM command from the EDIT menu 2 Simultaneously strike Command ð on the keyboard Set Zoom to 1 1 The SET ZOOM TO 1 1 command enables you to view the image in the active scan window at 72 dpi The SET ZOOM TO 1 1 command can be invoked in two ways 1 Select...

Page 178: ...ect the ORIGINAL SCAN ZOOM command from the EDIT menu 2 Simultaneously strike Command ð 0 zero on the keyboard Page 164 Software Reference for Scanners Nikon Control Application Software Macintosh Chapter 17 ...

Page 179: ...n scanned images Complete scanning control is provided via the Nikon Scanner plug in described in detail in this manual Launching Nikon Control The Nikon Control application is launched by double clicking on its icon shown in Figure 18 1 Figure 18 1 Launching Nikon Control Scan Windows Nikon Control is based on three elements a simple menu system the Nikon Scanner plug in and scan windows The scan...

Page 180: ...OW menu Figure 18 3 The Nikon Control Main menu The File Menu The FILE menu seen in Figure 18 4 contains commands to perform scans open existing scanned image files into scan windows close scan windows save new scans to a disk file and exit the application Page 166 Software Reference for Scanners Nikon Control Application Software Windows Chapter 18 ...

Page 181: ...n dialog Only Targa and Windows Bitmap file formats are supported Multiple files may be selected by using the Control and Shift keys Holding down the Shift key will allow you to select a range of files Holding down the Control key will allow you to toggle the selection of specific files A typical Open dialog is shown in Figure 18 5 Figure 18 5 The OPEN FILE dialog Software Reference for Scanners P...

Page 182: ...mand Figure 18 6 Closing or saving a scanned image dialog Save The SAVE command causes the image in the active scan window to be saved as a file If the image has not been previously named and saved as a file the SAVE AS dia log will appear The Control S keyboard shortcut will also invoke the SAVE com mand Save As The SAVE AS command causes the image in the active scan window to be saved as a file ...

Page 183: ... the Control and C keys at the same time Selecting this menu item will copy the image in the currently active window to the clipboard If the entire image does not fit into memory an error will be reported and the operation will fail Most applications have a provision for importing BMP or TGA files If the copy fails the image should be saved and imported into the other application in this manner If...

Page 184: ... rows across the bottom of the application window This option is only available if an image is loaded Zoom In The ZOOM IN command enables you to magnify the view of the image in the active scan window up to 8 times the original view The ZOOM IN command can be invoked in three different ways 1 Select the ZOOM IN command from the WINDOW menu 2 Simultaneously strike Control and on the keyboard 3 Plac...

Page 185: ...ommand will zoom the currently active image anywhere from actual size out to 1 8 and resizes the window so that the entire image is visible This option is only available if an image is loaded Autosize Window The AUTOSIZE WINDOW command will attempt to resize the currently active win dow so that the entire image is visible If the image is larger then the application win dow s workspace the window i...

Page 186: ...ows open at the same time you will see each one listed if you pull down the WINDOW menu You can select the window you want to be active by placing the menu scroll bar over it then releasing the mouse button Page 172 Software Reference for Scanners Nikon Control Application Software Windows Chapter 18 ...

Page 187: ...nizing the disk used to start the system 1 Shut the system off remove the scanner then restart If the system starts normally check the SCSI ID number of all disk drives and other attached SCSI devices Make sure that no device has the same SCSI ID number as the scanner If so power off all SCSI devices and reset their ID numbers accordingly Reconnect the scanner power up and proceed 2 If the Macinto...

Page 188: ...ower on all of your SCSI devices before starting your com puter If this fails to correct the problem the scanner may be defective or you may have a rare conflict on your SCSI bus 2 You may have two SCSI devices set to the same SCSI ID number such as the Nikon scanner and an external hard drive Make sure that no two SCSI devices are set to the same SCSI ID number 3 Try starting your Macintosh with ...

Page 189: ...olorStudio Users Version 1 5 or later Hold down the Command key when launching ColorStudio You will be asked to identify your plug in folder Once you copy the Nikon Scanner plug in to this folder you will be able to scan directly into ColorStudio Problem I can t get the software installation to finish Action You may have an extension conflict Restart your Macintosh with the Shift key held down the...

Page 190: ... 0 1 Problem When I open the Nikon Scanner plug in for my GPIB scanner my system locks up Action Check the version number of your NB Handler Version 4 4 of the NB Handler is not compatible with Nikon products Contact National Instruments at 1 800 433 3488 to obtain a later version Problem If I open SCSI Probe or other software that lists SCSI devices while scanning in Photoshop 2 5 the scan stops ...

Page 191: ...outside of the Nikon Installer the disks are read with no problem Action This problem is due to an error in reading different density media We advise you to install your third party software first then update the scan drivers with the Nikon Installer disk Problem My system won t boot after I install the SCSI controller card in my PC or compatible Action You have an interrupt conflict For Coolscan ...

Page 192: ...n has not com pleted the power up diagnostics you may need to reboot your system so that Coolscan is recognized Please contact Nikon Technical Support if this occurs Action Check that you have all cables firmly attached to Coolscan For LS 10E units it is advised to fasten the connector s wire clips in order to firm ly attach the SCSI cable and terminator to the back of Coolscan SCSI cables will so...

Page 193: ...ate it Problem I get a system error when I m scanning Action Make note of the exact error message that appears then contact Nikon Technical Support It will help if you have the following file information in front of you before you call Contents of Config sys Autoexec bat Win Ini Problem I am getting an error code 203 or 208 while scanning with Coolscan Action Enable the jumper on the Trantor T 130...

Page 194: ...Page 180 Software Reference for Scanners Troubleshooting Windows ...

Page 195: ...n the same file or as separate files Sometimes called planar screen or field sequential binary a number system which uses a base of two Used for the majority of computing systems since electrical logic circuits are easily constructed with a small positive voltage to signify On or True and a nega tive or 0 voltage used to represent Off or False bit A binary digit representing 0 or 1 true or false p...

Page 196: ...be established so that regardless of the exposure increase the black level stays the same This is a non linear type of amplification CPU central processing unit cropping trimming an image color correction the process of balancing the color of an image color models there are many ways to describe color Color spaces are three dimen sional that is they consist of units of measurement along three diff...

Page 197: ...ns by blending small components of different shades alternately together dither pattern a two dimensional matrix used in the dithering process This com monly measures from 2x2 up to 8x8 cells with different values in each cell As the dither matrix grows more shades can be simulated but the image will appear less and less defined sharp as small details of high contrast pixels are spread over a wide...

Page 198: ...eded to produce a neutral tone from dark to light intensities HEX or h a number system which uses a base of 16 Where we use the first ten numbers in the arabic system and continue on with letters 0 1 2 3 4 5 6 7 8 9 A B C D E F hue a discrete fully saturated color is given a name This name is its hue The same hue is referred to by different descriptors depending on the color model being used hands...

Page 199: ... table used to transpose one value into another via some predetermined scheme LSB least significant bit the right most bit in a binary code mapping assigning colors to particular areas of an image based on shade or some other description Often used to produce visually continuous tone color images when there are very few colors available in the palette to do so moire an undesirable visible interfer...

Page 200: ...fore a screen preview pseudo color images when colors are assigned to monochrome shades to give meaning to areas in the picture Often used in satellite imagery to define vegeta tion and geological information Can also refer to simple tinting of monochrome images like oil coloring B W prints RAM Random Access Memory raster a lattice of parallel lines used to represent an image by varying the bright...

Page 201: ...ical or light induced fogging to produce a positive image from the unprocessed portions of the negative The negative image is then bleached away leaving a positive silver layer for black and white or three silver layers with color cou plers for a color image For color the silver is bleached away leaving the color couplers which are then developed out to become color dyes screen a lattice of lines ...

Page 202: ...rmation from scalar to vector Vector informa tion is defined as having magnitude and direction In other words a point in space can be defined in a cartesian coordinate system and there is a vector pointing towards that location in space In imaging we can convert a pixel from a value at a particular x y location to a vector number which defines its magnitude as well as its spatial loca tion in one ...

Page 203: ... B BASE 27 28 35 36 115 BLACK AND WHITE NEGATIVE 115 116 BLACK AND WHITE POSITIVE 115 134 BLACK BORDER 30 38 BLACK POINT 148 152 BLUE EXPOSURE 123 124 126 BLUE GAMMA CURVE BUTTON 153 BLUE YELLOW SLIDER 124 BMP 90 169 BRIGHTNESS 26 29 32 34 37 40 44 56 57 86 89 119 126 146 148 BRIGHTNESS BUTTON 121 122 BUSY LED 30 31 37 39 C CALIBRATE LAMP BUTTON 64 70 CALIBRATING THE LAMP 70 CASCADE 170 COLOR BALA...

Page 204: ...ATE 73 76 79 80 82 86 DIMENSIONAL UNITS 103 DISK FREE 111 DISK SPACE STATUS 110 111 137 DITHERED 3 32 40 DONE BUTTON 70 129 134 155 DOS 11 82 91 DOUBLE ZOOM 162 163 DYNAMIC RANGE 121 122 E EASY INSTALL 7 10 EJECT 5 6 11 30 37 41 49 50 91 92 159 161 EJECT BUTTON 30 49 50 91 EJECT COOLSCAN FILM 5 6 11 49 50 91 92 EMULSION 27 EXPOSURE 44 86 87 89 98 119 123 126 F FACTORY DEFAULT GAMMA CURVES 137 139 ...

Page 205: ...69 70 GPIB AT 2 GPIB PCIIA 2 GRAPHICS WINDOW 60 61 GREEN EXPOSURE 119 124 125 GREEN EXPOSURE BUTTON 125 GREEN GAMMA CURVE BUTTON 153 GREEN MAGENTA SLIDER 125 H HALVE ZOOM 162 163 HEIGHT 45 46 58 89 93 101 103 108 158 HEIGHT VALUE EDIT BOX 45 HELP 13 14 57 64 71 72 136 137 HIGHLIGHTS 121 124 149 153 HISTOGRAM 147 148 HISTOGRAM BUTTON 147 HOT SPOTS 30 38 100 101 I IMAGING LENS 28 36 INCREASING BRIGH...

Page 206: ... PROPORTIONS 107 LOCKING THE ASPECT 93 97 107 108 LOCKING THE FILE SIZE 46 47 97 108 LS 3500 1 2 7 9 43 58 88 124 LS 3510AF 1 2 6 10 20 21 27 31 34 36 39 43 50 58 64 66 70 88 119 121 122 124 127 M MAGNIFYING GLASS 89 127 170 171 MAIN SCAN DIALOG 24 27 31 33 34 39 41 42 52 57 68 127 MANUAL FOCUS 88 89 MAPPED 149 151 MASTER CURVE BUTTON 146 MASTER CURVE 134 142 144 146 149 151 152 MASTER GAMMA CURVE...

Page 207: ...NI 71 79 80 82 111 134 NON INTEGER PITCH 106 OPTICAL DEFINITION 127 ORIENTATION 27 28 30 35 37 41 44 89 94 95 113 118 ORIGINAL SCAN ZOOM 162 164 OUTPUT RESOLUTION 45 46 95 102 104 OVEREXPOSE 121 P PATH SELECTION FOR FILES DIALOG 16 20 PATH SELECTION FOR INSTALLER DIALOG 19 20 PHOTOSHOP PLUG IN 5 11 41 51 PHOTOSTYLER 39 51 PICT 90 161 PITCH 31 39 46 93 97 101 106 PIXEL COORDINATES 48 98 PLUG IN STA...

Page 208: ...TTON 124 RED GAMMA CURVE BUTTON 153 RESET 73 74 76 88 99 139 143 144 RESET BUTTON 73 74 76 99 139 143 RESETTING THE GAMMA CURVES 143 RGB BUTTON 146 RGB COMPONENT VALUE 150 ROM VERSION 34 58 S SATURATE 121 SAVE AS 32 39 40 48 49 90 91 161 168 169 SAVE SETTINGS 74 77 80 84 140 141 SAVE SETTINGS BUTTON 74 77 80 84 SAVING 49 73 75 79 80 82 90 139 143 155 161 168 SCAN BUTTON 31 32 39 48 79 81 85 90 SCA...

Page 209: ... 93 101 SLIDE HOLDER 28 36 50 STATUS BAR 158 STOP BUTTON 9 88 89 127 130 131 SYSTEM 6 0 5 1 6 SYSTEM 7 2 6 10 49 91 T TGA 90 169 THIRD PARTY APPLICATIONS 6 12 16 19 32 BIT QUICKDRAW 2 TIFF 90 161 TILE 170 TOOLS 26 51 55 63 68 70 91 127 130 TOOLS BUTTON 66 67 127 TRANTOR T 130 21 TRANTOR T 260 21 U Z UNDEREXPOSED 121 USE DEFAULTS BUTTON 79 80 82 USE LARGE SCREEN CHECK BOX 64 67 USER NAMED METHOD 73...

Page 210: ...DTH 45 46 58 89 93 101 103 108 158 WIDTH VALUE EDIT BOX 45 WINDOWS FILE MANAGER 11 18 WINDOWS 3 0 1 2 12 WINDOWS 3 1 1 2 12 ZOOM IN 157 162 165 170 171 ZOOM OUT 157 162 163 165 171 Page 196 Software Reference for Scanners Index ...

Page 211: ... 1300 Walt Whitman Road Melville NY 11747 3064 1993 Nikon Inc All brands and product names are the registered trademarks of their respective holders Product specifications are subject to change without notice EID SRFS 993 Product 29990 ...

Reviews: