65
C
o
pyi
n
g
Ne
tw
o
rk Pr
o
fil
es
to
t
h
e
C
a
m
e
ra
/ I
n
fr
a
stru
c
tu
re
N
e
tw
o
rk
s
Using the WT-4 with a Computer
9
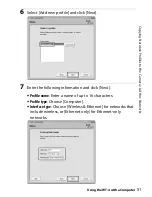
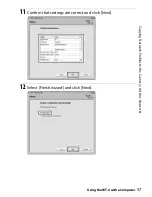
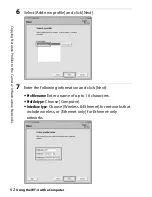
Enter the following information and click [Next].
•
Network name (SSID)
: Enter a network name or choose from a
list of existing networks. Do not change the name if it is
supplied automatically.
•
Communication mode
: Select [Infrastructure].
•
Authentication
: Choose the authentication used on the
network. In infrastructure mode, the camera supports WPA-
PSK, WPA2-PSK, open system, and shared key
authentication.
•
Encryption
: Choose the encryption used on the network. The
options available depend on the authentication used:
Open
: None, 64- or 128-bit WEP
Shared
: 64- or 128-bit WEP
WPA-PSK
: TKIP, AES
WPA2-PSK
: AES
•
Encryption key
: If the network uses encryption, enter the
network key. The number of characters required depends
on the type of key used:
•
Key Index
: If [WEP64] or [WEP128] is selected for [Encryption],
choose a key index (the default index is [1]). A key index is
not required when [None] is selected.
WEP (64-bit) WEP (128-bit)
TKIP, AES
Number of characters (ASCII)
5
13
8–63
Number of characters (hex)
10
26
64
Summary of Contents for WT-4
Page 1: ...Wireless Transmitter En User s Manual ...
Page 41: ...Configuring the Network Windows XP Creating an Ad Hoc Network Introduction 29 5 Click Add ...
Page 67: ...55 Copying Network Profiles to the Camera Ad Hoc Networks Using the WT 4 with a Computer ...
Page 136: ...124 Copying Network Profiles to the Camera Ad Hoc Networks Uploading Images to an ftp Server ...
Page 156: ...Connecting to the ftp Server Uploading Images to an ftp Server 144 4 Click Close ...
Page 162: ...Uploading Images Uploading Images to an ftp Server 150 ...
Page 186: ...174 Device Settings Format Transmitter s Memory Menu Guide ...

