Service Manual-AS1050R
04 Control System 19
Removal and Installation
Warning! This procedure must be performed by qualified personnel only.
1. Park machine on level ground.
2. Switch off machine.
Dash Board (EB1)
1. Prepare necessary tools, cross screwdriver and socket spanner.
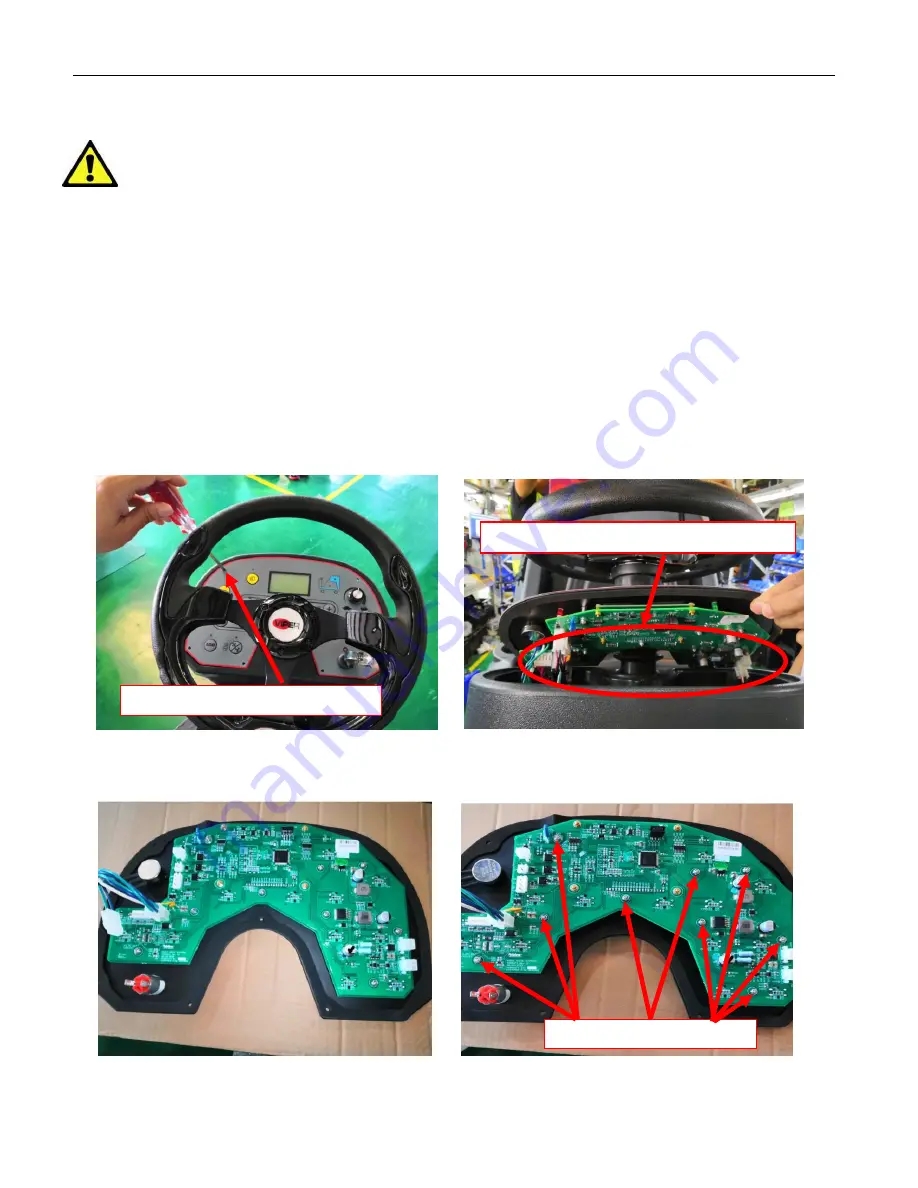
2. Remove 7 screws on Dash Board, detach Dash Board (Figure 8).
3. Disconnect all harnesses and terminals which are used for connecting Dash Board, then take out
Dash Board (Figure 9 and 10).
4. Use sleeve to take out 9 screws which are used for fastening PCBA (Figure 11).
5. Assemble components in reverse order of disassembly.
Figure 8
Figure 9
Figure 10
Figure 11
Remove 7 screws on Dash Board
Disconnect all harnesses and terminals
Remove P
CBA’s 9 screws
Summary of Contents for 50000593
Page 11: ...Service Manual AS1050R 03 General Information 11 Machine Structure Figure 2 ...
Page 12: ...Service Manual AS1050R 03 General Information 12 Machine Structure continues Figure 3 ...
Page 13: ...Service Manual AS1050R 03 General Information 13 Control Panel Figure 4 ...
Page 15: ...Service Manual AS1050R 03 General Information 15 Dimensions continues ...


