background image

A-20 / ENGLISH

A-20

 - FORM NO. 56091001 - BR 1100S SBG SPECIAL

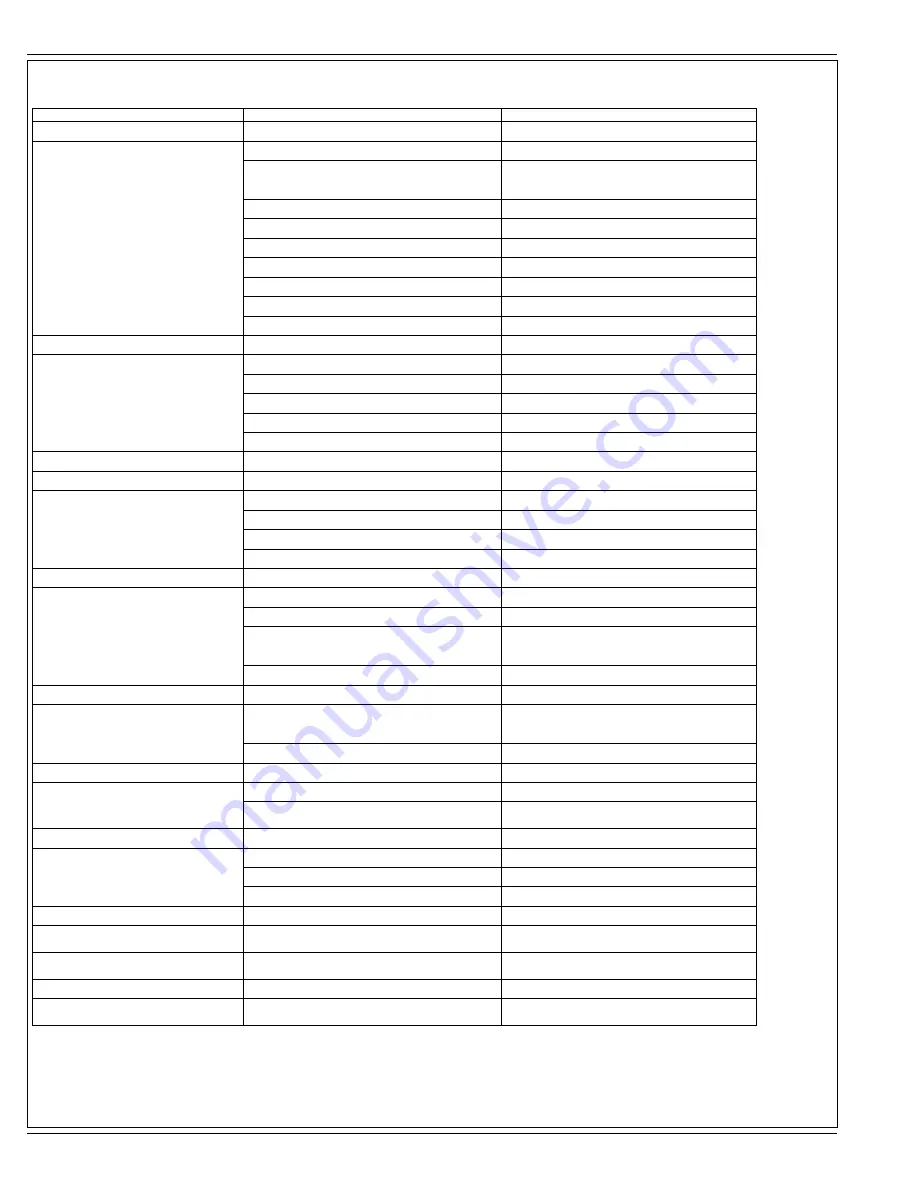
GENERAL MACHINE TROUBLESHOOTING

Problem

Possible Cause

Remedy

Poor water pick-up

Worn or torn squeegee blades

Reverse or replace

Squeegee out of adjustment

Adjust so blades touch 

fl

 oor evenly

across entire width

Recovery tank full

Empty recovery tank

Recovery tank drain hose leak

Secure drain hose cap or replace

Recovery tank cover gasket leak

Replace gasket / Seat cover properly

Debris caught in squeegee

Clean squeegee tool

Vacuum hose clogged

Remove debris

Using too much solution

Reduce 

fl

 ow via control panel solution button

Foam 

fi

 lter cover not seated

Seat cover properly

Poor scrubbing performance

Worn brush or pad

Rotate or replace brushes

Wrong brush or pad type

Consult Nil

fi

 sk

Wrong cleaning chemical

Consult Nil

fi

 sk

Moving machine too fast

Slow down

Not using enough solution

Increase 

fl

 ow via control panel solution button

Scrub Motors Do Not Run

Tripped 20 Amp (F3) circuit breaker

Check for electrical short circuit & reset

Inadequate solution 

fl

 ow

or no solution

Solution tank empty

Fill solution tank

Solution lines, valves, 

fi

 lter or trough clogged

Flush lines, trough and clean solution 

fi

 lter

Solution turned OFF

Activate 

fl

 ow via control panel solution button

Solution solenoid valve plugged  or defective

Clean or replace valve 

(see service manual)

Machine does not run

Emergency stop switch tripped

Reconnect battery connectors

Operator seat safety switch

Check for open circuit and replace

Main system controller

Check error fault codes

(see service manual)

Tripped 3 Amp (F1) circuit breaker

Check for electrical short circuit & reset

No FWD/REV wheel drive

Drive system speed contoller

Check error fault codes

(see service manual)

Emergency stop switch tripped

Reconnect battery connectors

Vacuum shuts off and display shows
“FULL” when recovery tank is not full

Plugged squeegee hose

Clear debris

Vacuuming large amounts of water
at a high travel speed

Slow down or disable auto shut-off feature

(see service manual)

Poor Sweeping Performance
(Cylindrical System)

Hopper Full

Empty and clean hopper

Brushes worn

Replace brushes

Bristles have taken a set

Rotate brushes

No Detergent Flow (EcoFlex models 
only)

Empty detergent cartridge

Fill detergent cartridge

Plugged or kinked detergent 

fl

 ow line

Purge system, straighten lines to
remove any kinks

Dry seal cap on detergent cartridge not sealed

Reseat dry seal cap

Detergent pump wiring
disconnected or backwards

Connect or reconnect wiring

Summary of Contents for 56380640

Page 1: ...A English BR 1100S SBG SPECIAL 7 10 FORM NO 56091001 MODEL 56380640 Instructions For Use Original Instructions ...

Page 2: ...hould be performed by your Authorized Nilfisk Service Center who employs factory trained service personnel and maintains an inventory of Nilfisk original replacement parts and accessories Call the NILFISK DEALER named below for repair parts or service Please specify the Model and Serial Number when discussing your machine Dealer affix service sticker here NAME PLATE The Model Number and Serial Num...

Page 3: ...hine on or near these agents or operate in areas where flammable liquids exist Do not clean this machine with a pressure washer Only use the brushes provided with the appliance or those specified in the instruction manual The use of other brushes may impair safety CAUTION This machine is not approved for use on public paths or roads This machine is not suitable for picking up hazardous dust Do not...

Page 4: ... of an item mentioned in the text NOTE Refer to the service manual for detailed explanations of each item illustrated on the next 3 pages 1 Recovery Tank Cover 2 Solution Tank Fill Cover 3 Operator s Seat 4 Solution Tank Drain Hose 5 Steering Wheel Tilt Adjust Knob 6 Brake Pedal Parking Brake 7 Solution Shut off Valve 8 Drive Pedal Directional Speed 9 Hopper cylindrical models only 10 Drive and St...

Page 5: ...Housing 17 Squeegee Assembly 18 Solution Filter 19 Recovery Tank Drain Hose 20 Machine Battery Connector 21 Control Panel 22 Squeegee Tilt Adjust Knob 23 Operator Seat Adjustment Lever 24 Control Circuit Breaker 25 Auxiliary Circuit Breaker 26 Side Broom Motor Circuit Breaker 27 Side Access Panel 28 Squeegee Height Adjust Knob ...

Page 6: ...H Horn I Vacuum Wand Switch J Detergent System EcoFlex models only K Display K1 Solution Flow Indicator K2 Fault Indicator K3 Hour Meter K4 Detergent Indicator if so equipped K5 Battery Indicator K6 Scrub Pressure Indicator K7 Recovery Tank FULL Indicator K8 Battery Low Indicator K9 Detergent Percentage Indicator L Scrub Speed Switch Flow Flow Flow Regular Heavy Extreme Rate 1 Rate 2 Rate 3 Scrub ...

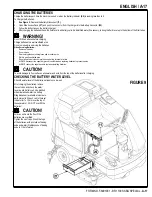
Page 7: ...s from their shipping crate and carefully inspect them for cracks or other damage If damage is evident contact the carrier that delivered them or the battery manufacturer to file a damage claim 2 Turn the Master Key Switch A OFF and remove the key 3 Remove the recovery tank from the machine NOTE Disconnect the tether and the vacuum motor wiring and lift the tank straight up and off the machine 4 Y...

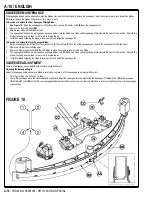
Page 8: ...s off O 2 See Figure 2 Remove both side skirt assemblies NOTE The skirts are held in place by two large Knobs AA Loosen these knobs slide the Skirt Assemblies BB forward slightly and then off of the Scrub Deck 3 Loosen the Black Knobs CC on top of the Idler Assemblies DD until they drop down far enough to disengage from the Notches EE and remove 4 Slide the brush into the housing lift slightly pus...

Page 9: ...oper cleaning chemical for the job Always follow the dilution instructions on the chemical container label NOTE EcoFlex machines can either be used conventionally with detergent mixed in the tank or the detergent dispensing system can be used When using the detergent dispensing do not mix detergent in the tank plain water should be used CAUTION Use only low foaming non flammable liquid detergents ...

Page 10: ... AA 2 Connect the Recovery Hose BB to the squeegee inlet using Hose Clamp CC 3 Lower the squeegee move the machine ahead slightly and adjust the squeegee tilt and height using the Squeegee Tilt Adjust Knob 22 and Squeegee Height Adjust Knobs 28 so that the rear squeegee blade touches the floor evenly across its entire width and is bent over slightly as shown in the squeegee cross section FIGURE 4 ...

Page 11: ...10 seconds See illustration on next page for Detergent System indicators Normally one purge cycle is adequate to purge the system Detergent Percentage 1 The detergent percentage default is 0 25 To change the percentage the detergent system must be OFF then press and hold the Detergent ON OFF Switch J for 2 seconds The detergent indicator will flash and each press of the switch will cycle through t...

Page 12: ...A 12 ENGLISH A 12 FORM NO 56091001 BR 1100S SBG SPECIAL DETERGENT SYSTEM PREPARATION AND USE ECOFLEX MODELS ONLY PURGE Press J F for 3 seconds to purge FIGURE 6 ...

Page 13: ...oo much solution the recovery tank may be full or the squeegee tool may require adjustment 9 The machine defaults to the EcoFlex cleaning mode EcoFlex Switch Indicator is lit conserving solution and detergent Press the EcoFlex Switch G to override the EcoFlex cleaning mode and temporarily increase scrub pressure solution flow and the detergent percentage This will cause the indicator to flash for ...

Page 14: ...A 14 ENGLISH A 14 FORM NO 56091001 BR 1100S SBG SPECIAL OPERATING THE MACHINE FIGURE 7 ...

Page 15: ...ow and perform any required maintenance before storage MAINTENANCE SCHEDULE MAINTENANCE ITEM Daily Weekly Monthly Yearly Charge Batteries X Check Clean Tanks Hoses X Check Clean Rotate the Brushes Pads X Check Clean the Squeegee X Check Clean Vacuum Shut Off Float X Check Clean the vacuum motor foam filter s X Clean Hopper on Cylindrical System X Check Each Battery Cell s Water Level X Inspect Scr...

Page 16: ...A 16 ENGLISH A 16 FORM NO 56091001 BR 1100S SBG SPECIAL FIGURE 8 ...

Page 17: ...a rubber apron Work in a well ventilated area Do not allow tools to touch more than one battery terminal at a time ALWAYS disconnect the negative ground cable first when replacing batteries to prevent sparks ALWAYS connect the negative cable last when installing batteries CAUTION To avoid damage to floor surfaces wipe water and acid from the top of the batteries after charging CHECKING THE BATTERY...

Page 18: ...osen the 2 Thumb Nuts CC on top of the squeegee and remove the squeegee tool from the mount 2 Remove both rear Tension Straps first 3 Remove all the wing nuts that hold the front blade in place then remove tension strap and blade 4 The squeegee blade has 4 working edges as shown below Turn the blade so a clean undamaged edge faces toward the front of the machine Replace the blade if all 4 edges ar...

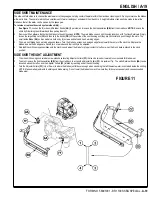
Page 19: ...nside Blade EE on disk models is held on by 2 screws and nuts and has 2 working edges 3 The main skirt blade has 4 working edges as shown Turn the blade so a clean undamaged edge faces toward the center of the machine Replace the blades as a set if all 4 edges are nicked torn or worn beyond their ability to be adjusted 4 Reinstall the skirt housing assemblies onto the machine and adjust the blade ...

Page 20: ...h lines trough and clean solution filter Solution turned OFF Activate flow via control panel solution button Solution solenoid valve plugged or defective Clean or replace valve see service manual Machine does not run Emergency stop switch tripped Reconnect battery connectors Operator seat safety switch Check for open circuit and replace Main system controller Check error fault codes see service ma...

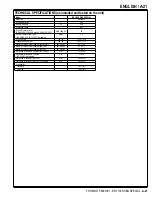
Page 21: ... ISO 11201 Uncertainty dB A 3 0 Gross Weight lbs kg 3325 1508 Transportation Weight lbs kg 2897 1314 Maximum Wheel Floor Loading center front psi kg cm2 116 119 9 Maximum Wheel Floor Loading right rear psi kg cm2 81 83 7 Maximum Wheel Floor Loading left rear psi kg cm2 86 88 9 Vibrations at the Hand Controls ISO 5349 1 m s2 1 12m s2 Vibrations at the Hand Controls ISO 5349 1 Uncertainty m s2 11 m ...

Page 22: ......

Page 23: ...rektīvām un standartiem CZ Níže podepsaný stvrzuje že výše uvedený model byl vyroben v souladu s následujícími směrnicemi a normami SLO Spodaj podpisani potrjujem da je zgoraj omenjeni model izdelan v skladu z naslednjimi smernicami in standardi F Je soussigné certifie que les modèles ci dessus sont fabriqués conformément aux directives et normes suivantes NL Ondergetekende verzekert dat de boveng...

Page 24: ...Nilfisk Advance A S Sognevej 25 DK 2605 Brøndby Denmark Tel 45 43 23 81 00 Fax 45 43 43 77 00 www nilfisk advance com ...

Reviews: