TEST FOR GROUND CONTINUITY BEFORE EACH USE
Test for ground continuity before each use:
a)The compressed airline supplied with the A15EXP machine is impregnated with
carbon for the purpose of transferring static charge to an earth ground source.
Check to insure that there is electrical conductivity between the body of the vacuum
and the hose fitting attached to the compressed airline.
b) Connect the conductive, collection hose to the inlet of the stainless steel
tank and check to insure that there is electrical conductivity between
end of the hose and the tank inlet.
NOTE: This vacuum must be connected to an earth ground source. If the vacuum
cleaner should malfunction or break down, grounding provides a path of
least resistance for electrical current to reduce the risk of electrical shock.
For added safety, an auxiliary grounding clamp has been included with the machine.
WARNING: If unacceptable results are recorded, DO NOT OPERATE THE CLEANER.
Using the tester, check for continuity between each connection of the vacuum
cleaner (example: tool to wand, wand to hose, hose to machine, etc) If the problem
can not be corrected refer the unit to an AUTHORIZED SERVICE CENTER ONLY.
WARNING: Insure that the conductive, polyester filter assembly (#25, #26, #27, page 9)
is properly mounted inside the recovery tank. If not, refer to the instructions for
“Replacing the Main Filter” (page 6).
INSTRUCTIONS FOR USE
PAGE 3
“Replacing the Main Filter” (page 6).
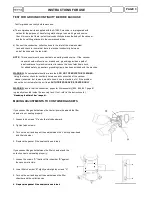
MAKING ADJUSTMENTS TO CONTAINER GASKETS
If you suspect the gasket between the Venturi power-head and the filter
chamber is not sealing properly:
1. Loosen latch screws "A" and slide latch downward.
2. Tighten latch screws.
3. Turn on the unit and inspect the seal between the Venturi power-head
and filter chamber.
4. Replace the gasket if the seal continues to leak.
If you suspect the gasket between the filter chamber and the
collection can is not sealing properly:
1. Loosen the screws "A" that lock filter chamber "B" against
the vacuum structure.
2. Lower filter chamber "B" slightly and retighten screws "A".
3. Turn on the unit and inspect the seal between the filter
chamber and the collection can.
4. Replace the gasket if the seal continues to leak.
4. Replace the gasket if the seal continues to leak.
Summary of Contents for A15EXP
Page 3: ...English INSTRUCTIONS FOR USE PAGE 1...
Page 15: ...Espa ol INSTRUCCIONES DE USO P GINA 1 Espa ol...
Page 27: ...Fran ais INSTRUCTIONS D UTILISATION PAGE 1...
Page 39: ......

