9/00 Form No. 56040733
(page 3 of 3)
G
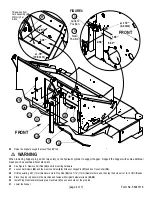
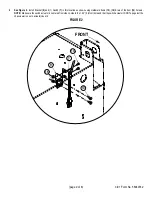
FRONT
B
A
F
L
T
A
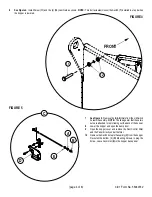
FRONT
D
E
C
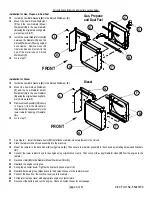
B
O
L
T
For installation follow the appropriate section below.
Installation for Gas, Propane, & Dual Fuel
13
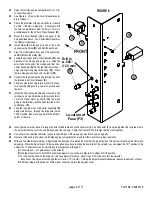
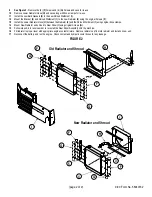
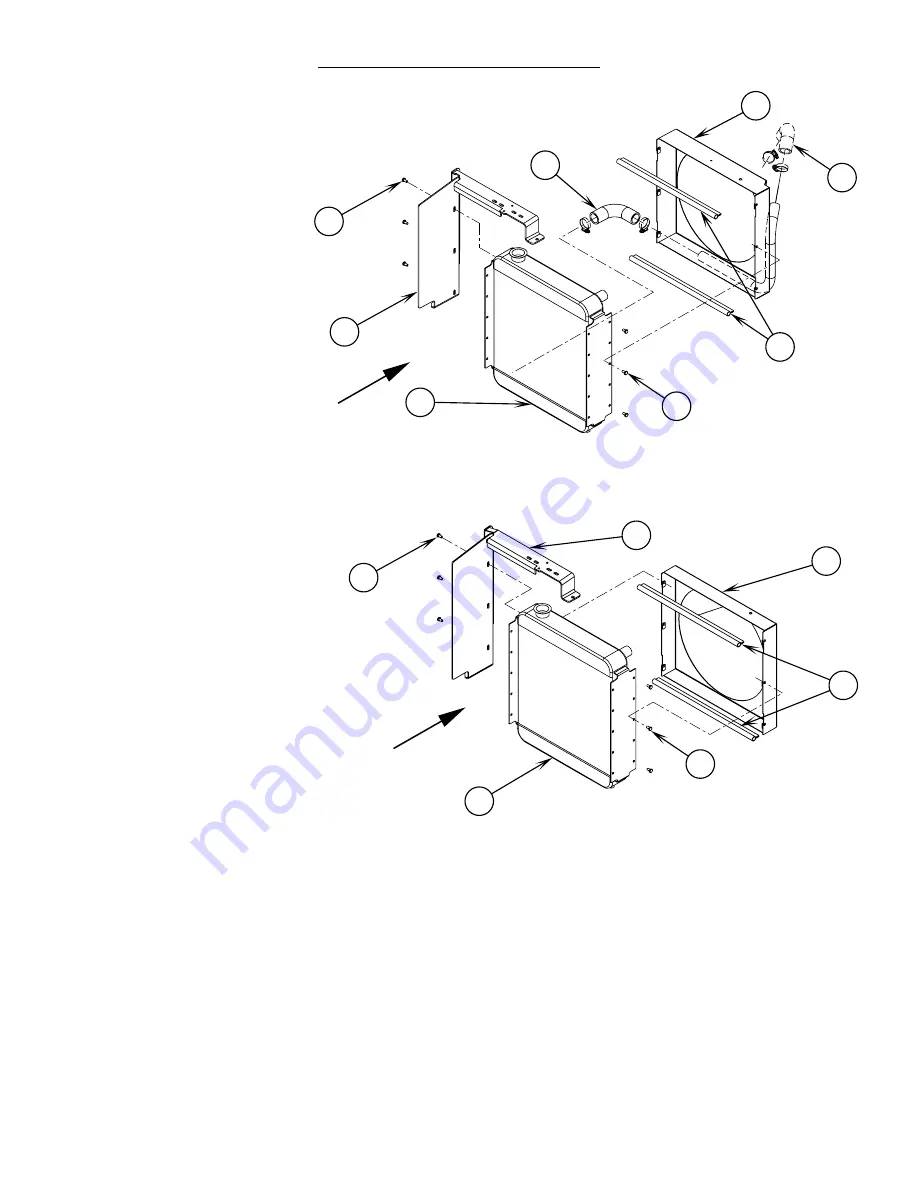
Install the new Bulb Gaskets
(B)
to the Shroud Weldment
(C)
.
Diesel
Gas, Propane
and Dual Fuel
Installation for Diesel
13
Install the new Bulb Gaskets
(B)
to the Shroud Weldment
(F)
.
17
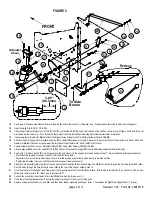
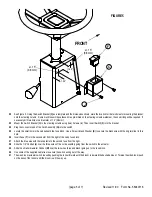
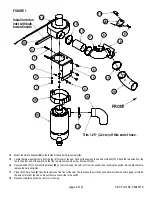
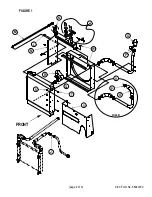
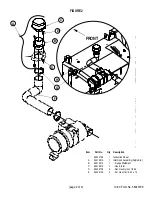
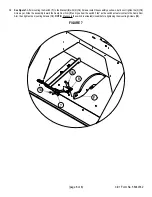
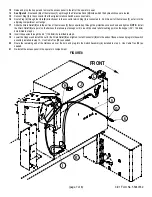
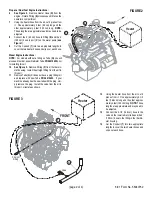
See Figure 1.
Install hardware items
(W)
that attaches radiator mount weldment to the shroud.
18
Place the radiator and shroud assembly into the machine.
19
Mount the radiator to the back Panel
(V)
using Screws
(S)
. Then secure the radiator assembly to the chassis by installing Screws and Washers
(K)
.
20
Connect the lower radiator hose to the engine using original hose clamp. Then connect the upper Radiator Hose
(R)
from the engine to the
radiator.
21
Reconnect Bar
(M)
to the Radiator Mount Weldment
(D
or
G)
.
22
Reattach the engine cooling fan.
23
Swing the oil cooler down. Tighten the hydraulic hoses at point
(J)
.
24
Reattach hardware group
(H)
and secure the hydraulic hoses to the radiator mount.
25
Connect the hose from the overflow reservoir to the radiator.
26
Fill radiator to proper level with appropriate engine coolant mixture.
27
Reconnect the battery and run the engine. Check all coolant hoses for any leakage.
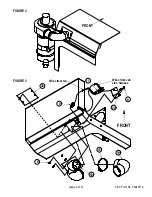
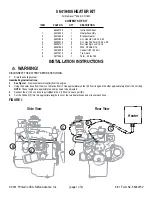
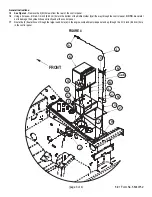
14
Mount the new Shroud Weldment
(C)
and the new Radiator Mount
Weldment
(D)
to the new Radiator
(A)
using the original mounting hard-
ware screws
(L & T)
.
15
Install the Lower Radiator Hose
(E)
between the Radiator
(A)
and the
Shroud Weldment
(C)
using original
hose clamps. Remove Hose
(O)
from old shroud and install it to the
end of the metal tube on Shroud
Weldment
(C)
.
16
Go to step 17.
14
Mount the new Shroud Weldment
(F)
and the new Radiator Mount
Weldment
(G)
to the new Radiator
(A)
using the original mounting hard-
ware Screws
(L & T)
.
15
Remove Hose Assembly
(U)
(shown
in Figure 1) from the old radiator,
then install this hose assembly to the
lower radiator opening of Radiator
(A)
.
16
Go to step 17.
Summary of Contents for Advance Retriever 2060
Page 87: ...4 99 Form No 56040696 page 2 A 3 B C D 5 1 2 6...
Page 94: ...6 99 revised 3 00 Form No 56040702 page 2 5 3 2 6 6 5 3 4 1 2...
Page 111: ...9 00 Form No 56040733 page 2 of 3 Diesel H FRONT M K L N R W P O T S J Q O P U V FIGURE 1...
Page 128: ...PROGRAM PURPOSE and OBJECT ZENITH FUEL SYSTEMS Page 1 1 5 48 7 0 1 2 3 4 5 0 50...
Page 133: ...ZENITH FUEL SYSTEMS Page 5 1 5 0 50 A 50 4 4 B 8 6 A C D FIG 5 1...
Page 134: ...ZENITH FUEL SYSTEMS Page 5 2 6 5 8 0 8 2 0 2 0 2 E F 0 D 50 4 C D 5 5 5 5 6 6 2 0 6 FIG 5 2...
Page 139: ...Fuel Enrichment 4 6 6 50 5 5 6 A 50 5 0 0 ZENITH FUEL SYSTEMS Page 5 7...
Page 144: ...ZENITH FUEL SYSTEMS INC Page 5 12 3F 6 6 H J 3F FIG 5 19 6 G 6 FIG 5 20...
Page 147: ...ZENITH FUEL SYSTEMS Page 6 2 A A 1 6 FIG 6 1...
Page 148: ...ZENITH FUEL SYSTEMS Page 6 3 5 2 3 0 0 1 4 4 B 6 6 6 4 4 3 6 6 6 9 6 6...
Page 149: ...ZENITH FUEL SYSTEMS Page 7 2 8 2...
Page 150: ...ZENITH FUEL SYSTEMS Page 7 3 8 2...
Page 153: ...ZENITH FUEL SYSTEMS Page 9 3...
Page 160: ...ZENITH FUEL SYSTEMS Page 9 11 6 6 9 8 2...
Page 163: ...ZENITH FUEL SYSTEMS Page 9 14 6 6 9 8 Continued...

