3/01 Form No. 56040742
(page 4 of 8)
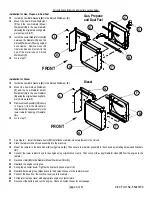
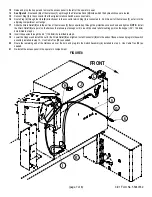
FRONT
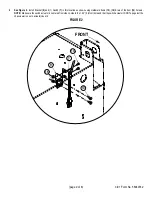
11
12
6
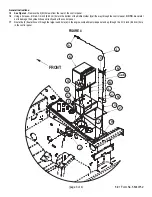
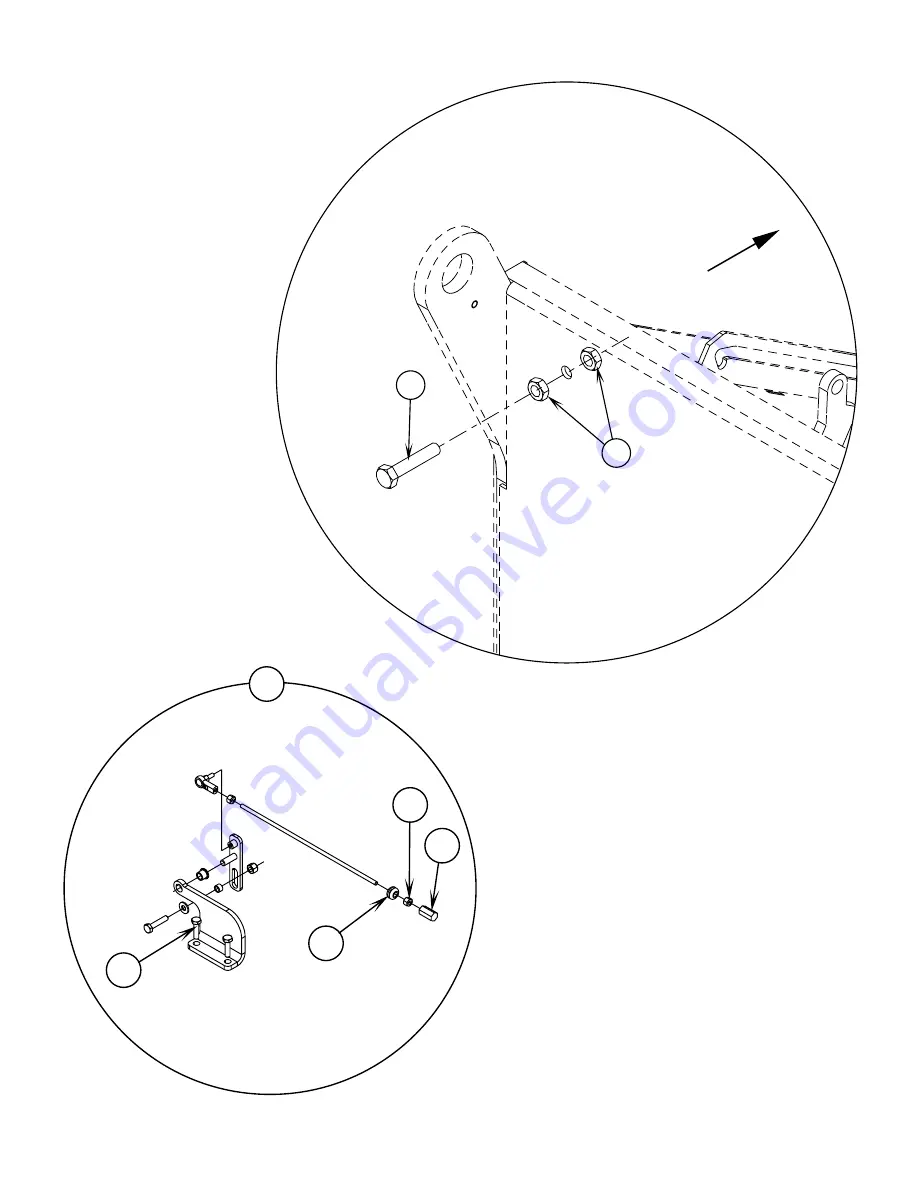
See Figure 4.
Install Screw
(11)
and the (2)
(12)
Jam Nuts as shown.
NOTE:
This bolt actuates(closes) the Switch
(7)
installed in step 4 when
the hopper is lowered.
FIGURE 4
A
D
B
C
E
7
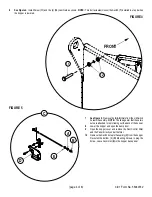
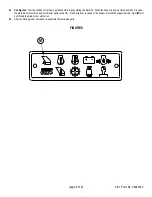
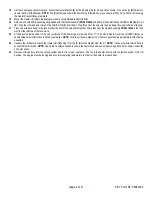
See Figure 5.
Remove the
(A & B)
Nuts from the old Switch
Actuator Assembly.
NOTE:
The linkage arm that these two
nuts are attached to is protruding out the back of the hopper.
8
Lower the hopper and open the dump door.
9
Open the hopper cover and remove the Dust Control Filter
and the Panel directly under the filter.
10
Remove the Switch Actuator Assembly
(C)
from the hopper.
Re-install the bottom (2)
(D)
Mounting Screws to plug the
holes. Leave Grommet
(E)
in the hopper back panel.
FIGURE 5
Summary of Contents for Advance Retriever 2060
Page 87: ...4 99 Form No 56040696 page 2 A 3 B C D 5 1 2 6...
Page 94: ...6 99 revised 3 00 Form No 56040702 page 2 5 3 2 6 6 5 3 4 1 2...
Page 111: ...9 00 Form No 56040733 page 2 of 3 Diesel H FRONT M K L N R W P O T S J Q O P U V FIGURE 1...
Page 128: ...PROGRAM PURPOSE and OBJECT ZENITH FUEL SYSTEMS Page 1 1 5 48 7 0 1 2 3 4 5 0 50...
Page 133: ...ZENITH FUEL SYSTEMS Page 5 1 5 0 50 A 50 4 4 B 8 6 A C D FIG 5 1...
Page 134: ...ZENITH FUEL SYSTEMS Page 5 2 6 5 8 0 8 2 0 2 0 2 E F 0 D 50 4 C D 5 5 5 5 6 6 2 0 6 FIG 5 2...
Page 139: ...Fuel Enrichment 4 6 6 50 5 5 6 A 50 5 0 0 ZENITH FUEL SYSTEMS Page 5 7...
Page 144: ...ZENITH FUEL SYSTEMS INC Page 5 12 3F 6 6 H J 3F FIG 5 19 6 G 6 FIG 5 20...
Page 147: ...ZENITH FUEL SYSTEMS Page 6 2 A A 1 6 FIG 6 1...
Page 148: ...ZENITH FUEL SYSTEMS Page 6 3 5 2 3 0 0 1 4 4 B 6 6 6 4 4 3 6 6 6 9 6 6...
Page 149: ...ZENITH FUEL SYSTEMS Page 7 2 8 2...
Page 150: ...ZENITH FUEL SYSTEMS Page 7 3 8 2...
Page 153: ...ZENITH FUEL SYSTEMS Page 9 3...
Page 160: ...ZENITH FUEL SYSTEMS Page 9 11 6 6 9 8 2...
Page 163: ...ZENITH FUEL SYSTEMS Page 9 14 6 6 9 8 Continued...

