ENGLISH
USER MANUAL
10
FLOORTEC 550 P
146 2572 000(1)2005-03 A
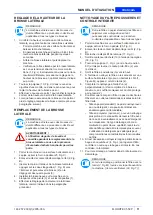
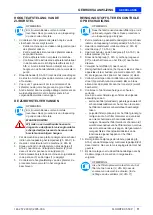
MAIN BROOM HEIGHT CHECK
1.
Check the main broom for proper ground clearance,
proceeding as follows:
–
Drive the machine on a level ground.
–
Keep the machine stationary and rotate the main
broom for a few seconds.
–
Stop the main broom and move the machine.
–
Check that the main broom print (1, Fig. D), along
its length, is from 2 to 4 cm wide.
If the print (A) is different, it is necessary to adjust the
broom height, proceeding as described in step 2.
2.
Drive the machine on a level ground and activate the
pedal brake (25, Fig. C) (if present).
3.
Remove the key (2, Fig. B) from the machine on/off
switch.
4.
Loosen the knobs (1, Fig. E) on both sides of the
machine.
5.
Move the broom height variation indicator (2) as
necessary on both sides of the machine by using the
knobs (1, Fig. E), then screw down the knobs (1).
6.
Perform step 1 again to check the proper adjustment
of the main broom height from the ground.
7.
When the broom is too worn to be adjusted, replace it
as shown in the next paragraph.
MAIN BROOM REPLACEMENT
1.
Drive the machine on a level ground and activate the
pedal brake (25, Fig. C) (if present).
2.
Remove the key (2, Fig. B) from the machine on/off
switch.
3.
Loosen the knobs (1, Fig. E) on both sides of the
machine.
4.
Operating on the knobs (1, fig. E) move, on both sides
of the machine, the broom height variation indicator
(2) until the broom is as far from the ground as
possible. Screw down the knobs (1).
5.
Open the hood (5, Fig. C). On the left side of the
machine, loosen the knob (3, Fig. E).
6.
Remove the broom cover (1, Fig. F) pressing
outwards to disengage the retainers (2).
7.
Remove the broom (1, Fig. G).
8.
Check also that the entrainer hub (4, Fig. Q) is free
from dirt or foreign materials (ropes, rags, etc.)
accidentally rolled up.
9.
The new broom must be installed with the bristles
rows positioned as shown in the figure (1, Fig. H) (top
view).
10. Install the new broom on the machine and ensure that
its mesh (1, Fig. I) correctly fits in the related entrainer
hub (4, Fig. Q).
11. Reinstall the broom cover (1, Fig. F), engaging the
retainers (2).
12. Screw down the knob (3, Fig. E).
13. Carry out the main broom height adjustment as
described in the previous paragraph.
NOTE
Brooms of various hardness are available. This
procedure is applicable to all types of brooms.
NOTE
The indicator (2) must be at the same position
on both sides of the machine; the maximum
difference allowed is 2 notches to obtain the
print (1, Fig. D) from 2 to 4 cm as described in
step 1.
CAUTION!
An excessive print (larger than 4 cm) of the
main broom can lead to the machine
malfunction and the overheating of the
moving parts, thus reducing machine life.
Take care when performing the
above-mentioned checks and use the
machine only according to the indicated
conditions.
NOTE
Brooms of various hardness are available. This
procedure is applicable to all types of brooms.
CAUTION!
It is advisable to use protective gloves
when replacing the main broom because
there can be cutting debris between the
bristles.
Summary of Contents for Alto FLOORTEC 550 P
Page 2: ...6 6 6 6 6 6 6 6 6 6 ...


